How to Build a Vaulted Ceiling Truss
A vaulted ceiling truss is a structural element designed to create a distinctive arched ceiling in a building. It's a popular design choice in contemporary and traditional architectural styles, adding visual interest and a sense of spaciousness to a room. Building a vaulted ceiling truss requires careful planning, precise measurements, and a thorough understanding of the necessary materials and techniques. This article will guide you through the essential steps involved in constructing a vaulted ceiling truss.
Step 1: Design and Planning
Before embarking on the construction process, meticulous planning is crucial. This involves determining the desired dimensions and shape of the vaulted ceiling, as well as the overall structural integrity of the building. Factors to consider include the span of the truss, the desired height of the vault, and the load it needs to support. Consulting with a structural engineer is highly recommended to ensure the truss meets building codes and can safely bear anticipated loads.
Determining the truss's span, the distance between the supporting walls or columns, is paramount for ensuring stability. This is typically measured in feet, and it dictates the number of truss components required to create a strong and balanced structure. The desired height of the vault, also known as the rise, will influence the overall aesthetics and the amount of materials needed. The load the truss must support includes the weight of the roof sheathing, insulation, roofing materials, and any potential future additions like solar panels or HVAC equipment.
Once you have a clear understanding of your needs, you can create a detailed blueprint of the truss. This blueprint should include precise measurements, angles, and the specification of necessary materials, such as lumber, connectors, and fasteners. It's essential to ensure all dimensions are accurate and that the truss design is compatible with the existing structure of the building.
Step 2: Material Selection and Preparation
The foundation of a vaulted ceiling truss lies in choosing the right materials. The primary components are lumber, connectors, and fasteners. The type of lumber used will depend on the load requirements and the desired aesthetic. Engineered lumber, such as laminated veneer lumber (LVL) and glulam beams, offers superior strength and consistency compared to solid lumber. However, solid lumber can be used for smaller spans and lower load applications.
Connectors play a crucial role in joining the various lumber components together. They can be made of metal or wood. Metal connectors, such as gusset plates and joist hangers, offer higher strength and durability. However, properly designed wood connectors, like timber connectors, offer a more traditional aesthetic. Fasteners, like nails, screws, and bolts, are essential for securing the connectors to the lumber.
Before assembling the truss, it's essential to prepare the lumber by ensuring it is dry and free from defects. Lumber should be thoroughly inspected for knots, cracks, or any signs of damage. It's also advisable to cut the lumber to the precise dimensions specified in the blueprint. This ensures a smooth and accurate assembly process.
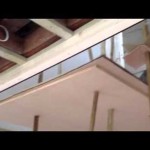
Step 3: Truss Assembly
With the materials ready and the blueprint in hand, the construction of the vaulted ceiling truss can begin. Assembly typically takes place on a flat surface, such as a workbench or the floor. The process involves carefully joining the lumber components using pre-drilled holes and the chosen connectors. It's vital to follow the blueprint meticulously and ensure all angles and measurements are accurate.
For larger trusses, it's advisable to use jigs or templates to ensure consistent angles and accurate positioning of the components. This can be particularly helpful when creating complex shapes like the arched curve of a vaulted ceiling truss.
As you assemble the truss, it's crucial to regularly inspect the joints and connectors. Make sure they are securely fastened and that the truss maintains its overall structural integrity. Any inconsistencies or weak spots must be addressed immediately.
Step 4: Truss Installation
Once the truss is fully assembled and inspected, it's ready for installation. This involves lifting the truss into place and securing it to the supporting walls or columns. This step requires considerable care and may involve using specialized equipment like cranes or scaffolding, depending on the size and weight of the truss.
The truss is typically secured to the supporting structures using pre-installed anchors or bolts. It's essential to ensure a secure connection to prevent any movement or instability. After installation, the truss should be further reinforced by attaching the roof sheathing, insulation, and roofing materials.
Building a vaulted ceiling truss is a complex process requiring meticulous planning, precise execution, and a thorough understanding of structural principles. By following the steps outlined above, you can create a strong and visually appealing vaulted ceiling that adds character and elegance to your building. Remember, consulting with a structural engineer is highly recommended to ensure the truss meets building codes and can safely support the intended load.

Vaulted Ceiling Precautions Don T Get In Trouble On Your Project Armchair Builder Blog Build Renovate Repair Own Home Save Money As An Owner

Types Of Roofs Rhyne Restoration Res Gambrel Roof Trusses Vaulted Ceiling Kitchen

Framing A Cathedral Ceiling Fine Homebuilding

Best Way To Build A Cathedral Roof For Garage Greenbuildingadvisor

Framing A Cathedral Ceiling Rafter Overview My Diy

Insulating And Air Sealing A Vaulted Ceiling Greenbuildingadvisor

Vaulting A Presently Trussed Ceiling In Ranch House Fine Homebuilding

Explore Roof Truss Designs For Your Project A J Reliable Inc

How Much Does A Roof Truss Cost 2024 Angi

What Would It Cost To Create A Vaulted Ceiling Raise The From Flat Peak In Living Room Single Story Home With Pitched Roof Quora
Related Posts