Hanging a Ceiling Fan on a Vaulted Ceiling: A Comprehensive Guide
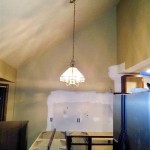
Installing a ceiling fan on a vaulted ceiling presents unique challenges compared to a standard flat ceiling installation. The angled surface requires specialized hardware and careful planning to ensure the fan operates safely and efficiently while maintaining aesthetic appeal. This article provides a detailed, step-by-step guide to successfully installing a ceiling fan on a vaulted ceiling, covering everything from pre-installation considerations to post-installation checks.
Before beginning the installation process, it is crucial to understand the specifics of the vaulted ceiling and the ceiling fan chosen. Factors such as the ceiling's slope, the fan's weight, and the presence of existing wiring all influence the necessary equipment and installation techniques. Failure to properly assess these factors can lead to an unstable installation, potential damage to the ceiling, or even electrical hazards.
Key Point 1: Assessing the Vaulted Ceiling and Selecting Compatible Hardware
The first crucial step involves a thorough assessment of the vaulted ceiling. This includes determining the ceiling's slope or pitch, locating the ceiling joist or support structure, and verifying the presence of adequate electrical wiring. The ceiling's slope is typically expressed as a ratio (e.g., 4/12), indicating the vertical rise for every 12 inches of horizontal run. This measurement is critical for selecting the correct downrod and mounting bracket.
The location of the ceiling joist or support structure is paramount for ensuring a secure mounting point. Vaulted ceilings often incorporate complex framing, making it essential to use a stud finder to accurately locate the joist. Ideally, the fan should be directly mounted to a structural member capable of supporting its weight and the dynamic forces generated during operation. If the existing junction box is not securely attached to a joist, it must be replaced with a fan-rated box designed to withstand the weight and vibrations of a ceiling fan.
Next, the existing electrical wiring needs to be inspected. Verify that the wiring is in good condition and meets local electrical codes. Ensure that the circuit breaker controlling the wiring is properly sized for the ceiling fan's amperage requirements. If the wiring is inadequate or outdated, a qualified electrician should be consulted to upgrade the wiring before proceeding with the installation.
Based on the ceiling's slope and the fan's weight, the appropriate hardware needs to be selected. This typically includes a sloped ceiling adapter, a downrod of sufficient length, and a fan-rated electrical box. A sloped ceiling adapter allows the fan to hang vertically even on an angled surface. The downrod length determines the distance between the fan blades and the ceiling, influencing airflow and aesthetics. Shorter downrods are suitable for lower vaulted ceilings, while longer downrods are recommended for higher ceilings to maximize air circulation.
The electrical box must be specifically designed for ceiling fans and be securely mounted to a ceiling joist. Standard electrical boxes are not designed to support the weight and vibrations of a ceiling fan and should never be used for this purpose. Fan-rated boxes come in various designs, including those that can be directly mounted to a joist and those that can be braced between two joists. Choose a box that is compatible with the ceiling's construction and the fan's mounting requirements.
Key Point 2: Preparing the Mounting Location and Installing the Electrical Components
Once the appropriate hardware has been selected, the next step involves preparing the mounting location and installing the electrical components. This includes removing the existing light fixture (if applicable), installing the fan-rated electrical box, and connecting the electrical wiring.
Begin by turning off the power to the circuit at the circuit breaker. This is a crucial safety precaution to prevent electrical shock. Carefully remove the existing light fixture, if present, and disconnect the wiring. Identify the hot, neutral, and ground wires. These wires are typically color-coded (black, white, and green or bare copper, respectively), but it is essential to verify their identity using a voltage tester before disconnecting them.
Install the fan-rated electrical box according to the manufacturer's instructions. If the existing box is not fan-rated, it must be removed and replaced. Securely attach the new box to the ceiling joist using screws or nails designed for this purpose. Ensure that the box is flush with the ceiling surface and can adequately support the weight of the ceiling fan.
Connect the electrical wiring to the fan-rated electrical box. Match the wires according to their color code: black to black (hot), white to white (neutral), and green or bare copper to green or bare copper (ground). Use wire connectors to securely join the wires, ensuring that no bare wire is exposed. Wrap the wire connectors with electrical tape for added insulation and protection.
Install the sloped ceiling adapter and the downrod according to the manufacturer's instructions. The downrod should be long enough to provide adequate clearance between the fan blades and the ceiling but not so long that the fan hangs too low. The sloped ceiling adapter should be securely attached to the electrical box and the downrod. Ensure that all screws and bolts are tightened securely.
Key Point 3: Assembling and Hanging the Ceiling Fan
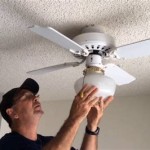
With the mounting location prepared and the electrical components installed, the next step involves assembling and hanging the ceiling fan. This includes attaching the fan blades, connecting the wiring within the fan's motor housing, and securing the fan to the downrod and mounting bracket.
Carefully unpack the ceiling fan and identify all the components. Refer to the manufacturer's instructions for specific assembly details. Typically, the first step is to attach the fan blades to the motor housing. Ensure that the blades are properly aligned and securely fastened. Some fans may require balancing after installation to prevent wobbling.
Connect the wiring from the ceiling to the wiring within the fan's motor housing. This typically involves connecting the hot, neutral, and ground wires, as well as any additional wires for controlling the fan's speed or a light kit. Follow the manufacturer's instructions carefully to ensure that the wiring is connected correctly. Use wire connectors to securely join the wires and wrap them with electrical tape for added insulation.
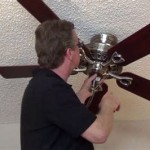
Carefully lift the fan motor housing and attach it to the downrod and mounting bracket. The mounting bracket typically has a hook or loop that allows the fan to be temporarily suspended while the wiring is connected. Secure the fan to the downrod using the provided screws or bolts. Ensure that all screws and bolts are tightened securely.
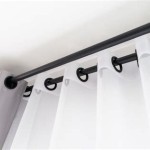
After the fan is securely mounted, install the fan's canopy or housing cover to conceal the wiring and mounting hardware. The canopy should fit snugly against the ceiling and be securely fastened. If the fan includes a light kit, install it according to the manufacturer's instructions. Be careful to properly seat the light fixture to prevent any light leaks or aesthetic issues.
Finally, carefully inspect the entire installation to ensure that all components are properly installed and secured. Double-check all wiring connections and ensure that all screws and bolts are tightened. Once the inspection is complete, turn on the power to the circuit breaker and test the ceiling fan. Verify that the fan operates smoothly and quietly and that all speeds and light functions are working correctly.
If the fan wobbles excessively, it may be necessary to balance the blades. Most ceiling fans come with a balancing kit that includes weights that can be attached to the blades to correct any imbalances. Follow the instructions provided with the balancing kit to properly balance the fan blades.
Proper preparation, careful execution, and meticulous attention to detail are essential for successfully installing a ceiling fan on a vaulted ceiling. By following these guidelines and consulting the manufacturer's instructions, one can achieve a safe, functional, and aesthetically pleasing installation.
Following the installation, it's important to regularly inspect the fan for any signs of loosening or wear. This proactive maintenance will ensure the longevity and safety of the installation. Periodically tighten any screws that may have loosened due to vibration. Clean the fan blades regularly to maintain optimal airflow and efficiency.
If at any point during the installation process, uncertainty or discomfort arises, it is always advisable to consult with a qualified electrician or experienced handyman. This professional guidance can prevent potential hazards and ensure a safe and successful installation.

Ensuring Proper Ceiling Fan Installation With Vaulted Ceilings

How To Install A Ceiling Fan On Sloped Lemon Thistle

How To Install A Ceiling Fan On Sloped Lemon Thistle

Vaulted Ceiling Beams Installing Recessed Lighting Fan

Pin By Connie Worley On Ceiling Fan Vaulted Ideas Makeover

How To Choose A Ceiling Fan For Vaulted Ceilings Lightology

Pin By Renee B On New House Ceiling Fan Vaulted Lighting Home

How To Choose A Ceiling Fan For Vaulted Ceilings Lightology

Ceiling Fan Boise Id Installation

Image Result For How To Install A Fan On Vaulted Ceiling Cathedral Living Room Beams
Related Posts