```html
Hanging A Fan From Vaulted Ceiling
Vaulted ceilings, with their dramatic angles and sense of spaciousness, present unique challenges when it comes to installing fixtures like ceiling fans. Unlike standard flat ceilings, vaulted ceilings require specific hardware and techniques to ensure the fan is safely and securely mounted, operates efficiently, and complements the aesthetic of the room. This article outlines the critical steps and considerations for successfully hanging a fan from a vaulted ceiling.
The primary concern when installing a ceiling fan on a vaulted ceiling is the angle. Standard ceiling fan mounting kits are designed for flat surfaces, and attempting to use them on an angled ceiling will result in an unstable and potentially dangerous installation. The fan needs to hang vertically to operate correctly, providing optimal airflow and minimizing stress on the motor. Furthermore, the electrical wiring and support structure must be adequate to handle the weight and vibrations of the fan.
Planning and Preparation
Before commencing any installation work, meticulous planning and preparation are essential. This involves assessing the ceiling structure, selecting the appropriate mounting hardware, gathering the necessary tools, and ensuring electrical safety.
The first step is to determine the type of vaulted ceiling. Vaulted ceilings can be categorized into several types, including cathedral ceilings (single, high slope), shed ceilings (sloped on one side), and groin vault ceilings (intersecting arches). The specific type of vault will influence the choice of mounting hardware and the installation process. It is also important to identify the location of ceiling joists or structural supports behind the finished ceiling material. These structural members are crucial for providing a secure anchor point for the fan mount.
Selecting the correct mounting hardware is paramount. A specialized vaulted ceiling fan mounting kit is designed to accommodate the angled surface. These kits typically include a mounting bracket with an adjustable swivel ball or similar mechanism that allows the fan to hang vertically, regardless of the ceiling's angle. The kit should also include a downrod, which is a metal extension rod that connects the fan motor to the mounting bracket. The length of the downrod is critical for ensuring adequate clearance between the fan blades and the ceiling, as well as for optimizing airflow within the room. A longer downrod is typically required for steeper vaulted ceilings.
Gathering the necessary tools is the next step. Essential tools include a stud finder (to locate ceiling joists), a level, a drill with various drill bits, a screwdriver (both Phillips head and flathead), wire strippers, wire connectors, a voltage tester, safety glasses, and a ladder. It is also advisable to have a helper on hand, especially when lifting and securing the fan motor.
Electrical safety is of utmost importance. Before working with any electrical wiring, turn off the power to the circuit at the breaker box. Use a voltage tester to confirm that the power is off. Never work on electrical wiring while the power is on. If unsure about any aspect of the electrical work, consult a qualified electrician.
Installation Procedure
The installation procedure involves several carefully executed steps, starting with installing the mounting bracket, wiring the fan, attaching the downrod, and securing the fan motor.
Begin by locating a ceiling joist using the stud finder. Mark the location of the joist on the ceiling. Most vaulted ceiling fan mounting kits are designed to be attached directly to a ceiling joist for maximum support. If the existing electrical box is not located directly on a joist, it may need to be relocated or reinforced. This is a task best left to a qualified electrician.
Next, install the mounting bracket according to the manufacturer's instructions. Ensure that the bracket is securely attached to the ceiling joist using appropriate screws or lag bolts. The bracket should be level and plumb, and the swivel ball or adjustable mechanism should be oriented correctly to allow the fan to hang vertically. Double-check the stability of the bracket before proceeding.
Wiring the fan involves connecting the fan's electrical wires to the existing electrical wiring in the ceiling. Typically, there will be three wires: a black wire (hot), a white wire (neutral), and a green or bare copper wire (ground). Connect the corresponding wires using wire connectors, ensuring that the connections are secure and properly insulated. Refer to the fan's wiring diagram and local electrical codes for specific wiring instructions. If the fan includes a light kit or remote control, follow the manufacturer's instructions for wiring those components as well.
Attach the downrod to the fan motor. The downrod typically screws into a threaded opening on the top of the fan motor. Ensure that the downrod is securely tightened and that any set screws are properly engaged. Feed the fan's electrical wires through the downrod, leaving enough slack to make the final connections to the wiring in the ceiling. The length of the downrod should be determined based on the height of the ceiling and the desired clearance between the fan blades and the ceiling. As a general guideline, the fan blades should be at least 7 feet above the floor.
Carefully lift the fan motor and downrod assembly and insert the swivel ball on the top of the downrod into the mounting bracket. Ensure that the swivel ball is properly seated and locked into place. This step may require a helper, especially for heavier fans. Once the fan is securely mounted, make the final electrical connections. Tuck the wires neatly into the electrical box and attach the canopy, which is a decorative cover that conceals the wiring and mounting bracket.
Addressing Potential Challenges
During the installation process, several challenges may arise, including inadequate ceiling joists, complex wiring configurations, and difficult access to the ceiling. Addressing these challenges effectively is crucial for a safe and successful installation.
If the ceiling joists are not strong enough to support the weight of the fan, reinforcement may be necessary. This could involve adding additional joists or installing a bracing system to distribute the weight more evenly. In some cases, it may be necessary to install a specially designed fan brace, which is a metal support structure that spans between multiple joists to provide a secure anchor point for the fan. This type of reinforcement should be done by a qualified contractor or structural engineer.
Complex wiring configurations can also present a challenge. If the existing electrical wiring is outdated, damaged, or does not meet current electrical codes, it may need to be upgraded. This is a task best left to a qualified electrician. It is also important to carefully label all wires and connections to avoid confusion. If the fan includes a light kit or remote control, the wiring can become even more complex. Always refer to the manufacturer's instructions and local electrical codes for specific wiring guidance.
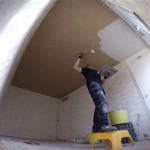
Difficult access to the ceiling can also be a problem, especially in rooms with high vaulted ceilings. A sturdy ladder or scaffolding may be necessary to reach the ceiling safely. Ensure that the ladder or scaffolding is properly positioned and secured before starting work. It is also advisable to have a helper on hand to assist with lifting and holding the fan motor and other components.
After completing the installation, test the fan to ensure that it is operating correctly. Turn on the power at the breaker box and check that the fan blades rotate smoothly and quietly. Test all of the fan's features, including the light kit, remote control, and speed settings. If the fan is wobbling, adjust the blade balancing weights as needed. If any problems arise, consult the manufacturer's troubleshooting guide or contact a qualified electrician.
```
Electrical Mount Ceiling Fan At The Peak Of A Sloped Home Improvement Stack Exchange

Ensuring Proper Ceiling Fan Installation With Vaulted Ceilings

How To Install A Ceiling Fan On Sloped Lemon Thistle

How To Choose A Ceiling Fan For Vaulted Ceilings Lightology

Cathedral Ceiling Fan Installation Instructions

Diy Cathedral Mount Ceiling Fan Box The Shabinlife

Mounting Ceiling Fan On Sloped Home Improvement Stack Exchange

How To Choose A Ceiling Fan For Vaulted Ceilings Lightology

How To Install A Ceiling Fan On Sloped Lemon Thistle

In Depth Fan Installation Guide With Downrod Shortening Extending Method
Related Posts