Flush Mount Ceiling Fan Installation on a Slanted Ceiling: A Comprehensive Guide
Installing a ceiling fan adds both aesthetic appeal and functional value to a room. A flush mount ceiling fan, also known as a low-profile ceiling fan or a hugger fan, is designed for rooms with low ceilings. While standard installations involve flat, horizontal surfaces, mounting a flush mount ceiling fan on a slanted or angled ceiling presents a unique set of challenges. This article provides a detailed guide on selecting the appropriate fan, preparing the space, and executing the installation safely and effectively.
1. Understanding the Unique Considerations for Slanted Ceilings
Slanted ceilings, often found in attics, lofts, or rooms with architectural design elements, require careful planning before installing a ceiling fan. The primary consideration is ensuring proper clearance between the fan blades and the ceiling. Insufficient clearance can lead to inefficient airflow, excessive noise, and potential damage to the fan or the ceiling itself. Moreover, the mount must be capable of securely holding the fan's weight at an angle without causing instability.
Another important factor is the angle of the slope. A steeper slope necessitates a more robust mounting solution than a gentle incline. The fan's motor also needs to be designed to operate correctly at an angle. Some ceiling fans are specifically engineered for installation on sloped ceilings and come with features that compensate for the inclination.
Finally, electrical connections need to be handled with extra caution. Ensuring that wiring is properly insulated and secured is crucial to prevent electrical hazards. This is particularly important when working at an angle, as gravity can cause loose wires to become dislodged or strained.
2. Selecting the Right Flush Mount Ceiling Fan for a Slanted Ceiling
Choosing the correct fan involves several considerations regarding size, design, and functionality. The size of the room dictates the appropriate fan blade span. A small room might only require a fan with a 42-inch blade span, while a larger room may need 52 inches or more. A fan that is too small won't circulate air effectively, while a fan that is too large can create an uncomfortable draft.
For slanted ceilings, select a fan specifically designed for sloped installations. These fans typically have a ball-and-socket mounting system or a similar mechanism that allows the fan to hang straight even when attached to an angled surface. This ensures proper balance and prevents the fan from wobbling.
Consider the fan's motor type. DC motors are generally more energy-efficient and quieter than AC motors, making them a suitable choice for bedrooms or living areas. Some fans also offer features like remote control operation and multiple speed settings, enhancing user convenience.
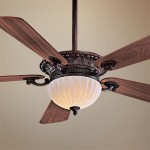
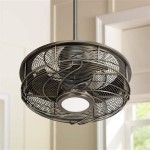
The aesthetic design of the fan should complement the room's décor. Flush mount fans come in a variety of styles, from traditional to contemporary, allowing you to choose one that seamlessly integrates with the existing design elements. Finishes range from brushed nickel to oil-rubbed bronze, offering further customization options.
Prioritize safety certifications, such as UL listing, which indicate that the fan has been tested and meets safety standards. Check the manufacturer's specifications to confirm the maximum slope angle the fan is designed to accommodate. Ensure the chosen fan includes all necessary mounting hardware and instructions specifically for slanted ceiling installations.
3. Preparing the Installation Site
Before commencing the installation, the power to the circuit must be turned off at the breaker box. This is the most crucial safety precaution and should never be skipped. Test the circuit with a non-contact voltage tester to confirm that the power is indeed off before proceeding.
Locate the ceiling joist to which the fan will be mounted. For a slanted ceiling, a standard electrical box mounted between joists may not be sufficient to support the fan's weight safely. In such cases, a bracing system might be required to provide additional support. This may involve installing a cross brace between the joists or using a specialized fan mounting bracket designed for sloped ceilings.
Inspect the existing wiring. Ensure that the wires are in good condition and of the appropriate gauge for the fan's electrical requirements. If the wiring is damaged or inadequate, it should be replaced by a qualified electrician. Confirm that the existing electrical box is rated to support the weight of the ceiling fan. Many older electrical boxes are not designed for this purpose and must be upgraded to a fan-rated box.
The angle of the slope should be measured accurately using a protractor or angle finder. This measurement is essential for selecting the appropriate mounting hardware and ensuring that the fan is installed correctly. Note the angle for future reference during the installation process.
Clear the area around the installation site to provide ample workspace. Cover furniture and flooring to protect them from dust and debris. Gather all necessary tools and materials, including a drill, screwdriver, wire strippers, wire connectors, measuring tape, level, and safety glasses.
4. Installing the Flush Mount Ceiling Fan on a Slanted Ceiling
Begin by assembling the fan motor housing according to the manufacturer's instructions. This may involve attaching the fan blades and the motor to the housing. Refer to the instruction manual for specific guidance on the proper assembly procedure.
Attach the mounting bracket to the electrical box or bracing system. Ensure that the bracket is securely fastened to the joist or support structure. Use appropriate screws or bolts to ensure a strong and stable connection. If using a ball-and-socket mounting system, ensure that the ball is properly seated in the socket.
Carefully lift the fan motor housing and connect the wiring according to the wiring diagram provided with the fan. Typically, the black wire connects to the black wire from the electrical box, the white wire connects to the white wire, and the green or bare wire connects to the ground wire. Use wire connectors to secure the connections and ensure that no bare wire is exposed. Gently tuck the wires into the electrical box without crimping or straining them.
Attach the fan motor housing to the mounting bracket. Align the mounting holes on the housing with the corresponding holes on the bracket and secure them with screws. Ensure that the screws are tightened securely to prevent the fan from wobbling. Double-check that the ball-and-socket joint (if applicable) allows the fan to hang straight down despite the angled ceiling.
Install the fan blades according to the manufacturer's instructions. Ensure that the blades are properly aligned and securely fastened to the motor housing. Check the balance of the blades to prevent wobbling. If necessary, use a balancing kit to adjust the blade weight and ensure smooth operation.
Install the light kit, if applicable. Connect the wiring for the light kit according to the wiring diagram. Attach the light fixture to the motor housing and install the light bulbs. Test the light kit to ensure that it is functioning correctly.
Install the decorative canopy to conceal the mounting hardware and wiring. Ensure that the canopy is securely attached to the ceiling and that it sits flush against the surface. This enhances the aesthetic appearance of the installation and prevents dust from entering the electrical box.
5. Testing and Troubleshooting
After completing the installation, restore power to the circuit at the breaker box. Test the fan to ensure that it is operating correctly. Check the fan's speed settings, the light kit, and any other features. Listen for any unusual noises or vibrations that may indicate a problem.
If the fan wobbles, check the blade balance and alignment. Use a balancing kit to adjust the blade weight and ensure smooth operation. Tighten all screws and connections to eliminate any looseness that may be causing the wobble.
If the fan does not turn on, check the wiring connections to ensure that they are secure and that the power is reaching the fan motor. Verify that the wall switch or remote control is functioning correctly. If the light kit does not work, check the light bulbs and wiring connections.
If the fan hums loudly, it may indicate a problem with the motor. Check the motor mounting hardware and ensure that it is properly secured. If the humming persists, the motor may need to be replaced.
If you encounter any difficulties during the installation or testing process, consult the manufacturer's instructions or seek assistance from a qualified electrician. Do not attempt to repair or modify the fan if you are not comfortable working with electrical wiring.
6. Safety Precautions and Best Practices
Always turn off the power to the circuit at the breaker box before commencing any electrical work.
Wear safety glasses to protect your eyes from dust and debris.
Use a ladder that is stable and properly positioned to avoid falls.
Follow the manufacturer's instructions carefully.
Ensure that all wiring connections are secure and properly insulated.
Do not overload electrical circuits.
Inspect the fan regularly for signs of wear or damage.
Clean the fan blades periodically to maintain optimal performance.
If you are not comfortable working with electrical wiring, hire a qualified electrician to perform the installation.
By following these guidelines, you can safely and effectively install a flush mount ceiling fan on a slanted ceiling, enhancing the comfort and aesthetics of your living space.

How To Install A Ceiling Fan On Sloped Lemon Thistle

How To Choose A Ceiling Fan For Vaulted Ceilings Lightology

Ceiling Fans For Vaulted Ceilings Downrod

Ceiling Fans For Angled Ceilings

How To Install A Ceiling Fan On Sloped Lemon Thistle

How To Choose A Ceiling Fan For Vaulted Ceilings Lightology

Vaulted Ceiling Fans Sloped Lightology

Fans On An Angle Installing Ceiling Angled Or Raked

54 Modern Forms Aviator 5 Flush Black Smart Ceiling Fan 221r1 Lamps Plus

Install Ceiling Fan On Sloped Simple Modern Handmade Home
Related Posts