Floating ceilings are an increasingly popular choice for homeowners looking to add a modern, sleek touch to their home. Whether you’re looking to update an existing space or create a new room, a floating ceiling can be a great way to make a statement. But what exactly is a floating ceiling and what is involved in the installation process? This article will give you a comprehensive overview of the steps involved in floating ceiling installation.
What is a Floating Ceiling?
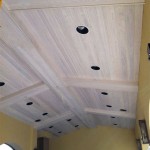
A floating ceiling is a type of suspended drywall ceiling which is installed independently from the walls. The drywall is hung from a metal grid and suspended from the ceiling joists. This type of ceiling creates an uninterrupted, smooth surface that can be painted or textured to match the rest of the room’s décor. Floating ceilings can also be used to create a dramatic effect, such as when used in a two-story foyer.
Benefits of Installing a Floating Ceiling
Floating ceilings offer a number of advantages, including:
- Aesthetically pleasing, modern look
- Easy to install
- Can be used to create a variety of effects, such as making a room appear larger or more dramatic
- Relatively inexpensive compared to other types of ceilings
- Able to support various lighting fixtures and other decorative elements
Tools and Materials Needed for Installation
The tools and materials you’ll need for installing a floating ceiling depend on the size and complexity of the job. Generally, you’ll need:
- Drywall sheets
- Metal grid track
- Metal cross tees
- Screws
- Drywall screws
- Joint compound
- Sandpaper
- Paint
- Masking tape
- Level
- Measuring tape
- Cordless drill
- Circular saw
- Utility knife
Step-by-Step Installation Guide
Installing a floating ceiling requires a few steps, which are outlined below:
- Measure the ceiling and determine the size of the drywall sheets needed. Cut the drywall to size using a circular saw.
- Attach the metal grid track to the ceiling joists using drywall screws. Use a level to ensure the track is straight.
- Attach the metal cross tees to the track, making sure to leave a few inches of space between each one.
- Install the drywall sheets to the cross tees using drywall screws.
- Cover the screws with joint compound and let it dry.
- Sand the compound to create a smooth surface.
- Paint the ceiling to match the rest of the room.
Conclusion
Floating ceilings are a great way to make a room feel more modern and chic. Installing a floating ceiling is a relatively straightforward process, but it’s important to take proper measurements and use the right tools and materials. With the right preparation and knowledge, you can create a beautiful, long-lasting ceiling that will transform your space.


Related Posts

