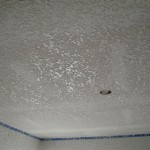
If you’re looking to freshen up the look of your home, one of the easiest and most affordable solutions is to remove the popcorn ceiling. Popcorn ceilings are a common feature in many homes, but they can be difficult to remove due to their textured surface. Fortunately, there are a few simple steps you can take to make the job easier and faster.
Preparing the Room
Before you begin, you’ll need to take the necessary precautions to protect yourself and the room. Start by covering the floors and furniture with a thick drop cloth or plastic sheet to catch any debris that falls during the removal process. You’ll also want to wear safety goggles, a dust mask, and protective clothing to avoid inhaling the dust created by the popcorn ceiling.
Applying Water and Detergent
Once you’re ready, you’ll need to mix a solution of warm water and mild detergent in a spray bottle. Spray this solution onto the popcorn ceiling, making sure to cover the entire surface evenly. The water and detergent will help to soften the texture, making it easier to remove. Allow the solution to sit for 10-15 minutes before moving onto the next step.
Removing with a Scraper
When the popcorn ceiling has been sufficiently softened, it’s time to start scraping it away. Use a putty knife or drywall scraper to gently remove the popcorn texture, being careful not to damage the drywall beneath. Start from the top and work your way down in small sections until the entire ceiling has been scraped clean.
Cleaning Up
Once all the popcorn has been removed, you’ll need to take the time to clean up the mess. Vacuum up any loose debris, then use a damp cloth to wipe down the walls and ceiling. This will help to remove any residue left behind from the scraping process. You may also want to use a mild detergent and water solution to give the walls and ceiling a final cleaning.
Conclusion
Removing popcorn ceilings is an easy and affordable way to freshen up any room. By following the simple steps outlined above, you can tackle this project in no time and have your home looking like new. With a little bit of preparation and the right tools, you can make quick work of this task and have your home looking its best.


Related Posts


