Cover Popcorn Ceiling With Tiles: An Easy DIY Project
Popcorn ceilings, once a ubiquitous feature in homes built from the 1950s through the 1980s, are now often regarded as outdated and aesthetically undesirable. Beyond their dated appearance, they can also harbor dust, allergens, and potentially asbestos in older homes. While professional removal is an option, it can be costly and messy. Covering a popcorn ceiling with tiles presents a viable and more manageable DIY alternative. This method encapsulates the existing texture, providing a clean, modern finish with the added benefit of potential sound dampening and insulation.
This article will explore the process of covering a popcorn ceiling with tiles, providing a detailed guide for homeowners looking to undertake this project. It will cover the necessary materials, preparation steps, installation techniques, and potential challenges associated with this DIY endeavor.
Assessing the Existing Popcorn Ceiling
Before embarking on the tiling project, a thorough assessment of the existing popcorn ceiling is crucial. This assessment involves several key considerations. Primarily, the age of the ceiling must be determined. If the house was built before the late 1970s, there is a possibility that the popcorn texture contains asbestos. Asbestos is a hazardous material, and disturbing it can release harmful fibers into the air. If asbestos is suspected, professional testing is strongly recommended. If asbestos is confirmed, professional abatement is the safest course of action. Covering an asbestos-containing ceiling with tiles is generally acceptable, as it encapsulates the material, preventing fiber release, but local regulations may vary and should be consulted.
Next, the structural integrity of the ceiling needs to be evaluated. Look for signs of water damage, such as staining or sagging. Any existing water damage must be addressed before proceeding with the tiling project. Repairing the underlying problem is essential, as water damage can compromise the adhesion of the tiles and lead to future problems, such as mold growth.
The stability of the popcorn texture itself also needs to be checked. Gently scrape a small area of the texture with a putty knife. If the texture crumbles easily or flakes off in large pieces, it may be necessary to stabilize it before tiling. This can be achieved by applying a coat of primer specifically designed for bonding to loose surfaces. A good quality primer will help to create a more secure surface for the tile adhesive to adhere to.
Finally, consider the existing ceiling height. Adding tiles will lower the ceiling slightly, which may be a concern in rooms with already low ceilings. Measure the ceiling height and factor in the thickness of the chosen tiles and adhesive to determine if the reduction in height is acceptable.
Choosing the Right Tiles and Materials
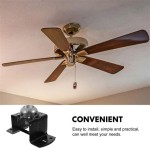
Selecting the appropriate tiles and materials is essential for a successful popcorn ceiling covering project. Several types of tiles are suitable for this application, each with its own advantages and disadvantages. Lightweight polystyrene tiles are a popular choice due to their ease of installation and affordability. They are also available in a variety of designs and patterns, allowing for diverse aesthetic options. However, polystyrene tiles are not as durable as other materials and may be more susceptible to damage.
Faux tin tiles, typically made from PVC or other lightweight materials, offer a more decorative and durable option. They mimic the look of real tin tiles but are much easier to install and maintain. Faux tin tiles are also available in a wide range of styles and finishes, making them a versatile choice for various interior design schemes.
Acoustic tiles, designed to absorb sound, can be a good option for rooms where noise reduction is desired. These tiles are often made from mineral fiber or foam and can significantly improve the acoustics of a space. However, acoustic tiles may be more expensive than other types of tiles and may require specialized adhesives for installation.
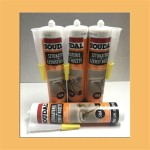
In addition to the tiles themselves, several other materials are needed for the project. Adhesive is crucial for securing the tiles to the ceiling. A construction adhesive specifically designed for bonding to textured surfaces is recommended. This type of adhesive provides a strong and durable bond, ensuring that the tiles remain securely in place.
A caulk gun is necessary for applying the adhesive. A utility knife is needed for cutting the tiles to size, especially when fitting them around light fixtures or other obstructions. A measuring tape, level, and pencil are essential for accurate measurements and marking. Safety glasses and a dust mask are recommended to protect the eyes and respiratory system from dust and debris.
Finally, consider purchasing a seam filler or caulk that matches the color of the tiles. This can be used to fill any gaps between the tiles and create a seamless, professional-looking finish.
Step-by-Step Installation Guide
The installation process involves several steps, each requiring careful attention to detail. First, prepare the ceiling by cleaning it thoroughly. Remove any loose debris, dust, or cobwebs. Use a vacuum cleaner with a brush attachment to remove any remaining particles. If the popcorn texture is particularly dirty, wipe it down with a damp cloth and mild detergent. Allow the ceiling to dry completely before proceeding.
Next, plan the layout of the tiles. Start by finding the center of the ceiling. Use a measuring tape to determine the center point of each wall and then draw intersecting lines across the ceiling to mark the center. This will serve as the starting point for the tile installation. It's often best to start in the center and work outwards to ensure a symmetrical and visually appealing result. Consider the placement of light fixtures or other ceiling-mounted objects and plan the tile layout accordingly.
Apply adhesive to the back of each tile. Follow the manufacturer's instructions for the specific adhesive being used. Typically, this involves applying a series of beads or dabs of adhesive to the back of the tile, ensuring that the adhesive is evenly distributed. Avoid applying too much adhesive, as this can cause the tile to slide or sag. Apply enough to get a good bond.
Position the first tile at the center of the ceiling, aligning it with the marked lines. Press the tile firmly against the ceiling, holding it in place for a few seconds to allow the adhesive to grab. Repeat this process for the remaining tiles, working outwards from the center. Ensure that the tiles are aligned properly and that there are no gaps between them. Use a level to check that the tiles are installed straight and even.
When cutting tiles to fit around light fixtures or other obstructions, use a utility knife to carefully score the tile along the desired cutting line. Snap the tile along the score line. If necessary, use a pair of scissors or a jigsaw to make more intricate cuts. Be sure to wear safety glasses when cutting the tiles to protect the eyes from flying debris.
Once all of the tiles are installed, inspect the ceiling for any gaps or imperfections. Use seam filler or caulk to fill any gaps between the tiles and create a seamless finish. Wipe away any excess filler with a damp cloth. Allow the adhesive and filler to dry completely according to the manufacturer's instructions.
Finally, clean the tiles with a damp cloth to remove any dust or fingerprints. The ceiling can now be painted or left as is, depending on the desired aesthetic.
Addressing Potential Challenges
While covering a popcorn ceiling with tiles is a relatively straightforward DIY project, several potential challenges may arise. Uneven surfaces can be a common issue, particularly in older homes. If the popcorn texture is uneven or if there are any bumps or ridges on the ceiling, it may be necessary to level the surface before installing the tiles. This can be achieved by applying a thin layer of patching compound to the affected areas and then sanding it smooth once it is dry.
Adhesive failure can also be a problem, especially if the surface is not properly prepared or if the wrong type of adhesive is used. To prevent adhesive failure, ensure that the ceiling is clean, dry, and free of any loose debris. Use a construction adhesive specifically designed for bonding to textured surfaces. Apply the adhesive evenly and press the tiles firmly against the ceiling.
Tile slippage can occur if too much adhesive is used or if the tiles are too heavy. To prevent tile slippage, use the recommended amount of adhesive and consider using lighter-weight tiles. If slippage does occur, use temporary supports, such as shims or masking tape, to hold the tiles in place until the adhesive dries.
Cutting tiles accurately can be challenging, particularly when fitting them around light fixtures or other obstructions. To ensure accurate cuts, use a sharp utility knife and a cutting guide. Practice cutting on scrap pieces of tile before cutting the actual tiles. Be patient and take your time to achieve a professional-looking result.
Dealing with asbestos requires extreme caution. If asbestos is suspected, do not attempt to remove the popcorn texture yourself. Contact a qualified asbestos abatement professional to have the material tested and removed safely. Covering an asbestos-containing ceiling with tiles is generally acceptable, but it is important to check local regulations and obtain the necessary permits.
Proper ventilation is essential throughout the project. Open windows and use fans to circulate air. Wear a dust mask to protect the respiratory system from dust and debris. Clean up any spills or messes immediately to prevent accidents.
By addressing these potential challenges proactively, homeowners can increase the likelihood of a successful and satisfying popcorn ceiling covering project.

How To Cover Popcorn Ceilings With Beadboard Step By Guide Shoe Makes New

How To Cover Popcorn Ceiling 8 Creative Ways Making Maanita

Diffe Ways To Cover Popcorn Ceilings

The Genius New Way People Are Hiding Their Popcorn Ceilings

How To Cover Popcorn Ceiling 8 Creative Ways Making Maanita

Say Goodbye To Messy Popcorn Ceilings Diy Guide Covering With Glue Up Ceiling Tiles

Decorative Ideas To Cover Popcorn Ceilings Artsy Rule

How To Cover Popcorn Ceilings With Beadboard Step By Guide Shoe Makes New

Budget Upgrade Good Bye Popcorn Ceiling Hometalk

8 Genius Ways To Cover A Popcorn Ceiling Without Removing It Bless Er House
Related Posts