Cover Popcorn Ceiling With Tiles: An Easy DIY Project Ideas
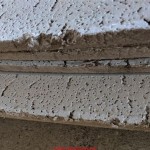
Popcorn ceilings, also known as acoustic ceilings, were once a popular choice for residential interiors due to their sound-dampening properties and ability to hide imperfections. However, their outdated aesthetic and potential for containing asbestos (in older homes) has led many homeowners to seek ways to update this surface. While removal is an option, it can be messy, time-consuming, and potentially hazardous. Covering a popcorn ceiling with tiles offers a simpler, cleaner, and often more cost-effective alternative.
This article explores the process of covering popcorn ceilings with tiles, focusing on various DIY project ideas, materials needed, and the step-by-step instructions involved. Covering a popcorn ceiling with tiles can dramatically transform the look of a room, adding texture, sophistication, and value to the home.
Preparing the Popcorn Ceiling for Tile Installation
Before embarking on the tiling project, proper preparation of the existing popcorn ceiling is crucial. This step ensures a stable and even surface for the tiles to adhere to, maximizing the longevity and aesthetic appeal of the finished project. The extent of preparation depends on the type of tile chosen and the condition of the popcorn ceiling itself.
The first step is to assess the ceiling thoroughly. Check for any signs of water damage, sagging, or loose popcorn texture. These issues must be addressed before proceeding further. Water damage can weaken the ceiling structure and compromise the tile adhesion. Sagging indicates underlying structural problems that need professional evaluation. Loose popcorn texture will prevent the adhesive from forming a strong bond.
If water damage is present, the source of the leak must be identified and repaired before any further work is done. Any damaged drywall should be replaced or repaired. Sagging ceilings may require reinforcing the joists above the ceiling or even replacing sections of the ceiling. Loose or flaking popcorn texture should be gently scraped away using a wide putty knife or drywall scraper. It is important to note that if the home was built before 1980, the popcorn ceiling may contain asbestos. In this case, testing is recommended before disturbing the material, and professional asbestos abatement may be necessary.
Once any necessary repairs are completed, the ceiling should be cleaned to remove dust, dirt, and cobwebs. A vacuum cleaner with a soft brush attachment is ideal for this purpose. This will help the adhesive bond properly to the popcorn ceiling. After cleaning, a primer specifically designed for bonding to difficult surfaces, such as popcorn ceilings, should be applied. This primer creates a more porous surface for the adhesive to grip onto.
Consider using a leveling compound to even out any significant imperfections or uneven areas on the popcorn ceiling. This step is particularly important when using larger format tiles or tiles with a glossy finish, as any imperfections will be more noticeable. Apply the leveling compound according to the manufacturer's instructions, ensuring a smooth and level surface. This step can be skipped if the popcorn ceiling is relatively smooth and even.
Choosing the Right Tiles and Adhesive
Selecting the appropriate tiles and adhesive is paramount to the success of the project. The choice of tiles depends on the desired aesthetic, budget, and ease of installation. The adhesive must be compatible with the chosen tile and the existing popcorn ceiling, ensuring a strong and durable bond.
Several types of tiles are suitable for covering popcorn ceilings. Lightweight options such as polystyrene tiles, cork tiles, and foam tiles are popular choices due to their ease of installation and minimal weight, which reduces the stress on the existing ceiling structure. These tiles are typically installed using an adhesive designed for foam or polystyrene. They are available in a wide range of styles and patterns, mimicking the look of more expensive materials like wood, metal, or ceramic.
PVC panels offer another lightweight and waterproof option, ideal for bathrooms or kitchens where moisture is a concern. These panels are typically interlocking and can be installed using adhesive or staples. They are easy to clean and maintain and are available in a variety of colors and finishes.
Thinner, lighter ceramic or porcelain tiles can also be used, but extra care must be taken to ensure the ceiling can support the added weight. A stronger adhesive, such as a modified thin-set mortar, is required for these types of tiles. It's crucial to consult with a structural engineer or experienced contractor to assess the ceiling's load-bearing capacity before using heavier tiles.
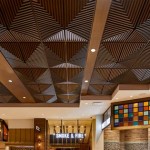
Metal tiles, such as pressed tin or aluminum tiles, can add a unique and stylish touch to a room. These tiles are typically lightweight and easy to install using adhesive or nails. They are available in a variety of patterns and finishes, from antique to modern.
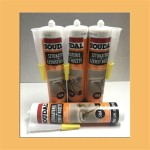
Regardless of the tile type, it is essential to select a high-quality adhesive specifically formulated for bonding to textured surfaces. Construction adhesives designed for use with drywall or plaster are generally suitable. Read the manufacturer's instructions carefully to ensure the adhesive is compatible with the chosen tile and the popcorn ceiling. For heavier tiles, a modified thin-set mortar may be necessary. Test the adhesive in an inconspicuous area of the ceiling before applying it to the entire surface to ensure it bonds properly.
Consider the overall design of the room when choosing the tile style and color. Lighter colors can make a room feel brighter and more spacious, while darker colors can add a sense of drama and sophistication. Choose a tile pattern that complements the existing decor and architectural style of the home. Sample tiles should be ordered and viewed in the room's lighting conditions before making a final decision.
Step-by-Step Tile Installation Guide
Once the popcorn ceiling is properly prepared and the appropriate tiles and adhesive are selected, the installation process can begin. Careful planning and attention to detail are essential for achieving a professional-looking result.
Before beginning the installation, it is important to plan the layout of the tiles. Start by finding the center of the ceiling. This can be done by measuring the length and width of the room and marking the midpoint of each side. Draw intersecting lines from these midpoints to create a cross in the center of the ceiling. This intersection will be the starting point for the tile layout.
Dry-fit the tiles around the center point to ensure a balanced and symmetrical layout. If the edges of the ceiling require cutting tiles, adjust the starting point slightly to minimize small or awkward cuts. The goal is to achieve a visually appealing pattern with minimal waste.
Apply the adhesive to the back of the tile according to the manufacturer's instructions. Use a notched trowel to create ridges in the adhesive, which will help it bond to the popcorn ceiling. Press the tile firmly onto the ceiling, aligning it with the planned layout. Hold the tile in place for a few seconds to allow the adhesive to grab. For larger or heavier tiles, consider using temporary supports, such as painter's tape or props, to hold the tiles in place while the adhesive dries.
Work in small sections, applying adhesive to only a few tiles at a time. This prevents the adhesive from drying out before the tiles can be installed. Use a level to ensure the tiles are aligned properly and that the surface is even. Periodically check the alignment of the tiles to prevent them from drifting out of alignment.
When reaching the edges of the ceiling, cut the tiles to fit using a utility knife or tile cutter. Measure the space carefully and mark the cut line on the tile. Use a straight edge to guide the cutting tool. Score the tile several times before snapping it along the score line. Smooth the cut edges with sandpaper or a file to prevent sharp edges.
After all the tiles have been installed, allow the adhesive to dry completely according to the manufacturer's instructions. This typically takes 24 to 48 hours. Remove any temporary supports or tape after the adhesive has dried. Inspect the finished installation for any gaps or imperfections. Fill any gaps with caulk or adhesive. Clean the tiles with a damp cloth to remove any dust or residue.
Consider adding decorative trim around the perimeter of the ceiling to hide any cut edges and create a more finished look. Crown molding or decorative ceiling tiles can be used to create a seamless transition between the tiled ceiling and the walls. Adding lighting fixtures, such as recessed lights or chandeliers, can further enhance the aesthetic appeal of the tiled ceiling.
Proper ventilation is essential during the installation process. Open windows and doors to allow fresh air to circulate. Wear appropriate safety gear, such as gloves, safety glasses, and a dust mask, to protect yourself from dust and fumes. Follow all safety precautions outlined in the manufacturer's instructions for the adhesive and tiles. By following these steps carefully, covering a popcorn ceiling with tiles can be a successful and rewarding DIY project.

How To Cover Popcorn Ceiling 8 Creative Ways Making Maanita

How To Cover Popcorn Ceilings With Beadboard Step By Guide Shoe Makes New

Diffe Ways To Cover Popcorn Ceilings

How To Cover Popcorn Ceiling 8 Creative Ways Making Maanita

How To Cover Popcorn Ceilings With Beadboard Step By Guide Shoe Makes New

Cover Popcorn Ceilings Armstrong Residential

Budget Upgrade Good Bye Popcorn Ceiling Hometalk

Decorative Ideas To Cover Popcorn Ceilings Artsy Rule

Ideas For Covering A Popcorn Ceiling Armstrong Ceilings The Home

How To Cover Popcorn Ceiling 8 Creative Ways Making Maanita
Related Posts


