Ceiling Light Flush Mount Installation: A Comprehensive Guide
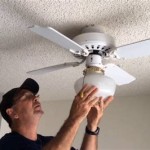
Installing a flush mount ceiling light fixture is a common home improvement task that can significantly enhance a room's aesthetics and functionality. Flush mount fixtures, also known as ceiling huggers, are designed to sit nearly flush with the ceiling, maximizing headroom and providing general ambient lighting. This guide provides a detailed explanation of the process, from preparation to completion, ensuring a safe and effective installation.
Before commencing any electrical work, safety is paramount. Working with electricity poses inherent risks, and adherence to safety protocols is crucial to prevent injury or property damage. The following steps outline the necessary precautions and preparations for a successful flush mount ceiling light installation.
The first and most important step is to turn off the power to the circuit at the electrical panel. Locate the circuit breaker that controls the existing light fixture in the room where the new fixture will be installed. Switch the breaker to the "off" position. To verify that the power is completely disconnected, use a non-contact voltage tester. Hold the tester near the wires of the existing fixture. If the tester indicates the presence of voltage, immediately re-check the breaker and ensure it is fully switched off. If the breaker is labeled incorrectly, carefully identify the correct breaker before proceeding.
Gather all necessary tools and materials before beginning the installation. Having everything readily available will streamline the process and minimize interruptions. The required tools typically include: a non-contact voltage tester, a screwdriver set (both flathead and Phillips head), wire strippers, wire connectors (wire nuts), electrical tape, a ladder or step stool, a level, a pencil, and safety glasses. The materials required include the new flush mount ceiling light fixture, mounting hardware (typically included with the fixture), and potentially new wire if the existing wires are damaged or too short.
Carefully remove the existing light fixture. Loosen any screws or nuts holding the fixture in place. Gently lower the fixture, being mindful of its weight and any potential dangling wires. Once the fixture is safely lowered, disconnect the wires using wire strippers to detach the wire connectors. It is beneficial to visually inspect the existing wiring for signs of damage, such as frayed insulation or corrosion. If damage is present, replace the affected wiring with new wire of the same gauge. After disconnecting the wires, completely remove the old fixture and dispose of it responsibly.
Identifying and Connecting the Wires
Correctly identifying and connecting the wires is critical for the safe and proper operation of the new light fixture. Standard electrical wiring typically consists of three wires: a black (hot) wire, a white (neutral) wire, and a green or bare copper (ground) wire. The black wire carries the electrical current from the power source, the white wire provides a return path for the current, and the ground wire provides a safety path in case of a fault. Proper identification and connection of these wires are essential to prevent electrical shock and ensure the fixture operates correctly.
Visually inspect the wires exiting the electrical box in the ceiling. Typically, they will be color-coded as described above. However, it's always best to confirm with a voltage tester (after ensuring the power is OFF at the breaker). If the wiring is old and the colors are faded or unclear, a qualified electrician should be consulted to properly identify the wires. Never assume the wiring is correct based solely on visual inspection.
The new flush mount light fixture will also have labeled wires or wires with specific color coding. Typically, the black wire from the fixture connects to the black wire in the ceiling box, the white wire from the fixture connects to the white wire in the ceiling box, and the green or bare copper wire from the fixture connects to the green or bare copper wire in the ceiling box, or to a grounding screw within the electrical box. Always refer to the manufacturer's instructions for the specific wiring configuration of the new fixture.
Use wire connectors (wire nuts) to securely join the wires of the same color. Strip about ¾ inch of insulation from the end of each wire using wire strippers. Hold the bare ends of the wires together and twist the wire connector clockwise until it is firmly attached. Give each wire a gentle tug to ensure the connection is secure. Wrap electrical tape around the base of the wire connector to further secure the connection and prevent any exposed wire from touching other components. Properly securing the wire connections is crucial to prevent loose connections, which can lead to flickering lights, overheating, or even electrical fires.
If the existing wires are too short to easily connect to the fixture's wires, it may be necessary to add pigtails. Pigtails are short lengths of wire that are used to extend the reach of the existing wires. Use wire of the same gauge and color as the existing wiring, and connect the pigtails to the existing wires using wire connectors as described above. Then, connect the other end of the pigtails to the fixture's wires.
Mounting the Flush Mount Fixture
Correctly mounting the flush mount fixture to the ceiling is essential for ensuring that it is securely attached and operates safely. The method for mounting the fixture will vary depending on the type of fixture and the existing electrical box in the ceiling. Always follow the manufacturer's instructions for the specific fixture being installed.
Most flush mount fixtures come with a mounting bracket that attaches to the electrical box in the ceiling. The bracket provides a secure base for the fixture to attach to. Align the mounting bracket with the screw holes in the electrical box. Use screws of the appropriate length and size to securely attach the bracket to the box. Ensure that the bracket is installed level to prevent the fixture from appearing crooked. A level can be used to verify that the bracket is properly aligned.
Carefully tuck the connected wires back into the electrical box. Ensure that the wires are not pinched or damaged during this process. There should be enough space within the box to accommodate the wires without overcrowding. Overcrowding the box can lead to overheating and potential electrical hazards. Gently position the fixture up to the mounting bracket. The fixture should align with the mounting holes in the bracket. Secure the fixture to the bracket using the screws or nuts provided with the fixture. Tighten the screws or nuts firmly, but avoid over-tightening, which could damage the fixture or the mounting bracket.
After the fixture is mounted and secured, install the light bulb(s). Use the correct type and wattage of bulb as specified by the manufacturer. Exceeding the specified wattage can overheat the fixture and potentially create a fire hazard. Ensure that the bulb is properly seated in the socket. If the fixture has a glass cover or diffuser, carefully attach it to the fixture according to the manufacturer's instructions. Make sure the cover or diffuser is securely fastened to prevent it from falling. A secure cover or diffuser also helps to protect the bulb and distribute the light evenly.
Testing and Troubleshooting the Installation
Once the fixture is installed, testing is crucial to ensure it operates correctly and safely. Troubleshooting may be necessary if the fixture does not function as expected. These steps will help identify and resolve common issues.
Restore power to the circuit by switching the circuit breaker back to the "on" position. Observe the fixture to see if it illuminates. If the fixture turns on and operates normally, the installation is successful. However, if the fixture does not turn on, or if it flickers, pops, or hums, there may be an issue with the wiring or the fixture itself.
If the fixture does not illuminate, first double-check the light bulb. Ensure that the bulb is not burned out and that it is properly seated in the socket. If the bulb is good, turn off the power again at the breaker and carefully inspect the wire connections. Ensure that all connections are secure and that the wires are properly connected according to the manufacturer's instructions. If the connections are loose or incorrect, re-secure or correct them and then test the fixture again.
If the fixture flickers or produces a humming sound, the issue may be related to loose wiring or a faulty ballast (if the fixture uses fluorescent or LED technology). Turn off the power at the breaker and carefully inspect the wiring for any loose connections. Tighten any loose connections and ensure that the wires are properly secured. If the fixture continues to flicker or hum, the ballast may need to be replaced. Consult a qualified electrician for assistance with replacing the ballast.
In rare cases, the issue may be with the circuit breaker itself. If all other troubleshooting steps have been exhausted, test the circuit breaker by replacing it with a known working breaker of the same amperage. If the fixture then works, the original breaker was faulty and should be replaced. However, if the problem persists, a more complex issue may be present in the wiring, and a qualified electrician should be consulted to diagnose and repair the issue.
By carefully following these instructions and prioritizing safety, homeowners can successfully install flush mount ceiling light fixtures, enhancing the lighting and aesthetics of their homes. If any doubts arise or if the homeowner is uncomfortable performing electrical work, seeking assistance from a qualified electrician is always the safest and most prudent course of action.

How To Install A Flush Mount Light Canarm

How To Install Flush Mount Ceiling Lights

How To Install Modern Ceiling Light Cover Conversion Kits

How To Install Flush Mount Fixture Junction Box

The Most Popular Flush Mount Lighting Styles To Know Ledmyplace

How To Install Outdoor Flush Mount Lights

Commercial Electric 9 In White Oil Rubbed Broe Trims 800 Lumens Led Flush Mount Ceiling Light Fixture With Night Adjustable Cct 56582112 The Home Depot

Flush Mount Chandelier Installation By Real Regular Homeowners

Next Glow Luxuries Slim Ceiling Light 1 6 5 In White Led Flush Mount The Lighting Department At Com

Commercial Electric 13 In White Oil Rubbed Broe Trims 1350 Lumens Led Flush Mount Ceiling Light Fixture With Night Adjustable Cct 56584112 The Home Depot
Related Posts

