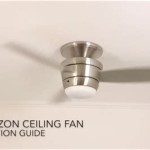
Replacing a ceiling fan glass bowl is an easy and inexpensive way to update the look of your fan. Whether your current glass bowl is cracked, chipped, or just needs to be replaced due to age, replacing it with a new one can be done quickly. This guide will walk you through the steps needed to replace your ceiling fan glass bowl.
Steps to Replace a Ceiling Fan Glass Bowl
Follow these steps in order to replace your ceiling fan glass bowl:
- Turn off the power supply to your fan by turning off the circuit breaker or unplugging the fan.
- Remove the fan blades from the fan motor by unscrewing the screws that hold them in place.
- Remove the screws that hold the glass bowl in place. You may need to use a flathead screwdriver to do this.
- Carefully lift the glass bowl from the fan motor and set it aside.
- Place the new glass bowl in its place and secure it with the screws you just removed.
- Reattach the fan blades to the fan motor and re-secure them with the screws.
- Turn the power back on.
Tips for Replacing a Ceiling Fan Glass Bowl
- Make sure you measure the existing glass bowl before purchasing a new one. This will ensure that the replacement glass bowl is the correct size and fits properly.
- Be sure to wear gloves and safety glasses when performing any electrical work.
- Be sure to check the fan blades for any damage or wear before reattaching them.
- If you are unsure about any step, contact a professional for assistance.
Conclusion
Replacing a ceiling fan glass bowl is a relatively easy task that can be done in just a few steps. By following the steps outlined in this guide, you can quickly and easily replace your glass bowl and update the look of your fan. Remember to always use caution and safety when replacing any electrical components and contact a professional if you are unsure of any step.


Related Posts


