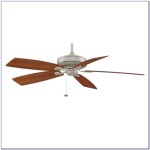
Can You Paint a Gold Ceiling Fan With Light?
Painting a ceiling fan, even one with integrated lighting, is a viable way to update a room's aesthetic. However, the process requires careful preparation and execution to ensure a professional-looking finish and the continued safe operation of the fan. This article will guide you through the necessary steps and considerations for painting a gold ceiling fan with light.
Key Considerations Before Painting
Before embarking on this project, several factors warrant attention:
- Fan Material: Different materials require different paint types. Metal fans typically accept a wider range of paints than plastic ones. Identify the fan's material to select the appropriate paint.
- Existing Finish: A glossy finish might require sanding or priming for proper paint adhesion. A previously painted surface may need cleaning and light sanding to remove any loose or flaking paint.
- Desired Finish: Consider whether a matte, satin, or gloss finish best suits the room's decor. The chosen finish impacts both the aesthetic and the cleanability of the painted surface.
Necessary Materials and Tools
Gathering the correct tools and materials beforehand streamlines the painting process. The following list provides a comprehensive starting point:
- Screwdrivers: Essential for disassembling the fan and light fixture.
- Drop Cloths: Protects the flooring and surrounding furniture from paint splatters.
- Painter's Tape: Masks areas that should not be painted, such as the lightbulb sockets and any non-removable parts.
- Sandpaper (fine grit): Used to lightly roughen the existing finish for better paint adhesion.
- Primer (if necessary): Provides a base for better paint adhesion, especially on glossy or previously painted surfaces.
- Paint (suitable for metal or plastic): Choose a high-quality paint designed for the fan's material in the desired gold finish. Spray paint formulated for metal is often preferred for even coverage.
- Paintbrushes or Spray Paint Applicator: Depending on the chosen paint, select appropriate applicators. For intricate details, brushes are recommended.
- Cleaning Solution (e.g., mild detergent and water): Used to clean the fan blades and housing before painting.
- Safety Glasses and Mask: Protect eyes and lungs from dust and paint fumes.
Preparation Steps
Proper preparation is crucial for a successful outcome. The following steps outline the preparation process:
- Turn Off the Power: Disconnect the power supply to the fan at the circuit breaker to ensure safety.
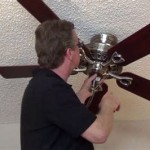
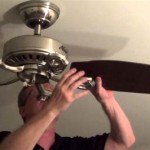
- Disassemble the Fan: Carefully remove the fan blades, light fixture, and any other removable parts. Organize screws and small parts to facilitate reassembly.
- Clean the Fan Components: Thoroughly clean all surfaces to be painted with a mild detergent and water solution. Allow them to dry completely.
- Protect Surrounding Areas: Cover the floor and nearby furniture with drop cloths. Use painter's tape to mask areas that should not be painted.
- Sand and Prime (if necessary): Lightly sand glossy or previously painted surfaces to improve paint adhesion. Apply primer if required and let it dry completely according to the manufacturer's instructions.
Painting the Fan
Applying the paint methodically ensures even coverage and minimizes drips. The following steps outline the painting process:
- Apply Thin Coats: Whether using spray paint or brushes, apply multiple thin coats rather than one thick coat. This prevents drips and promotes even drying.
- Allow Sufficient Drying Time: Let each coat dry completely before applying the next, following the paint manufacturer's instructions.
- Paint in a Well-Ventilated Area: Paint fumes can be hazardous. Ensure adequate ventilation throughout the painting process.
Reassembly and Installation
Once the paint has fully cured, the fan can be reassembled and reinstalled.
- Carefully Reassemble the Fan: Reattach the fan blades, light fixture, and other removed components, ensuring all screws and connections are secure.
- Restore Power: After confirming all components are correctly installed, restore power to the circuit breaker.
- Test the Fan: Test the fan's operation to ensure everything is functioning correctly.
Choosing the Right Gold Paint
Selecting the correct gold paint contributes significantly to the final result. Consider the following:
- Metal vs. Plastic: Use paint specifically designed for the fan's material. Spray paint formulated for metal is often a good choice for ceiling fans.
- Sheen: Choose a sheen that complements the room's decor. Matte finishes hide imperfections, while gloss finishes are easier to clean.
- Durability: Opt for a durable paint that can withstand regular cleaning and the fan's movement.
Safety Precautions
Safety should always be the top priority during any home improvement project.
- Electrical Safety: Always disconnect the power supply before working on any electrical fixture.
- Ventilation: Ensure adequate ventilation to prevent the inhalation of paint fumes.
- Personal Protective Equipment: Wear safety glasses and a mask to protect eyes and lungs.

How To Update A Ceiling Fan Without Removing It Savvy Apron

Update A Ceiling Fan Using Spray Paint

Another Ceiling Fan Makeover And How Not To Paint A Nani S Notebook

How To Update A Ceiling Fan Without Removing It Savvy Apron

Golden Fan Better After Ceiling Makeover Painting Fans

Ceiling Fan Makeover 100 Room Challenge The Palette Muse

Another Ceiling Fan Makeover And How Not To Paint A Nani S Notebook

Ceiling Fan Makeover 100 Room Challenge The Palette Muse

Diy Ceiling Fan Makeover One Room Challenge Week 4

My Favorite Ceiling Fan And I Painted It Gold Modern Wood Fans
Related Posts