Can You Drywall Over Popcorn Ceiling Texture? A Comprehensive Guide
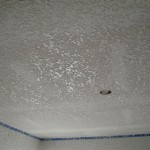
The presence of popcorn ceiling texture, a once-popular aesthetic choice, is often a source of frustration for homeowners embarking on renovation projects. The texture, characterized by its bumpy or stippled appearance, can appear dated and can also contain asbestos in homes built before the late 1970s. Due to the potential health risks and aesthetic drawbacks, many homeowners seek effective methods for removing or covering it. One such method involves installing drywall directly over the existing popcorn ceiling. This article provides a comprehensive exploration of this technique, outlining its advantages, disadvantages, preparatory steps, and the process itself.
The decision to install drywall over a popcorn ceiling, rather than opting for removal, is frequently driven by a combination of factors. Removal can be a messy and time-consuming process, often involving scraping, sanding, and subsequent repairs to the underlying ceiling surface. It can also pose health risks if the popcorn texture contains asbestos. Covering the texture with drywall offers a potentially cleaner, faster, and safer alternative, provided that certain conditions are met and the installation is performed correctly.
Before considering this method, it's crucial to understand the potential implications for the structural integrity of the ceiling and the overall aesthetics of the room. The added weight of the drywall can stress the existing ceiling framing, and any pre-existing imperfections in the ceiling can be magnified by the new surface. Therefore, a thorough assessment of the current ceiling is paramount.
Assessing the Existing Ceiling Structure
The first critical step is to evaluate the structural soundness of the existing ceiling. This involves checking for signs of water damage, such as staining or sagging. Water damage indicates potential leaks that must be addressed before any further work is undertaken. The presence of mold is another serious concern that requires remediation by qualified professionals. Ignoring these issues will only exacerbate them, potentially leading to more significant and costly repairs down the line.
Next, examine the ceiling framing for any signs of bowing or sagging. A slightly uneven ceiling might be acceptable, but significant deviations could indicate structural problems that need to be addressed before adding the weight of drywall. Consult with a structural engineer if you suspect any underlying structural issues. They can assess the ceiling's load-bearing capacity and recommend appropriate solutions, such as reinforcing the existing framing.
Finally, determine the type of material the existing ceiling is made of. Plaster ceilings, while usually robust, can be susceptible to cracking and crumbling over time. Drywall ceilings, on the other hand, might be easier to work with but can also have their own set of issues, such as loose seams or damaged areas. Understanding the material's properties will inform the choice of fasteners and the overall installation approach.
Preparation: Key to a Successful Installation
Proper preparation is essential for achieving a smooth and durable drywall installation over a popcorn ceiling. This phase involves several crucial steps, including cleaning, securing, and leveling the existing surface.
Begin by thoroughly cleaning the popcorn ceiling. Use a vacuum cleaner with a brush attachment to remove any loose debris, dust, or cobwebs. This will help ensure that the drywall adhesive (if used) and fasteners have a clean surface to adhere to. If there are any stains, attempt to clean them with a mild detergent and water, being careful not to saturate the ceiling.
Next, carefully inspect the popcorn texture for any loose or flaking areas. These areas need to be secured before installing the drywall. Use construction adhesive to reattach any loose pieces, pressing them firmly against the ceiling until the adhesive sets. For larger areas of damage, consider removing the loose texture and patching the underlying surface with joint compound.
One critical step that is often overlooked is flattening the popcorn ceiling to create a more even surface for the new drywall. While you don't need to completely remove the texture, knocking down the high points can significantly improve the final result. Use a wide drywall knife or scraper to gently scrape off the tips of the popcorn texture. Be careful not to apply too much pressure, as this could damage the underlying ceiling material. This process aims to reduce the overall height variations, minimizing the risk of bumps and unevenness in the finished drywall surface.
The Drywall Installation Process
With the preparation complete, you can now proceed with the drywall installation. This involves measuring, cutting, attaching, and finishing the new drywall surface. Adhering to best practices throughout this process is crucial for achieving a professional-looking result.
Start by accurately measuring the ceiling area and planning the layout of the drywall sheets. Aim to minimize the number of seams and ensure that the seams fall on joists or furring strips for proper support. When cutting the drywall, use a utility knife and a straight edge to score the paper facing on one side. Then, snap the drywall along the score line and cut the paper facing on the other side. This technique ensures clean and accurate cuts.
When attaching the drywall, use a combination of construction adhesive and drywall screws. Apply a generous bead of construction adhesive to the back of the drywall sheet and then lift it into place against the ceiling. Ensure the drywall sheet is flush with the adjacent sheets, then secure it with drywall screws. Space the screws approximately 12 inches apart along the joists or furring strips. Use a drywall screw gun to drive the screws to the correct depth, ensuring that they are slightly recessed without tearing the paper facing.
After all the drywall sheets are installed, the seams and screw holes need to be finished. Apply a thin layer of joint compound over the seams, embedding paper or fiberglass tape into the compound. Allow the compound to dry completely, then apply a second and third coat, feathering the edges to create a smooth transition. After each coat, sand the surface lightly with a sanding sponge or pole sander to remove any imperfections. Repeat the process for the screw holes, applying multiple thin coats of joint compound and sanding between coats.
Finally, prime the entire drywall surface with a quality drywall primer. This will seal the surface and provide a uniform base for painting. After the primer dries, inspect the surface for any remaining imperfections and touch them up with joint compound as needed. Once you are satisfied with the smoothness of the surface, you can apply the final coat of paint.
One significant concern when installing drywall over popcorn ceilings, particularly older ones, is the potential presence of asbestos. Asbestos was commonly used in building materials, including popcorn ceilings, prior to its regulation. Disturbing asbestos-containing materials can release harmful fibers into the air, posing a serious health risk. If you suspect that your popcorn ceiling contains asbestos, it is imperative to have it tested by a certified asbestos inspector before undertaking any renovation work. If asbestos is present, the safest course of action is to hire a qualified asbestos abatement contractor to remove the material properly.
Another factor to consider is the impact on room height. Adding drywall to the ceiling will inevitably reduce the overall ceiling height, which can be a concern in rooms with already low ceilings. Measure the existing ceiling height and calculate the reduction that will result from adding the drywall. If the reduction is significant, consider alternative methods for dealing with the popcorn ceiling, such as professional asbestos removal (if applicable) and skim coating to achieve a smooth finish.
While installing drywall over a popcorn ceiling can be a viable solution for some homeowners, it is not necessarily the best option for everyone. A careful assessment of the existing ceiling, proper preparation, and meticulous installation are essential for achieving a satisfactory result. Understanding the potential risks, such as asbestos exposure and ceiling height reduction, is also crucial for making an informed decision. By carefully weighing the pros and cons and following the steps outlined in this article, homeowners can successfully transform their ceilings and enhance the overall aesthetics of their homes.

How To Cover Popcorn Ceiling With Drywall Diy Family Handyman

How To Cover Popcorn Ceiling With Drywall Diy Family Handyman

Removing A Popcorn Ceiling Diy Or Hire Pro Yelp

How To Cover Popcorn Ceilings Trusscore

Second Layer Of Drywall On Textured Ceiling Do I Need To Sand Down Or Remove The Texture Before Goes Home Improvement Stack Exchange

4 Diy Methods To Remove Popcorn Ceilings Erin Zubot Design

How To Mix Skim Coat Mud Tools Over Popcorn Ceiling

How To Cover Popcorn Ceilings With Beadboard Step By Guide Shoe Makes New

How To Cover Popcorn Ceiling Without Removing It Dallas Paints

The Joy Of Popcorn Ceiling Removal Centsational Style
Related Posts


