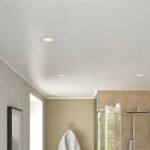
Can You Drywall Over Popcorn Ceiling? A Comprehensive Guide
The ubiquitous popcorn ceiling, a textured finish popular from the mid-20th century through the early 1980s, is often viewed as an outdated aesthetic. Homeowners seeking to modernize their living spaces frequently explore options for removing or covering this texture. One such option is installing drywall directly over the existing popcorn ceiling. While seemingly a straightforward solution, this approach requires careful consideration of various factors to ensure a successful and structurally sound outcome.
The decision to drywall over popcorn ceiling involves weighing the advantages and disadvantages compared to the alternative of complete removal. Removal can be messy and potentially hazardous, especially if the texture contains asbestos, a known carcinogen. Drywalling over the texture offers a less intrusive and potentially quicker solution if executed properly. However, it also presents its own set of challenges that must be addressed before, during, and after installation.
This article provides a comprehensive overview of the process of drywalling over popcorn ceiling, addressing key considerations, potential pitfalls, and best practices for achieving a professional and durable finish. It will cover aspects such as structural integrity, preparation techniques, drywall installation methods, and finishing procedures.
Assessing the Existing Popcorn Ceiling
Before embarking on the project of drywalling over a popcorn ceiling, a thorough assessment of the existing surface is crucial. This assessment will determine the feasibility of the project and identify any potential problems that need to be addressed. One of the primary concerns is the presence of asbestos. Prior to the late 1970s, asbestos was commonly used in popcorn ceilings due to its fire-resistant properties. Disturbing asbestos-containing materials can release harmful fibers into the air, posing a significant health risk. Therefore, it is imperative to have the popcorn ceiling tested for asbestos by a certified professional before proceeding with any work.
If asbestos is present, the homeowner has two primary options: professional asbestos abatement or encapsulation by drywalling over the texture. While drywalling over provides a barrier, it's crucial to disclose the presence of asbestos during any future home sales. The second critical aspect is the stability and adhesion of the existing popcorn ceiling. The texture must be firmly bonded to the underlying ceiling substrate. Any loose, peeling, or crumbling areas should be addressed before installing drywall. These areas could compromise the structural integrity of the new drywall ceiling and lead to future problems.
Conduct a thorough inspection of the ceiling, paying close attention to areas around light fixtures, vents, and corners. Gently scrape at various locations to assess the adhesion. If the popcorn texture comes off easily, it must be stabilized before drywalling. This can involve scraping away the loose material, applying a bonding agent, or even securing the existing texture with screws and washers. Finally, consider the overall condition of the existing ceiling. Are there any signs of water damage, cracks, or sagging? These issues must be resolved before installing drywall. Water damage can weaken the ceiling structure and promote mold growth, while cracks and sagging can indicate underlying structural problems that need to be repaired.
Preparing the Ceiling for Drywall Installation
Proper preparation is paramount to a successful drywalling project over a popcorn ceiling. This involves cleaning, securing, and potentially leveling the existing surface. Begin by thoroughly cleaning the popcorn ceiling to remove any dust, dirt, or cobwebs. A gentle brushing with a soft-bristled brush or vacuuming with a brush attachment can effectively remove loose debris without damaging the texture. This step is crucial for ensuring proper adhesion of the bonding agent or drywall adhesive.
Next, address any loose or damaged areas. As mentioned earlier, scrape away any peeling or flaking popcorn texture using a drywall knife or scraper. Be careful not to gouge the underlying ceiling substrate. Once the loose material is removed, apply a bonding agent to the exposed areas. A bonding agent is a liquid adhesive that helps to create a strong bond between the existing ceiling and the new drywall. Follow the manufacturer's instructions for application, ensuring that the bonding agent is evenly distributed over the prepared surface. Some bonding agents may require a specific drying time before proceeding with drywall installation.
In situations where the popcorn ceiling is particularly uneven or textured, it may be necessary to level the surface before installing drywall. This can be achieved by applying a layer of joint compound or drywall mud over the existing texture. Use a wide drywall knife or trowel to spread the compound evenly, filling in any low spots and smoothing out any high spots. Allow the compound to dry completely before sanding it smooth. Repeat this process as needed until the ceiling is relatively level. Alternatively, furring strips can be installed to create a level surface for the drywall. Furring strips are thin strips of wood or metal that are attached to the existing ceiling to create a level framework. This method is particularly useful for ceilings that are significantly uneven or have substantial sagging.
Drywall Installation Techniques and Best Practices
With the popcorn ceiling properly assessed and prepared, the next step involves installing the drywall. Selecting the appropriate type and thickness of drywall is essential for ensuring a durable and aesthetically pleasing result. For most residential applications, ½-inch thick drywall is sufficient for ceilings. However, in situations where additional soundproofing or fire resistance is desired, 5/8-inch thick drywall may be a better choice. Lightweight drywall options are also available, which can be easier to handle and install, particularly for large ceilings.
When installing drywall over a popcorn ceiling, it is crucial to use longer screws than would typically be used for standard drywall installation. This is because the screws need to penetrate through the drywall, the popcorn texture, and into the underlying ceiling joists or framing members. Choose screws that are long enough to penetrate at least 1 inch into the joists. Use a drywall screw gun to drive the screws into the drywall, ensuring that the screw heads are flush with the surface of the drywall but not driven so deep that they tear the paper facing. Space the screws approximately 12 inches apart along the edges of the drywall sheets and 16 inches apart in the field of the sheet. This spacing provides adequate support and prevents the drywall from sagging.
When hanging the drywall sheets, start in a corner of the room and work your way across the ceiling. Stagger the seams between the sheets to prevent cracking. Use a drywall lift to hold the drywall sheets in place while you secure them with screws. A drywall lift is a mechanical device that allows you to easily raise and position heavy drywall sheets without straining yourself. Ensure that the drywall sheets are tightly butted together at the seams. Leave a small gap (about 1/8 inch) between the drywall sheets and the walls to allow for expansion and contraction. This gap will be covered later with joint compound and drywall tape.
Pay close attention to areas around light fixtures, vents, and other ceiling features. Cut the drywall sheets to fit around these features, using a drywall saw or utility knife. Make accurate measurements and cut carefully to ensure a tight and clean fit. Avoid creating large gaps around these features, as these gaps can be difficult to fill and can detract from the overall appearance of the ceiling. For recessed lighting, consider using drywall that is fire-rated to maintain the fire resistance of the ceiling assembly.
Once the drywall is installed, inspect the ceiling for any imperfections, such as protruding screws or uneven seams. Correct any imperfections before proceeding with the finishing process. Over-driving screws should be backed out and re-driven properly. Uneven seams can be sanded down or filled with joint compound.
Finishing the Drywall: Taping, Mudding, and Sanding
Finishing the drywall involves taping the seams between the sheets, applying multiple coats of joint compound (mud), and sanding the surface smooth. This process is critical for creating a seamless and professional-looking ceiling. Start by applying drywall tape to all of the seams between the drywall sheets. There are two main types of drywall tape: paper tape and mesh tape. Paper tape is stronger and more resistant to cracking, while mesh tape is easier to apply and less prone to bubbling.
To apply paper tape, first apply a thin layer of joint compound to the seam. Then, press the paper tape into the wet compound, using a drywall knife to smooth out any wrinkles or bubbles. Apply a second layer of joint compound over the tape, feathering the edges to blend it seamlessly with the surrounding drywall. Allow the compound to dry completely before proceeding to the next step.
To apply mesh tape, simply stick the tape to the seam. Then, apply a layer of joint compound over the tape, using a drywall knife to smooth out any wrinkles or bubbles. Allow the compound to dry completely before proceeding to the next step.
After the tape is dry, apply two to three additional coats of joint compound over the seams, feathering the edges with each coat. Allow each coat to dry completely before applying the next coat. The purpose of these additional coats is to gradually build up the seam and create a smooth, seamless transition between the drywall sheets.
Once the final coat of joint compound is dry, sand the entire ceiling smooth using a drywall sanding sponge or sanding pole. Start with a coarse grit sandpaper (120-grit) to remove any bumps or ridges. Then, switch to a finer grit sandpaper (220-grit) to smooth out any remaining imperfections. Be careful not to sand too aggressively, as this can damage the drywall tape or create dips in the surface. Wear a dust mask and eye protection while sanding to protect yourself from drywall dust. A vacuum with a HEPA filter can also be used to collect dust as you sand.
After sanding, prime the ceiling with a drywall primer. Primer helps to seal the drywall and create a uniform surface for painting. Apply two coats of primer for best results. Finally, paint the ceiling with a high-quality ceiling paint. Choose a paint that is specifically designed for ceilings, as these paints are formulated to minimize splatter and provide a flat, even finish. Apply two coats of paint for best results.

How To Cover Popcorn Ceiling With Drywall Diy Family Handyman

How To Cover Popcorn Ceiling With Drywall Diy Family Handyman

How To Cover Popcorn Ceiling 8 Creative Ways Making Maanita

Removing A Popcorn Ceiling Diy Or Hire Pro Yelp

Skim Coat Over A Painted Popcorn Ceiling Coating Tips And Tricks

How To Cover Popcorn Ceilings Trusscore

Cover Popcorn Ceilings Kanopi By Armstrong

7 Ways To Cover Dated Popcorn Ceilings Without The Hassle Of Sc

4 Diy Methods To Remove Popcorn Ceilings Erin Zubot Design

How To Cover Popcorn Ceiling With Drywall Diy Family Handyman
Related Posts