Can You Do Crown Molding On Vaulted Ceilings? A Comprehensive Guide
Crown molding is a decorative feature often used to enhance the aesthetic appeal of a room by providing a transition between the wall and the ceiling. Its installation on standard, horizontal ceilings is a common practice and relatively straightforward. However, the prospect of installing crown molding on vaulted ceilings introduces complexities that require careful consideration and specialized techniques. This article aims to provide a detailed exploration of the possibilities and challenges associated with installing crown molding on vaulted ceilings.
Vaulted ceilings, characterized by their upward sloping surfaces that meet at a central point, present a unique set of challenges for crown molding installation. Unlike flat ceilings, the angles and dimensions constantly change, demanding precise measurements and cuts. Furthermore, the material selection and installation methods must accommodate the structural nuances of the vaulted ceiling to ensure a seamless and aesthetically pleasing result.
Understanding the Challenges of Vaulted Ceiling Crown Molding Installation
The primary challenge in installing crown molding on vaulted ceilings lies in the varying angles where the wall meets the ceiling. On a standard flat ceiling, this angle is a consistent 90 degrees, simplifying the cutting and fitting process. With a vaulted ceiling, however, this angle changes continuously along the length of the wall, necessitating a more intricate approach to measurement and cutting.
Another challenge stems from the structural considerations of the ceiling itself. Vaulted ceilings can be constructed in various ways, including using exposed beams, drywall, or a combination of materials. The chosen construction method will influence the way the crown molding is attached and the type of fasteners required. Ensuring that the molding is securely fastened to the ceiling without compromising its structural integrity is crucial.
Furthermore, the height and accessibility of vaulted ceilings can pose logistical difficulties. Installing crown molding often requires working at elevated heights, which can be challenging and potentially hazardous. Proper scaffolding, safety equipment, and assistance may be necessary to ensure a safe and efficient installation process. Accurate measurements are much more difficult when working at height, and the risk of material waste increases with mistakes.
Material selection also plays a critical role. Crown molding is available in various materials, including wood, MDF (Medium Density Fiberboard), polyurethane, and plaster. The chosen material should be suitable for the environment and the aesthetic desired. For instance, wood may be preferred for its natural look and durability, while polyurethane offers moisture resistance and ease of installation. The weight of the molding is also an important factor, as heavier materials may require additional support to prevent sagging or detaching from the ceiling.
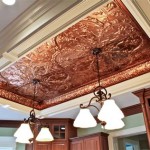
The overall design and style of the crown molding should complement the architectural character of the room. A wide range of profiles and sizes are available, and the selection should be carefully considered to achieve a cohesive and visually appealing result. The size and style of the molding should be proportional to the size and shape of the vaulted ceiling and the overall dimensions of the room.
Key Steps for Successful Installation on Vaulted Ceilings
Despite the challenges, installing crown molding on vaulted ceilings is achievable with careful planning, precise execution, and the right tools and materials. The following steps outline a systematic approach to ensure success:
Accurate Measurement: The initial step involves taking precise measurements of the angles where the wall meets the ceiling at various points along its length. A protractor or angle finder can be used to determine these angles accurately. It is recommended to take measurements at regular intervals, such as every foot or two, to capture the variations in angle along the vaulted ceiling. Digital angle finders can significantly improve accuracy and reduce potential errors.
Creating a Cutting Template: Once the angles are measured, a cutting template should be created. This template serves as a guide for cutting the crown molding at the correct angles. The template can be made from cardboard or scrap wood and should be marked with the corresponding angles measured from the ceiling. This template will allow for consistent and accurate cuts, minimizing waste and ensuring a seamless fit.
Precise Cutting Techniques: Cutting the crown molding requires precision and accuracy. A miter saw is the preferred tool for this task, as it allows for precise angle cuts. The saw should be set to the angles indicated on the cutting template, and the molding should be securely held in place during cutting. It is advisable to practice cutting scrap pieces of molding before cutting the actual pieces to ensure the accuracy of the measurements and angles. Consider using a compound miter saw for greater versatility in cutting complex angles.
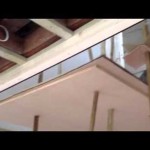
Secure Fastening: Fastening the crown molding to the vaulted ceiling requires careful consideration of the ceiling's construction. If the ceiling is constructed of drywall, drywall screws or nails can be used to secure the molding to the studs or rafters behind the drywall. For ceilings with exposed beams, construction adhesive may be necessary in addition to fasteners. It is crucial to use fasteners that are long enough to penetrate the ceiling material and provide a secure hold. Consider using a nail gun to speed up the fastening process and ensure consistent nail depth.
Coping Joints: Where two pieces of crown molding meet at an inside corner, a coping joint is typically used. This involves cutting one piece of molding at a 45-degree angle and then using a coping saw or a knife to remove the material behind the cut, creating a profile that matches the adjacent piece of molding. Coping joints provide a tight and seamless fit, even if the corner is not perfectly square. Practice coping techniques on scrap pieces of molding before attempting to cope the actual pieces.
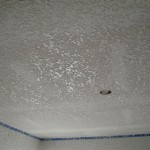
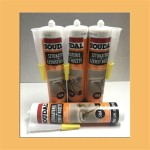
Filling Gaps and Seams: Even with precise measurements and cutting, small gaps and seams may still occur. These gaps can be filled with paintable caulk or wood filler to create a smooth and seamless finish. The caulk or filler should be applied sparingly and then smoothed with a wet sponge or putty knife. Allow the caulk or filler to dry completely before painting or finishing the molding.
Finishing and Painting: Once the crown molding is installed and the gaps are filled, it should be finished and painted or stained to match the décor of the room. If the molding is made of wood, it can be stained and sealed to enhance its natural beauty. If the molding is made of MDF or polyurethane, it should be primed and painted with a high-quality paint. Apply multiple coats of paint or stain to achieve a uniform and durable finish.
Choosing the Right Materials and Tools
Successful crown molding installation on vaulted ceilings hinges on selecting appropriate materials and employing the correct tools. The choice of material impacts not only the aesthetic appeal but also the ease of installation and long-term durability.
Material Considerations: Wood is a traditional choice, offering a classic look and the ability to be stained or painted. However, it can be more expensive and requires more precise cutting and fitting due to its susceptibility to warping and expansion. MDF is a cost-effective alternative that is easier to work with and less prone to warping, but it is not moisture-resistant and should not be used in damp environments. Polyurethane offers excellent moisture resistance and is lightweight, making it easier to handle, but it may not have the same level of detail as wood or MDF. Plaster is a durable and fire-resistant option, but it is heavy and requires specialized installation techniques. The weight of the chosen material should be carefully considered, as heavier materials may require additional support.
Essential Tools: A miter saw is essential for making accurate angle cuts. A compound miter saw offers greater versatility for cutting complex angles. A protractor or angle finder is crucial for measuring the angles of the vaulted ceiling. A cutting template helps to ensure consistent and accurate cuts. A coping saw or knife is used for creating coping joints. A nail gun or screw gun speeds up the fastening process. Construction adhesive provides additional support and helps to fill gaps. Caulk or wood filler is used to fill any remaining gaps or seams. A level ensures that the molding is installed straight and level. Scaffolding or a ladder is necessary for working at elevated heights. Safety glasses and gloves protect the eyes and hands during installation. Consider using laser levels for long runs to ensure accurate and consistent placement.
In conclusion, while installing crown molding on vaulted ceilings presents unique challenges, it is a feasible project with careful planning, precise execution, and the selection of appropriate materials and tools. By understanding the challenges, following the outlined steps, and choosing the right materials and tools, homeowners and contractors can successfully enhance the aesthetic appeal of rooms with vaulted ceilings through the addition of crown molding.

How To Install Crown Molding On Vaulted Or Cathedral Ceilings The Joy Of Moldings

Crown Molding On Angled Ceilings Makely

How To Terminate Flying Crown Molding On This Vaulted Ceiling The Joy Of Moldings

Installing Crown Moulding On A Sloped Ceiling Doityourself Com Community Forums

Installing Crown Molding On A Vaulted Ceiling Pro Construction Guide

Can You Put Crown Molding On A Vaulted Ceiling Hometalk

Crown Molding On A Vaulted Ceiling

Installing Crown Moulding Part Two Canadian Woodworking

How To Install Crown Molding On A Vaulted Cathedral Ceiling Without Transition Piece

Installing Crown Molding Around A Cathedral Ceiling Fine Homebuilding
Related Posts