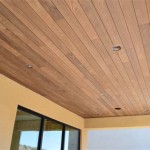
Can You Do Crown Molding On A Slanted Ceiling?
Crown molding, traditionally used to embellish the transition between walls and ceilings, adds a touch of elegance and refinement to interior spaces. Its installation on level surfaces is a relatively straightforward process for experienced DIYers or professional carpenters. However, the question of whether crown molding can be successfully installed on slanted ceilings, also known as vaulted or cathedral ceilings, often arises. The answer is unequivocally yes, but with certain considerations and adjustments to the typical installation methods.
Slanted ceilings present unique challenges compared to traditional level ceilings. The angles are rarely uniform, requiring precise measurements and accurate cuts to ensure a seamless and aesthetically pleasing finish. Successfully navigating these complexities involves a deeper understanding of geometry, carpentry techniques, and the properties of the molding material itself. While the task might seem daunting, careful planning, meticulous execution, and the right tools can result in a stunning architectural detail that enhances the room's overall design.
Understanding the Challenges of Angled Ceilings
The primary challenge in installing crown molding on a slanted ceiling stems from the varying angles. Unlike a standard 90-degree corner, the angle where a wall meets a slanted ceiling can be anywhere between acute and obtuse, depending on the roof's pitch. This necessitates calculating the precise miter and bevel angles for each cut to ensure a tight, gap-free joint. Furthermore, the angle changes along the length of the wall in some cases, especially in rooms with irregularly shaped vaulted ceilings. This variation requires more frequent measurements and adjustments to maintain a consistent aesthetic.
Another challenge lies in supporting the molding during installation. On a level ceiling, the molding sits flush against the wall and ceiling, providing some inherent stability. On a slanted ceiling, however, the molding is more prone to slipping or rotating, especially when applying adhesive or fasteners. Utilizing temporary support systems, such as jigs or strategically placed blocks of wood, becomes crucial to holding the molding in place while it sets or is being secured.
Finally, material selection plays a significant role in the success of the project. While traditional wood molding offers a classic look, it can be more difficult to work with on angled surfaces due to its rigidity and potential for warping. Flexible polymer-based moldings, on the other hand, are designed to conform to irregular shapes and curves, making them a viable option for complex vaulted ceilings. The choice of material should be carefully considered based on the complexity of the angles, the desired aesthetic, and the installer's experience level.
Key Steps for Successful Installation
A successful crown molding installation on a slanted ceiling hinges on meticulous planning and execution. Before starting, accurately measure all angles using a protractor or angle finder. Pay close attention to any variations in the angle along the length of the wall. Documenting these measurements is essential for making precise cuts. Create a detailed plan outlining the sequence of installation, accounting for any necessary transitions or adjustments.
Next, calculate the correct miter and bevel angles for each cut. Several online calculators and reference tables are available to assist with this process. Input the wall and ceiling angles to determine the corresponding angles for the miter saw. It is crucial to double-check these calculations to avoid costly mistakes. Practice cutting scrap pieces of molding to verify the accuracy of the angles before cutting the actual pieces. This iterative process allows for fine-tuning the measurements and ensures a tight fit.
When installing the molding, use a combination of adhesive and fasteners. Apply a generous bead of construction adhesive to the back of the molding to create a strong bond with the wall and ceiling. Secure the molding with finish nails or screws, spaced evenly along its length. Use a nail gun or drill with a countersinking bit to avoid damaging the molding's surface. Employ temporary supports, such as wooden blocks or adjustable clamps, to hold the molding in place while the adhesive cures. Regularly check the alignment and adjust as needed to ensure a consistent and professional finish.
Material Considerations for Angled Applications
The choice of material significantly impacts the ease and success of crown molding installation on slanted ceilings. Traditional wood molding, available in various profiles and wood species, offers a classic and sophisticated look. However, it can be challenging to work with on angled surfaces due to its inherent rigidity. Wood is also susceptible to warping and cracking, especially in environments with fluctuating humidity levels. For complex angles, wood molding often requires more precise cuts and careful handling to avoid damage.
Polyurethane molding offers a lightweight and flexible alternative to wood. This material is resistant to moisture, making it suitable for bathrooms and kitchens. Polyurethane molding is also easier to cut and install than wood, as it can be shaped with standard woodworking tools. Its flexibility allows it to conform to slight irregularities in the wall and ceiling surfaces, making it a more forgiving option for DIYers. Furthermore, polyurethane molding is often pre-primed, reducing the amount of preparation required before painting.
Flexible polymer molding, also known as flex molding, is specifically designed for curved or irregular surfaces. This material can be bent and shaped to fit virtually any angle, making it ideal for vaulted ceilings with complex geometries. Flex molding is typically made from a high-density polyurethane foam that is both durable and lightweight. While it can be more expensive than traditional wood or polyurethane molding, its ease of installation and ability to conform to challenging shapes often make it a worthwhile investment. Proper preparation and a thorough understanding of the product's properties are important for a successful installation.
In addition to the molding material itself, consider the type of adhesive and fasteners used. High-quality construction adhesive is essential for creating a strong and durable bond between the molding and the wall or ceiling. Choose an adhesive that is specifically formulated for bonding to the chosen molding material and the wall or ceiling surface. Finish nails or screws should be long enough to penetrate the framing behind the drywall, providing adequate holding power. Use a nail gun or drill with a countersinking bit to avoid damaging the molding's surface. Concealing the nail holes with wood filler or caulk will further enhance the finished appearance.
Ultimately, installing crown molding on a slanted ceiling is a complex but achievable task. By understanding the challenges, following a meticulous plan, and carefully selecting the right materials, it is possible to create a stunning architectural detail that enhances the beauty and value of the home. Always prioritize safety, wear appropriate protective gear, and consult with a professional if needed.

Crown Moulding On Angled Ceiling Sawdust Girl

Installing Crown Moulding On A Sloped Ceiling Doityourself Com Community Forums

Installing Crown Moulding Part Two Canadian Woodworking

Crown Molding On Angled Ceilings Makely

Crown Moulding On Angled Ceiling Sawdust Girl

Crown On An Angled Ceiling

Does Crown Molding Look Good In A Home With Vaulted Ceilings That Are Pitched At An Angle Between 8 And 14 Walls Quora

Installing Crown Moulding On A Sloped Ceiling Doityourself Com Community Forums

Crown Molding In Bedroom Vaulted Ceiling Slanted

Crown Molding On Angled Ceilings Makely
Related Posts