Can I Install A Ceiling Fan On A Slanted Ceiling?
The question of whether a ceiling fan can be installed on a slanted ceiling is a common one for homeowners looking to improve air circulation and aesthetics in rooms with non-standard ceiling configurations. The answer, in short, is yes, it is generally possible. However, the process requires careful planning, appropriate hardware, and adherence to safety guidelines. This article will explore the factors to consider, the necessary equipment, and the step-by-step procedures involved in installing a ceiling fan on a slanted ceiling.
Slanted ceilings, also known as sloped ceilings or cathedral ceilings, present unique challenges compared to flat ceilings. Standard ceiling fan installation kits are designed for horizontal mounting, and using them on an incline can lead to instability, improper fan operation, and even potential safety hazards. Therefore, specialized equipment and techniques are required to ensure a secure and functional installation. Understanding the specific requirements of a slanted ceiling installation is crucial for a successful and safe outcome.
Assessing the Ceiling Slope and Structural Integrity
The first step in determining the feasibility of installing a ceiling fan on a slanted ceiling is to assess the ceiling's slope. The steepness of the slope will dictate the type of mounting hardware required. Ceiling fan manufacturers typically specify the maximum slope their fans can accommodate. This information is usually found in the fan's instruction manual or on the manufacturer's website. Slopes are often expressed as a ratio (e.g., 4/12, meaning a rise of 4 inches for every 12 inches of horizontal distance) or as an angle in degrees.
Most ceiling fans designed for sloped ceilings can accommodate angles up to 30 degrees. For steeper slopes, specialized downrods or extension rods with ball-and-socket joints are necessary. These allow the fan to hang vertically, regardless of the ceiling's angle. It is crucial to choose a downrod length that provides adequate clearance between the fan blades and the ceiling. Insufficient clearance can impede airflow and create a safety hazard.
Beyond the slope, the structural integrity of the ceiling is paramount. The ceiling joist or support beam to which the fan is mounted must be strong enough to support the weight of the fan and the dynamic forces it generates during operation. A standard ceiling fan can weigh between 20 and 50 pounds, and the constant rotation adds stress to the mounting point. If the existing ceiling joist is not sufficiently strong, it may need to be reinforced or replaced. It is recommended to consult with a qualified structural engineer or contractor to assess the structural support and recommend appropriate solutions.
Another important consideration is the presence of electrical wiring already installed in the ceiling. Ideally, there should be an existing electrical box rated for ceiling fan installation. These boxes are designed to support the weight and movement of a ceiling fan. Standard light fixture boxes are typically not adequate and should not be used. If a fan-rated electrical box is not present, one must be installed. This often involves running new wiring from an existing circuit, which may require the services of a licensed electrician.
Selecting the Appropriate Mounting Hardware
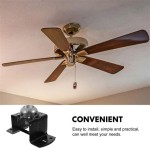
Once the ceiling slope and structural integrity have been assessed, selecting the appropriate mounting hardware is the next crucial step. As mentioned earlier, standard ceiling fan mounting kits are not suitable for slanted ceilings. Instead, specialized mounting systems designed for sloped installations are required. These systems typically include a downrod, a mounting bracket with a ball-and-socket joint, and hardware for attaching the bracket to the ceiling joist.
The downrod is a crucial component of a sloped ceiling fan installation. It extends the fan downwards from the mounting bracket, allowing it to hang vertically despite the ceiling's angle. The length of the downrod is determined by the ceiling's height and slope. A general rule of thumb is to ensure that the bottom of the fan blades are at least 7 feet above the floor. Longer downrods may be necessary for high ceilings or steep slopes.
The mounting bracket with a ball-and-socket joint allows the fan to pivot and hang vertically, regardless of the angle of the ceiling. The ball-and-socket joint allows for a degree of flexibility, compensating for slight variations in the ceiling's slope. The bracket should be securely attached to the ceiling joist using lag screws or other appropriate fasteners. It is imperative to use fasteners that are long enough to penetrate deep into the joist, ensuring a secure and stable connection.
In addition to the downrod and mounting bracket, other hardware may be required, such as wire connectors, electrical tape, and safety cables. Wire connectors are used to connect the fan's electrical wires to the house wiring. Electrical tape is used to insulate the connections and prevent short circuits. Safety cables provide an extra layer of security, preventing the fan from falling in the event of a mounting failure. All wiring connections should be made according to local electrical codes.
Step-by-Step Installation Process and Safety Considerations
Installing a ceiling fan on a slanted ceiling is a multi-step process that requires careful attention to detail and adherence to safety guidelines. It is recommended to turn off the power to the circuit breaker before beginning any electrical work. This will prevent electrical shock. It is also advisable to wear safety glasses and gloves to protect the eyes and hands.
The first step is to install the mounting bracket to the ceiling joist. Locate the joist using a stud finder or by tapping on the ceiling. Align the mounting bracket with the joist and mark the locations for the lag screws. Drill pilot holes at the marked locations to make it easier to drive the lag screws. Attach the bracket to the joist using the lag screws, ensuring that it is securely fastened.
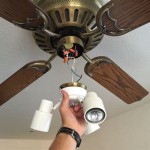
Next, assemble the ceiling fan according to the manufacturer's instructions. This typically involves attaching the fan blades to the motor housing and connecting the electrical wires. Carefully thread the fan's electrical wires through the downrod and attach the downrod to the fan's motor housing. Connect the wiring from the fan to the matching wires in the electrical box (white to white, black to black, and green or bare copper to ground). Use wire connectors to securely connect the wires and wrap the connections with electrical tape to insulate them.
Carefully lift the fan and attach the downrod to the mounting bracket. Engage the ball-and-socket joint and ensure that the fan is hanging vertically. Secure the fan to the mounting bracket using the provided hardware. Once the fan is securely mounted, install the fan's light kit, if applicable. Connect the light kit's electrical wires to the appropriate wires in the fan's motor housing.
Finally, install the fan blades and blade brackets. Ensure that the blades are properly balanced to prevent wobbling during operation. Turn the power back on at the circuit breaker and test the fan to ensure that it is working properly. Check the fan's speed settings and light functions. If the fan wobbles excessively, it may be necessary to balance the blades using a balancing kit.
Throughout the installation process, safety should be the paramount concern. Never work on electrical circuits without turning off the power. Use appropriate safety equipment, such as safety glasses and gloves. If unsure about any aspect of the installation process, it is recommended to consult with a qualified electrician or contractor. Improper installation can lead to safety hazards, such as electrical shock or fan failure.
Regular maintenance is essential for ensuring the safe and efficient operation of a ceiling fan. Periodically check the mounting hardware to ensure that it is securely fastened. Tighten any loose screws or bolts. Clean the fan blades regularly to remove dust and debris. This will help to maintain airflow and prevent the motor from overheating. By following these guidelines, a homeowner can safely and effectively install a ceiling fan on a slanted ceiling, enhancing the comfort and aesthetics of their home.

How To Install A Ceiling Fan On Sloped Lemon Thistle

Install Ceiling Fan On Sloped Simple Modern Handmade Home

How To Install A Ceiling Fan On Sloped Lemon Thistle

How To Choose A Ceiling Fan For Vaulted Ceilings Lightology

How To Install A Ceiling Fan On Vaulted Quora

Electrical Mount Ceiling Fan At The Peak Of A Sloped Home Improvement Stack Exchange

Ensuring Proper Ceiling Fan Installation With Vaulted Ceilings

Fans On An Angle Installing Ceiling Angled Or Raked

Vaulted Sloped Ceiling Adapter For Modern Fan Company Fans Stardust

How To Find Ceiling Fans Slope Adapters And Downrods For Angled Ceilings Delmarfans Com
Related Posts