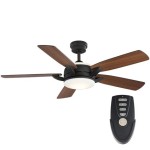
Adding Remote Control to Ceiling Fan: A Comprehensive Guide
Upgrading your ceiling fan with a remote control can enhance its convenience and functionality. This comprehensive guide will provide you with step-by-step instructions and essential considerations to ensure a successful installation.
Benefits of Remote Control
Remote controls for ceiling fans offer numerous advantages:
- Convenient control from anywhere in the room
- Ability to adjust fan speed, lighting (if applicable), and oscillation
- Increased safety, as you don't need to manually reach for the fan
- Enhanced accessibility for those with mobility limitations
Types of Remote Controls
Various types of remote controls are available:
- Infrared (IR) Remotes: Require direct line-of-sight to the fan and have a limited range.
- Radio Frequency (RF) Remotes: Use radio waves to communicate, allowing for better range and penetration through walls.
- Bluetooth Remotes: Pair with the fan via Bluetooth, enabling control from your smartphone or tablet.
- Wi-Fi Remotes: Connect to your Wi-Fi network, allowing remote control from anywhere with an internet connection.
Choosing the Right Remote Control
Consider these factors when selecting a remote control:
- Fan Model Compatibility: Ensure the remote is compatible with the make and model of your ceiling fan.
- Range and Signal Strength: Determine the range and signal strength required for your room size and layout.
- Additional Features: Consider features such as multi-speed control, light dimming, and timer settings.
- Ease of Use: Choose a remote with intuitive buttons and clear labeling.
Installation Steps
Follow these steps to install the remote control:
- Turn Off Power: Turn off the power to the fan at the circuit breaker or fuse box.
- Identify Wires: Locate the fan's existing wiring and identify the wires for power, ground, and light (if applicable).
- Connect Receiver: Connect the receiver module (included with the remote control kit) to the fan's wiring.
- Mount Receiver: Securely mount the receiver inside the fan's canopy or junction box.
- Restore Power: Turn on the power to the fan.
- Pair Remote: Follow the manufacturer's instructions to pair the remote control with the receiver.
- Test Functionality: Verify that the remote control operates the fan and lighting (if applicable) as desired.
Troubleshooting
If you encounter any issues, try these troubleshooting tips:
- Weak Signal: Check the batteries in the remote or replace them if necessary.
- No Response: Ensure that the receiver is connected correctly and that there are no loose wires.
- Interference: Move other electronic devices away from the fan or try using a different remote control frequency.
- Dimmed Lighting: Check the light bulbs and replace them if burned out.
Conclusion
Adding remote control to your ceiling fan can enhance convenience, accessibility, and safety. By following the steps outlined in this guide, you can successfully install and enjoy the benefits of a remote-controlled ceiling fan. Remember to choose the right remote control for your specific needs and follow the manufacturer's instructions to ensure a seamless installation.

How To Install A Ceiling Fan Remote Diy Family Handyman

How To Install A Ceiling Fan Remote Control

How To Add A Remote Control An Ordinary Ceiling Fan

How To Add A Remote Control Your Ceiling Fan 10 Steps

How To Install A Remote Control Your Ceiling Fan Easy And Fast

Install Ceiling Fan Light Wireless Remote Control With Timer 7

Electrical Ceiling Fan Wiring With Remote Control 2 Wall Switches Home Improvement Stack Exchange

How To Wire And Install A Ceiling Fan With Remote Control Light Fixture Removal

How To Wire A Ceiling Fan Control Using Dimmer Switch

Ceiling Fan Light Switches Tuya Smart Wall Alexa Acho Wireless Remote Control Home Automation Can Add Rf433 With Made In China Com
Related Posts


