How To Hang A Ceiling Fan On An Angle
Installing a ceiling fan can significantly improve air circulation and comfort within a room. When the ceiling is angled or sloped, the installation process necessitates specific considerations and hardware to ensure the fan operates safely and effectively. Installing a ceiling fan on an angled ceiling requires careful planning, the right equipment, and adherence to safety guidelines.
Understanding the Challenges of Angled Ceiling Fan Installation
Angled ceilings present unique challenges compared to flat ceilings. Gravity's influence on a fan mounted on an angle can cause it to swing excessively or operate unevenly. Without proper support and alignment, a fan can also exert undue stress on the mounting hardware, potentially leading to failure. Furthermore, the aesthetic appeal of a ceiling fan can be diminished if not mounted correctly on an angled ceiling.
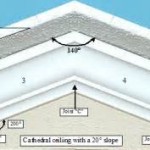
The primary issue stems from the potential for the fan to swing perpendicular to the slope rather than rotating smoothly around its axis. This can create a hazard and reduce the fan's efficiency. The angle of the ceiling dictates the type of mounting system required, and exceeding the recommended angle can compromise the installation's integrity.
Another challenge involves ensuring adequate blade clearance. The fan blades must have sufficient space to rotate freely without hitting the ceiling or any nearby fixtures. On an angled ceiling, one side of the fan will be closer to the ceiling than the other, making proper blade clearance essential for safe and efficient operation.
Essential Tools and Materials
The successful installation of a ceiling fan on an angled ceiling hinges on having the right tools and materials. The following is a list of necessities:
*Ceiling Fan Mounting Kit for Angled Ceilings:
This kit typically includes a downrod specifically designed for angled installations and a mounting bracket that can accommodate the slope. *Screwdriver Set (Phillips and Flathead):
Various sizes are needed to accommodate different screw types. *Wire Strippers/Crimpers:
For safely preparing and connecting electrical wires. *Electrical Tape:
To insulate wire connections. *Voltage Tester:
To ensure the power is off before working with electrical wires. *Pencil:
For marking locations. *Measuring Tape:
To determine clearances and downrod length. *Level:
To ensure the fan is installed straight, relative to the room. *Ladder:
A sturdy ladder is crucial for safe access to the ceiling. *Safety Glasses:
To protect eyes from debris. *Gloves:
To provide a better grip and protect hands. *Drill with Appropriate Drill Bits:
For creating pilot holes if necessary. *Stud Finder:
To determine the location of ceiling joists for secure mounting.The angled ceiling fan mounting kit is the most critical component. These kits are designed to accommodate specific ceiling angles, typically ranging from 0 to 45 degrees. Selecting the appropriate kit based on the ceiling angle is crucial for a safe and stable installation.
A longer-than-standard downrod might be necessary, depending on the ceiling height and the angle of the slope. The goal is to ensure the fan blades are at least 7 feet above the floor to prevent accidental contact and maximize airflow. The downrod length should be calculated considering the ceiling height and the angle of the slope.
Step-by-Step Installation Process
The installation process should be approached methodically, prioritizing safety at every stage. Before starting, turn off the power to the circuit at the breaker box.
Step 1: Assess the Ceiling and Electrical Wiring
Examine the existing electrical box in the ceiling. Ensure it is a fan-rated box, designed to support the weight and dynamic forces of a rotating ceiling fan. If the existing box is not fan-rated, it must be replaced with a suitable one. Use a stud finder to locate the ceiling joists and verify the position of the electrical box relative to the joists. The box should be securely mounted to a joist for maximum support.
Carefully inspect the electrical wiring to ensure it is in good condition and meets local electrical codes. If the wiring is damaged or outdated, consult a qualified electrician to make the necessary repairs or upgrades.
Step 2: Install the Angled Ceiling Mount
Follow the manufacturer's instructions for installing the angled ceiling mount. Typically, this involves attaching a mounting bracket to the ceiling electrical box or directly to a ceiling joist. Use appropriately sized screws and ensure the bracket is securely fastened. The bracket often has an adjustable angle to match the slope of the ceiling. Adjust the angle of the bracket according to the manufacturer's instructions and the measured ceiling angle.
If the mounting bracket requires attachment to a ceiling joist, use a stud finder to locate the joist and pre-drill pilot holes to prevent the wood from splitting when inserting the screws. Use long, sturdy screws designed for structural support to ensure a secure attachment.
Step 3: Assemble the Ceiling Fan
Assemble the ceiling fan motor, blades, and light kit (if applicable) according to the manufacturer's instructions. This usually involves attaching the blades to the blade holders and then mounting the blade holders to the fan motor. Connect the light kit wiring to the fan motor wiring, ensuring proper grounding.
It is often easier to assemble as much of the fan as possible on the ground before lifting it to the ceiling. This reduces the amount of work that needs to be done while on the ladder and minimizes the risk of dropping parts.
Step 4: Connect the Downrod and Wiring
Attach the downrod to the fan motor housing, following the manufacturer's instructions. Feed the electrical wires from the fan motor through the downrod. Connect the wires according to the wiring diagram provided with the fan. Use wire connectors to secure the connections and wrap them with electrical tape for added insulation.
Ensure that all wire connections are tight and secure to prevent loose connections, which can cause the fan to malfunction or create a fire hazard. Double-check the wiring diagram to verify that the wires are connected correctly.
Step 5: Mount the Fan to the Bracket
Carefully lift the assembled fan and downrod to the ceiling and hang the downrod ball joint onto the mounting bracket. Ensure the ball joint is securely seated in the bracket. Connect the fan wiring to the house wiring, matching the colors (black to black, white to white, and green or bare copper to green or bare copper). Use wire connectors to secure the connections and wrap them with electrical tape.
Once the fan is mounted, double-check that all screws and bolts are tight and that the fan is securely attached to the mounting bracket. Gently rotate the fan to ensure it moves freely and does not wobble or make any unusual noises.
Step 6: Final Adjustments and Testing
After mounting, visually inspect the fan to ensure it is hanging straight and is properly aligned. If necessary, make minor adjustments to the mounting bracket or downrod to correct any misalignment. Restore power to the circuit at the breaker box.
Test the fan to ensure it is functioning correctly. Check all fan speeds and the light kit (if installed). Listen for any unusual noises or vibrations. If the fan wobbles, refer to the manufacturer's instructions for balancing the blades. Often, a balancing kit with small weights is included to correct blade imbalances.
Safety Precautions During Installation
Safety should be paramount throughout the entire installation process. The following precautions should be observed:
*Turn Off the Power:
Disconnect the power to the circuit at the breaker box before starting any electrical work. Use a voltage tester to confirm that the power is off. *Use a Sturdy Ladder:
Ensure the ladder is placed on a level surface and is stable. Have someone spot you while you are on the ladder. *Wear Safety Glasses and Gloves:
Protect your eyes from debris and your hands from cuts and abrasions. *Follow the Manufacturer's Instructions:
Adhere to the manufacturer's instructions for assembling and installing the fan. *Inspect Wiring:
Carefully inspect all wiring for damage or wear before making connections. *Proper Wiring Connections:
Ensure all wiring connections are secure and properly insulated. *Balanced Fan Blades:
After installation, balance the fan blades to prevent wobbling and ensure smooth operation. *Consider Professional Help:
If unsure about any aspect of the installation, consult a qualified electrician or ceiling fan installer. Improper installation can lead to safety hazards and can compromise the fan's performance.Adhering to these safety precautions will minimize the risk of accidents and ensure a safe and successful ceiling fan installation on an angled ceiling.
Troubleshooting Common Issues
Even with careful planning and execution, some issues may arise during or after the installation of a ceiling fan. Knowing how to troubleshoot common problems can save time and prevent frustration.
Fan Wobbles:
A common issue is a wobbling fan. This is often caused by imbalanced blades. Use the balancing kit provided with the fan to add small weights to the blades until the wobble is eliminated. Ensure all blade screws are tight.Fan Hum:
A humming noise can be caused by loose screws or a faulty dimmer switch. Check all screws and tighten them as needed. If a dimmer switch is causing the issue, try replacing it with a standard on/off switch.No Power to Fan:
If the fan does not turn on, check the circuit breaker to ensure it has not tripped. Verify all wiring connections are secure. Use a voltage tester to confirm that power is reaching the fan.Light Kit Malfunctions:
If the light kit does not work, check the bulb to ensure it is not burned out. Verify that the wiring connections to the light kit are secure. If the problem persists, the light kit may be defective and need to be replaced.Fan Operates at Only One Speed:
This can be caused by a faulty speed control switch. Replace the switch with a new one.Addressing these common issues promptly will help ensure the ceiling fan operates safely and efficiently for years to come. If troubleshooting steps fail to resolve the problem, consult a qualified electrician.

How To Install A Ceiling Fan On Sloped Lemon Thistle

Install Ceiling Fan On Sloped Simple Modern Handmade Home

How To Install A Ceiling Fan On Sloped Lemon Thistle

How To Install A Ceiling Fan Hunter

Mounting Ceiling Fan On Sloped Home Improvement Stack Exchange

Fans On An Angle Installing Ceiling Angled Or Raked

Kichler Ceiling Fan Fast Facts Sloped

Electrical Mount Ceiling Fan At The Peak Of A Sloped Home Improvement Stack Exchange

How To Choose A Ceiling Fan For Vaulted Ceilings Lightology

How To Install A Ceiling Fan On Vaulted Quora
Related Posts