Textured Rollers For Ceilings: Get The Look You Desire In Your Eyes
Ceiling texture, often overlooked, plays a crucial role in the overall aesthetic and ambiance of a room. It can add depth, hide imperfections, and contribute to the acoustic properties of the space. While spray-on textures have been a common choice, textured rollers offer a versatile and often more manageable alternative. This article delves into the world of textured rollers for ceilings, exploring their benefits, types, application techniques, and considerations for achieving the desired look.
Textured rollers are specialized painting tools designed to impart a patterned or textured finish onto surfaces, primarily ceilings and walls. Unlike standard paint rollers with smooth surfaces, textured rollers feature intricately designed sleeves made from various materials, such as foam, rubber, or fabric. The patterns embossed onto these sleeves transfer onto the ceiling as the roller is applied, creating a raised or indented texture. This method allows for greater control and creativity compared to spray-on methods, making it suitable for both DIY enthusiasts and professional painters.
Advantages of Using Textured Rollers
Several factors contribute to the increasing popularity of textured rollers for ceiling applications. One primary advantage is the enhanced control over the texture application. Unlike spray-on textures, which can be prone to uneven distribution and overspray, textured rollers allow for precise application and uniform texture depth. This control minimizes the risk of errors and ensures a consistent finish across the entire ceiling surface. Furthermore, the relative ease of use makes this method accessible to both experienced painters and those with limited DIY experience.
Cost-effectiveness is another significant benefit. Textured rollers themselves are relatively inexpensive, and the amount of texturing compound or paint required is often less than that needed for spray-on applications. This makes it a budget-friendly option for homeowners looking to update their ceilings without incurring significant expenses. Additionally, clean-up is generally easier with textured rollers, as there is less mess and overspray compared to spray-on methods. This reduces the time and effort required for cleaning and preparation, making the overall process more efficient.
Finally, textured rollers offer a wide range of design possibilities. The market offers a variety of roller sleeves with different patterns, from subtle stipple effects to more pronounced designs. This allows homeowners to customize their ceilings according to their personal preferences and the overall style of the room. Whether a smooth, refined texture or a bold, dramatic look is desired, textured rollers provide the versatility to achieve the desired aesthetic.
Types of Textured Rollers and Patterns
The selection of a textured roller largely depends on the desired finish. Textured rollers are available in a wide array of types, each designed to create a unique pattern on the ceiling.
Stipple Rollers: These rollers create a subtle, dotted texture, resembling orange peel. Stipple rollers are excellent for hiding minor imperfections and creating a uniform, understated look. They are often used in areas where a light texture is desired, such as bedrooms and living rooms.
Patterned Rollers: These rollers feature more intricate designs, such as swirls, ridges, or geometric patterns. Patterned rollers can add a touch of elegance or visual interest to a room. The specific pattern to choose depends on personal preference and the overall style of the room.
Nap Rollers with Texture Paint: While not strictly "textured rollers", nap rollers can be used in conjunction with specially formulated texture paints. These paints contain additives that create a subtle texture when applied with a standard nap roller. This method offers a simpler approach for achieving a slight textured finish.
Foam Rollers: Foam rollers are suitable for applying various texture compounds to achieve consistent and even coverage. The density of the foam influences the texture, with higher density creating less prominent textures.
Selecting the appropriate roller type is essential for achieving the desired aesthetic. It's often helpful to test the roller on a small, inconspicuous area before applying it to the entire ceiling to ensure the pattern aligns with expectations.
Application Techniques for Textured Rollers
Proper application techniques are critical for achieving a professional and aesthetically pleasing textured ceiling finish. The process involves several key steps, starting with surface preparation.
Surface Preparation: Before applying any texture, the ceiling should be thoroughly cleaned and repaired. Repair any cracks, holes, or other imperfections using patching compound. Sand the patched areas smooth and prime the entire ceiling surface. Priming provides a uniform base for the texture to adhere to and helps prevent uneven absorption of the texturing compound or paint.
Applying the Texture Compound or Paint: Depending on the chosen method, the texture compound or paint should be applied to the roller in a consistent manner. For texture compounds, apply a generous amount to the roller sleeve and distribute it evenly. For texture paints, follow the manufacturer's instructions regarding application thickness. Avoid overloading the roller, as this can lead to drips and uneven texture distribution.
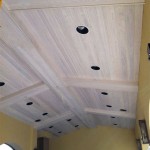
Rolling Technique: Begin rolling the texture onto the ceiling in a consistent and overlapping pattern. Maintain a steady pressure for even application. Work in small sections to prevent the texture compound or paint from drying before it can be properly rolled. For patterned rollers, ensure the pattern aligns properly with each roll to create a seamless design. Overlap each stroke slightly to prevent hard cut-off lines and maintain a uniform pattern across the surface.
Finishing Touches: After applying the texture, allow it to dry completely according to the manufacturer's instructions. Once dry, inspect the ceiling for any imperfections or uneven areas. Use a small brush or touch-up roller to correct any inconsistencies. If desired, the textured ceiling can be painted to further enhance its appearance. Choose a paint color that complements the overall style of the room.
Safety Precautions: Wear appropriate safety gear, including eye protection and a respirator, to protect against dust and fumes. Ensure adequate ventilation in the work area to prevent the build-up of hazardous vapors. If using texture compounds containing harmful chemicals, follow the manufacturer's safety guidelines carefully.
Achieving a professional-looking textured ceiling requires patience and attention to detail. By following these application techniques, homeowners can achieve a beautiful and durable finish that enhances the aesthetic appeal of their homes.
Textured ceiling patterns should complement the existing design elements within the room. For traditional spaces with high ceilings and ornate details, consider using heavily textured or patterned rollers to add depth and character. Swirls and geometric patterns can complement the ornate décor. In more contemporary settings, simple textures like stipple or smooth patterns often work best. The goal is to create a cohesive design that enhances the overall aesthetic appeal.
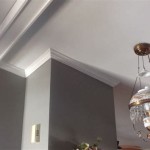
Lighting can significantly impact how the texture appears, so considering how natural and artificial light interact with the texture is essential. Textured ceilings tend to cast shadows, making the pattern appear more pronounced. If the room receives ample natural light, a lighter texture may be preferable to avoid overwhelming visual effects. In dimly lit areas, a more pronounced texture can add visual interest and depth. When selecting light fixtures, consider how the light will reflect off the texture. Avoid placing bright spotlights directly on the ceiling, as this can accentuate imperfections and create an uneven appearance. Instead, opt for diffused lighting that casts a softer glow.
The longevity of a textured ceiling depends on the quality of materials used and the application technique. Proper preparation, including cleaning, repairing, and priming the surface, is critical for ensuring the texture adheres properly and doesn't peel or crack over time. Selecting a high-quality texture compound or paint can also contribute to durability. Regular maintenance, such as dusting and cleaning, can help prevent the accumulation of dirt and grime that can dull the texture's appearance. Avoid using abrasive cleaning agents, as these can damage the texture. Instead, use a soft brush or damp cloth to gently remove any dirt or stains. With proper care and maintenance, a textured ceiling can last for many years, providing ongoing aesthetic and functional benefits.

How To Texture Or Retexture Ceilings Danks And Honey

How To Paint A Ceiling Reviewed

21 Unique Ceiling Texture Types To Elevate Your Interiors Cozycottagecute

Remarkable Ceiling Paint Colour Tips And Inspiration

Not Sc Here S How To Paint Your Popcorn Ceiling Instead

How To Texture Or Retexture Ceilings Danks And Honey

Toolpro Ojos Foam Texture Roller Cover Tool Pro Al S Taping Tools
/GettyImages-185108879-173dc15bb39d4dad88e6ba537049115f.jpg?strip=all "How To Texture A Ceiling")
How To Texture A Ceiling

Paint Your Ceiling Dark And Reasons Why You Should Artsy Rule

How To Texture Or Retexture Ceilings Danks And Honey
Related Posts