Selecting the Appropriate Paint for Textured Ceilings
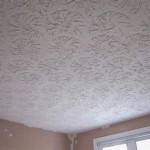
Textured ceilings, often referred to as "popcorn ceilings" or "acoustic ceilings," were a popular design choice for many years. While aesthetic preferences have shifted, many homes still retain these textured surfaces. Painting a textured ceiling presents unique challenges compared to painting a smooth surface. Selecting the correct type of paint and applying it properly is crucial for achieving a satisfactory and long-lasting result.
The primary function of paint on a textured ceiling is to refresh its appearance, conceal imperfections, and potentially improve its overall durability. However, the uneven surface of a textured ceiling can make paint application difficult and increase the risk of drips, uneven coverage, and potentially even loosening the texture itself, especially if the texture contains asbestos. Therefore, a thorough understanding of different paint types and their properties is essential before beginning any painting project.
Understanding the composition and condition of the existing textured ceiling is paramount. Older textured ceilings may contain asbestos, a hazardous material that requires professional removal. Before any work begins, it is imperative to test the ceiling for asbestos. If asbestos is present, disrupting the texture through painting (or any other means) could release harmful fibers into the air. In such cases, engaging a qualified asbestos abatement contractor is non-negotiable. Assuming the ceiling is asbestos-free, the next step involves assessing its current condition. Are there stains, cracks, or loose texture? Addressing these issues before painting will ensure a smoother, more uniform final product.
Understanding Paint Types: Latex vs. Oil-Based
Two primary categories of paint are commonly available: latex (water-based) and oil-based (alkyd). While oil-based paints were historically favored for their durability and sheen, latex paints have significantly improved in quality and are now often the preferred choice for interior painting, including ceilings. Understanding the distinct characteristics of each type is critical for making an informed decision.
Latex paints are water-based, making them easier to clean up with soap and water. They also have lower volatile organic compound (VOC) levels compared to oil-based paints, making them a more environmentally friendly option. Furthermore, latex paints are more flexible than oil-based paints, which reduces the risk of cracking over time, especially in areas prone to temperature fluctuations. They adhere well to properly primed surfaces and offer good color retention. For textured ceilings, the ease of application and clean-up offered by latex paints are significant advantages.
Oil-based paints, on the other hand, are known for their durability and resistance to stains. They provide a harder, more durable finish than latex paints, making them suitable for high-traffic areas. However, they are more difficult to work with due to their strong odor, slow drying time, and the need for mineral spirits for cleanup. Oil-based paints also tend to yellow over time, especially in areas with limited light exposure. Given the potential for yellowing and the complexities associated with application and cleanup, oil-based paints are generally not recommended for textured ceilings unless specifically required for a particular restoration project or to match an existing oil-based coating. The potential for the oil-based paint to react negatively with the underlying texture is also a considerable concern.
In most cases, a high-quality latex paint formulated specifically for ceilings is the ideal choice for painting textured ceilings. These paints are designed to minimize drips, provide good coverage, and are available in a variety of sheen levels to suit different aesthetic preferences.
Selecting the Right Sheen Level
The sheen level of paint refers to the amount of light it reflects. Different sheen levels offer varying degrees of durability, cleanability, and aesthetic appeal. For ceilings, lower sheen levels are generally preferred to minimize glare and hide imperfections.
Flat or matte paints have the lowest sheen level and are excellent at concealing imperfections. They provide a smooth, non-reflective finish that is ideal for ceilings, especially those with a pronounced texture. Flat paints are also the least washable, so they are best suited for areas that are not prone to staining. The minimal reflection of flat paint helps to downplay the texture itself, which can be desirable for those seeking a more subtle look.
Eggshell and satin paints have a slightly higher sheen level than flat paints. They offer better durability and washability while still maintaining a relatively low-reflective finish. Eggshell and satin paints are a good compromise between hiding imperfections and providing some degree of stain resistance. However, they may highlight imperfections slightly more than flat paints, making them less suitable for ceilings with significant texture irregularities.
Semi-gloss and gloss paints have the highest sheen levels and are the most durable and washable. However, they are not recommended for ceilings, as they reflect light intensely and accentuate imperfections. These high-sheen paints are better suited for trim, doors, and other areas that require frequent cleaning.
For textured ceilings, a flat or matte paint is generally the best choice. It will minimize glare, hide imperfections, and provide a smooth, uniform finish. If some degree of washability is desired, an eggshell paint can be considered, but it is important to be aware of the potential for it to highlight imperfections slightly more than a flat paint.
Preparation and Application Techniques
Proper preparation is crucial for achieving a successful paint job on a textured ceiling. This involves cleaning the ceiling, repairing any damage, and priming the surface if necessary.
Begin by thoroughly cleaning the ceiling to remove dust, dirt, and cobwebs. A soft brush or vacuum cleaner with a brush attachment can be used for this purpose. If there are stains, such as water stains, they should be cleaned with a mild detergent solution and allowed to dry completely before painting. Addressing any existing stains is essential to prevent them from bleeding through the new paint layer.
Repair any cracks or loose texture before painting. Small cracks can be filled with joint compound, while loose texture can be re-adhered with adhesive caulk or replaced with matching texture compound. Allow the repairs to dry completely and sand them smooth before proceeding. Ensuring the ceiling is structurally sound and free of loose material is a critical step in the preparation process.
Priming the ceiling is recommended, especially if it is stained, has been repaired, or is being painted with a different type of paint than the previous coating. A primer will help to seal the surface, improve adhesion, and ensure uniform color coverage. Use a high-quality primer that is specifically designed for ceilings and apply it according to the manufacturer's instructions. Priming is an essential step that should not be skipped, as it significantly contributes to the overall quality and longevity of the paint job.
When applying the paint, use a roller with a thick nap to ensure adequate coverage of the textured surface. A ¾-inch or 1-inch nap roller is typically recommended. Alternatively, an airless paint sprayer can be used to achieve a more even and consistent finish, but this requires more skill and careful masking to prevent overspray. Regardless of the application method, apply the paint in thin, even coats, allowing each coat to dry completely before applying the next. Avoid applying too much paint at once, as this can lead to drips and uneven coverage.
Cutting in around the edges of the ceiling with a brush is necessary to ensure a neat and professional finish. A high-quality angled brush is recommended for this purpose. Work slowly and carefully to avoid getting paint on the walls or trim. Using painter's tape can help to create a clean line and prevent paint from bleeding onto adjacent surfaces.
Multiple coats of paint may be necessary to achieve full coverage, especially if the existing ceiling is heavily stained or a significant color change is desired. Two coats are generally sufficient, but three coats may be required in some cases. Allow each coat to dry completely before applying the next.
Proper ventilation is essential when painting, especially if using oil-based paints or primers. Open windows and doors to provide fresh air and use a fan to circulate the air. Wear a respirator to protect against inhaling paint fumes. Safety precautions are paramount to ensure a healthy and comfortable working environment.

How To Paint A Textured Ceiling First Gen House

How Do You Make Ceiling Paint Grittily Textured

Complete Guide To Painting Popcorn Textured Ceilings Homeadvisor

Best Ceiling Paint For Textured Ceilings Eco Inc

How To Paint Popcorn Ceilings Robinson Painting Llc Of Colorado

How To Paint Smooth And Textured Ceilings Wagner Spraytech

Best Ceiling Paint Guide Forbes Home

Complete Guide To Painting Popcorn Textured Ceilings Homeadvisor

How To Paint A Textured Ceiling And Get Perfect Results

How To Paint A Ceiling After Removing Popcorn Dallas Paints
Related Posts


