How to Cut Crown Molding for Cathedral Ceilings
Installing crown molding adds a touch of elegance and sophistication to any room, but the process becomes significantly more complex when dealing with cathedral ceilings. The angular cuts required to seamlessly join the molding along these sloped intersections necessitate precise measurements, specialized techniques, and a thorough understanding of angles. This article provides a comprehensive guide on how to accurately cut crown molding for cathedral ceilings, ensuring a professional and aesthetically pleasing finish.
Before embarking on this project, gathering the necessary tools and materials is crucial. Essential tools include a miter saw (preferably one with dual bevel capabilities), a protractor or digital angle finder, a measuring tape, a pencil, and safety glasses. In addition, it is helpful to have a coping saw, sandpaper, wood filler, and construction adhesive.
Materials required include crown molding itself, typically made of wood or polyurethane, and appropriate fasteners such as nails or screws. Having extra lengths of molding is advisable to accommodate potential mistakes during the cutting process. Finally, a solid understanding of basic carpentry principles and safe woodworking practices is essential.
Determining the Spring Angle and Ceiling Angle
The first step in cutting crown molding for cathedral ceilings is to accurately determine the spring angle of the molding and the ceiling angle where the molding will be installed. The spring angle refers to the angle at which the molding sits against the wall and ceiling when installed. This information is often provided by the manufacturer of the crown molding; however, it can also be determined using a protractor or angle finder.
The ceiling angle is the angle formed by the two intersecting ceiling planes. Accurately measuring this angle is paramount for achieving seamless joints. Several methods can be used to determine the ceiling angle. One method involves using a protractor or digital angle finder to measure the angle directly. Another method involves using a T-bevel to transfer the angle to a piece of paper, where it can then be measured with a protractor.
For more complex cathedral ceilings with multiple angles, it is essential to measure each angle individually. It is also advisable to double-check all measurements to ensure accuracy. Even a slight error in measurement can result in noticeable gaps and imperfections in the finished product.
Once the spring angle and ceiling angle have been determined, they will be used to calculate the correct miter and bevel angles for the miter saw. This calculation is often performed using trigonometric functions or online calculators specifically designed for crown molding. Ensuring that the correct angles are used is significant because this determines the accuracy of the cuts.
Alternatively, some crown molding manufacturers provide charts or tables that list the appropriate miter and bevel angles for various ceiling angles and spring angles. Consulting these resources can save time and reduce the risk of errors in calculation.
Calculating Miter and Bevel Angles
Once the ceiling angle and spring angle have been obtained, the next task is to calculate the correct miter and bevel angles for the miter saw. The miter angle refers to the angle at which the saw blade needs to be rotated horizontally, while the bevel angle refers to the angle at which the saw blade needs to be tilted vertically.
Several formulas can be used to calculate the miter and bevel angles. These formulas typically involve trigonometric functions such as sine, cosine, and tangent. The specific formulas used will depend on the geometry of the cathedral ceiling and the spring angle of the crown molding.
For simplicity, several online calculators and apps are available that can perform these calculations automatically. These tools require the user to input the ceiling angle and spring angle, and they will then output the correct miter and bevel angles. While these tools can be convenient, it is still important to understand the underlying principles and to verify the results.
The calculations involved in determining the miter and bevel angles can be complex, especially for those unfamiliar with trigonometry. It is important to take the time to understand the formulas and to double-check all calculations before making any cuts. A small error in calculation can result in a significant error in the finished product. It is also helpful to test these calculations by trying out scrap pieces of crown molding.
It is crucial to understand the difference between inside corners and outside corners when cutting crown molding for cathedral ceilings. Inside corners are where two walls meet at an angle of less than 180 degrees, while outside corners are where two walls meet at an angle of more than 180 degrees. The miter and bevel angles will be different for inside and outside corners.
When cutting inside corners, the miter angle will typically be positive, while the bevel angle will be negative. This means that the saw blade will need to be rotated to the right and tilted to the left. Conversely, when cutting outside corners, the miter angle will typically be negative, while the bevel angle will be positive. This means that the saw blade will need to be rotated to the left and tilted to the right.
Cutting and Installing the Crown Molding
With the miter and bevel angles calculated, the next step is to cut the crown molding. Before making any cuts, it is essential to carefully set the miter saw to the calculated angles. Double-check the settings to ensure they are accurate. Incorrect settings will inevitably lead to inaccurate cuts and wasted material.
When cutting crown molding, it is important to hold the molding in the correct orientation. Crown molding is typically installed upside down and backwards on the miter saw. This is because the back of the molding is designed to sit flush against the fence of the saw, ensuring a clean and accurate cut.
Before cutting the actual molding, it is advisable to make a few test cuts on scrap pieces of molding. This allows you to verify the accuracy of the miter and bevel angles and to make any necessary adjustments. It also provides practice in holding the molding correctly and operating the miter saw safely.
When making the actual cuts, it is important to cut slowly and smoothly. Avoid forcing the saw blade through the molding, as this can lead to splintering and inaccurate cuts. Use a sharp blade and maintain a steady hand. Safety glasses should be worn at all times to protect the eyes from flying debris.
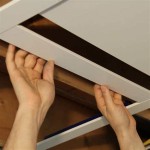
After cutting the crown molding, it is time to install it. Apply a bead of construction adhesive to the back of the molding and press it firmly against the wall and ceiling. Use finish nails or screws to secure the molding in place. Ensure that the nails or screws are driven into solid wood, such as studs or ceiling joists.
When installing the crown molding, pay close attention to the joints between the pieces. The joints should be tight and seamless. If there are any gaps, fill them with wood filler and sand them smooth. For larger gaps, it may be necessary to recut the molding or to use a coping saw to create a perfect fit.
After the crown molding has been installed, apply a coat of primer and paint. This will help to protect the molding and to create a uniform finish. Choose a paint color that complements the rest of the room. With proper planning, accurate measurements, and careful execution, installing crown molding on cathedral ceilings can transform the look and feel of your living space.
Finally, always prioritize safety when working with power tools. Wear safety glasses, ear protection, and a dust mask. Keep the work area clean and well-lit. If you are not comfortable using power tools, consider hiring a professional carpenter to do the job.

Install Crown Molding Cathedral Vaulted Ceiling

Installing Crown Molding Around A Cathedral Ceiling Fine Homebuilding

How To Install Crown Molding On A Vaulted Cathedral Ceiling Without Transition Piece

Installing Crown Moulding On A Sloped Ceiling Doityourself Com Community Forums

How To Cut A Crown For Vaulted Ceilings Quora

Install Crown Molding Cathedral Vaulted Ceiling

How To Install Crown Molding On Vaulted Or Cathedral Ceilings The Joy Of Moldings

Installing Crown Moulding Part Two Canadian Woodworking

Installing Crown Moulding On A Sloped Ceiling Doityourself Com Community Forums

Crown Moulding On Angled Ceiling Sawdust Girl
Related Posts