How To Install Crown Molding on a Vaulted Ceiling
Installing crown molding can significantly enhance the aesthetic appeal of any room, adding a touch of elegance and sophistication. However, installing crown molding on a vaulted ceiling presents unique challenges compared to standard flat ceilings. The angles involved require precise measurements and careful cuts to ensure a seamless and visually pleasing finish. This article provides a comprehensive guide on how to successfully install crown molding on a vaulted ceiling, covering the necessary tools, materials, and techniques.
Before commencing the installation process, a thorough understanding of the specific challenges associated with vaulted ceilings is crucial. Unlike flat ceilings where the angles are consistently 90 degrees, vaulted ceilings involve varying angles that require precise calculation and specialized cutting techniques. Failure to accurately measure and cut the molding will result in gaps, misalignments, and an overall unprofessional appearance. Thus, patience, attention to detail, and a systematic approach are essential for a successful installation.
The installation process can be broken down into several key stages: planning and preparation, measuring and calculating angles, cutting the molding, installing the molding, and finishing. Each stage requires careful attention to detail and adherence to specific techniques to achieve optimal results. The following sections will detail each stage, providing step-by-step instructions and helpful tips to guide the installer through the process.
Preparing for the Installation
The initial stage involves thorough planning and preparation. This includes gathering the necessary tools and materials, assessing the project scope, and preparing the workspace. The selection of appropriate materials and tools is crucial for achieving a professional-looking finish.
Tools and Materials Required:
- Crown molding (sufficient quantity plus extra for waste)
- Miter saw (with sharp blade)
- Coping saw
- Measuring tape
- Angle finder or protractor
- Level
- Stud finder
- Pencil
- Construction adhesive
- Caulk gun and paintable caulk
- Wood filler
- Paint (matching the molding or desired color)
- Paintbrushes or roller
- Safety glasses
- Dust mask
- Ladder or scaffolding (depending on ceiling height)
- Nail gun (optional, but recommended for faster installation)
- Finishing nails
- Hammer
- Backing blocks (optional, for additional support)
Workspace Preparation: Before starting the installation, clear the workspace of any furniture or obstructions. Cover the floor with drop cloths to protect it from dust, debris, and paint splatters. Ensure adequate lighting to facilitate accurate measurements and cuts. Set up the miter saw in a well-ventilated area and familiarize yourself with its operation. It is also recommended to have a stable work surface for cutting and preparing the molding.
Molding Selection: Crown molding is available in various materials, including wood, polyurethane, and MDF (Medium-Density Fiberboard). Wood molding offers a classic look and can be stained or painted, but it is more prone to warping and cracking. Polyurethane molding is lightweight, moisture-resistant, and easy to install, but it may not be as visually appealing as wood. MDF molding is a cost-effective option that is easy to paint and relatively stable, but it is susceptible to water damage. The choice of material will depend on factors such as budget, aesthetic preferences, and the specific environment.
Measuring and Calculating Angles
Accurate measurement and angle calculation are paramount for a successful crown molding installation on a vaulted ceiling. The angles at which the walls meet the ceiling will vary depending on the vault's geometry. Using the appropriate tools and techniques to determine these angles is essential.
Measuring the Vault Angle: The first step is to determine the angle of the vault. An angle finder or protractor can be used to measure the angle between the two ceiling planes. Place the angle finder against the ceiling at the point where the molding will be installed. Read the angle directly from the tool. Alternatively, a digital protractor can provide more precise measurements.
Calculating the Miter Angle: The miter angle is the angle at which the molding needs to be cut to create a joint. For an inside corner, the miter angle is half of the measured vault angle. For example, if the vault angle is 130 degrees, the miter angle will be 65 degrees. For an outside corner, the miter angle is half of the supplementary angle (180 degrees minus the vault angle). So, if the vault angle is 130 degrees, the supplementary angle is 50 degrees, and the miter angle is 25 degrees.
Calculating the Spring Angle: The spring angle, also known as the bed angle, is the angle at which the molding sits against the fence of the miter saw. This angle is determined by the profile of the crown molding itself. Many crown molding profiles have a standard spring angle of 45 degrees. However, it is essential to verify the specific spring angle for the chosen molding profile. This information can usually be found on the manufacturer's website or packaging. If the spring angle is not readily available, it can be determined using a bevel gauge and a piece of scrap molding.
Using a Crown Molding Angle Chart: To simplify the angle calculation process, a crown molding angle chart can be used. These charts provide pre-calculated miter and bevel angles for various vault angles and spring angles. These charts are readily available online and can save time and reduce the risk of errors. However, it is still recommended to double-check the angles using an angle finder or protractor to ensure accuracy.
Cutting and Installing the Molding
With accurate measurements and angle calculations in hand, the next step is to cut and install the crown molding. This requires careful attention to detail and the use of proper cutting techniques.
Cutting the Molding: Set the miter saw to the calculated miter and spring angles. Secure the molding against the fence of the saw and make the cut. For inside corners, the molding should be cut with the decorative face facing upwards. For outside corners, the molding should be cut with the decorative face facing downwards. Use a sharp blade to ensure clean, precise cuts. After making the cut, test-fit the molding in place to verify the accuracy of the cut. If necessary, make slight adjustments to the miter angle until the joint fits perfectly.
Coping Inside Corners: For inside corners, coping provides a more precise fit than simply mitering the joint. Coping involves cutting away the back portion of one piece of molding to match the profile of the adjacent piece. To cope an inside corner, cut one piece of molding at a 45-degree angle. Then, using a coping saw, carefully cut along the profile line, removing the material behind the face of the molding. This creates a contoured edge that will perfectly match the adjacent piece of molding. Test-fit the coped joint to ensure a tight, seamless fit.
Installing the Molding: Apply a bead of construction adhesive to the back of the molding. Position the molding against the wall and ceiling, aligning it carefully with the marked lines. Use a nail gun or finishing nails to secure the molding in place. Drive the nails into the wall studs and ceiling joists for maximum holding power. Space the nails approximately 12 to 16 inches apart. If necessary, use backing blocks to provide additional support, especially in areas where the wall or ceiling is uneven. Ensure the molding is level before permanently securing it in place. For long runs of molding, it may be necessary to join multiple pieces together. Use scarf joints (angled overlapping cuts) to create a seamless transition between pieces.
Finishing the Installation: After the molding has been installed, fill any nail holes and gaps with wood filler. Allow the wood filler to dry completely, and then sand it smooth. Caulk all the seams and joints to create a watertight seal and a seamless appearance. Use paintable caulk that matches the color of the molding. Apply the caulk in a thin, even bead, and then smooth it out with a wet finger or a damp sponge. Once the caulk has dried, prime and paint the molding with the desired color. Apply multiple coats of paint for a durable, professional-looking finish.

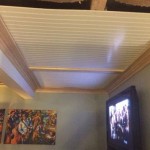
How To Install Crown Molding On Vaulted Or Cathedral Ceilings The Joy Of Moldings

Crown Molding On Angled Ceilings Makely

How To Install Crown Molding On A Vaulted Cathedral Ceiling Without Transition Piece

Install Crown Molding Cathedral Vaulted Ceiling

Installing Crown Moulding Part Two Canadian Woodworking

Installing Crown Moulding On A Sloped Ceiling Doityourself Com Community Forums

Installing Crown Molding Around A Cathedral Ceiling Fine Homebuilding

How To Terminate Flying Crown Molding On This Vaulted Ceiling The Joy Of Moldings

Install Crown Molding Cathedral Vaulted Ceiling

Installing Crown Molding On A Vaulted Ceiling Pro Construction Guide
Related Posts