Installation of a Ceiling Light: A Step-by-Step Guide
Installing a ceiling light fixture can significantly enhance the aesthetics and functionality of any room. This guide provides a comprehensive, step-by-step process for safely and effectively installing a standard ceiling light. Prior to commencing any electrical work, it is crucial to prioritize safety and adhere to all applicable local electrical codes.
This procedure assumes the presence of existing wiring in the ceiling box. If no wiring exists, or if the wiring is outdated or damaged, it is advisable to consult with a qualified electrician. Modifying or adding new electrical circuits requires specialized knowledge and expertise to ensure proper operation and prevent hazards.
The necessary tools and materials include, but are not limited to: a new ceiling light fixture, a voltage tester/non-contact voltage detector, a wire stripper/cutter, wire connectors (wire nuts), electrical tape, a screwdriver (both flathead and Phillips head), safety glasses, work gloves, and a stepladder. It is recommended to have all tools readily available before beginning the installation process.
Before starting the installation, carefully inspect the new light fixture. Ensure that all components are present and undamaged. Review the manufacturer's instructions provided with the fixture. This will provide specific details regarding the fixture's wiring configuration and mounting procedures. Understanding the fixture's specific requirements is crucial for a successful and safe installation.
Step 1: Safety First - Disconnect the Power
The most critical step in any electrical project is to disconnect the power supply to the circuit. Locate the circuit breaker that controls the room where the ceiling light will be installed. Turn the breaker to the "OFF" position. To confirm that the power is completely off, use a voltage tester or a non-contact voltage detector. Test the wires connected to the existing ceiling fixture. If the tester indicates the presence of voltage, double-check that you have turned off the correct breaker. If unsure, turn off the main power breaker for the entire house. This ensures complete safety during the installation process.
After confirming the power is off, it is a good practice to place a piece of tape over the breaker switch with a note indicating that electrical work is in progress. This prevents accidental activation of the circuit while you are working.
Removing the existing light fixture should be done carefully. Begin by unscrewing any screws or nuts that hold the fixture to the ceiling box. If the fixture is heavy, have someone assist you in supporting it to prevent it from falling and causing damage or injury. As you lower the fixture, carefully disconnect the wires. Note the color coding and arrangement of the wires for reference during the new fixture installation. Usually, black is hot, white is neutral, and green or bare copper is ground.
After disconnecting the wires, inspect the existing wiring. Look for any signs of damage, such as cracked insulation or corroded wires. If you find any damage, the wiring should be replaced by a qualified electrician before proceeding.
Step 2: Preparing the Ceiling Box
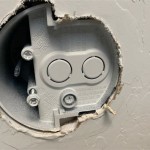
The ceiling box, also known as a junction box, is the enclosure in the ceiling that houses the electrical wiring. Before installing the new fixture, inspect the ceiling box to ensure that it is in good condition and securely attached to the ceiling joist. If the box is loose or damaged, it must be replaced or repaired before proceeding. A loose box can cause the light fixture to be unstable and could create a fire hazard.
If a mounting bracket is not already installed in the ceiling box, attach the appropriate bracket that comes with the new light fixture. The bracket provides a secure mounting surface for the fixture. Follow the manufacturer's instructions for attaching the bracket to the ceiling box. Make sure that the bracket is securely fastened and can support the weight of the new light fixture.
Examine the wires extending from the ceiling box. Using a wire stripper, carefully strip about ¾ inch of insulation from the ends of the wires. This will expose the bare wire for making connections to the new light fixture. Be careful not to nick or damage the wire strands when stripping the insulation.
Before making any wire connections, it’s helpful to bend the stripped ends of the wires into a hook shape. This will facilitate a secure and reliable connection when using wire connectors.
Step 3: Wiring the New Fixture
Wiring the new light fixture is a critical step and must be done correctly to ensure safety and proper operation. Refer to the manufacturer's instructions for the specific wiring configuration of the new fixture. Typically, the wiring connections are as follows:
Connect the black wire from the ceiling box to the black wire (or the wire designated as hot) from the new light fixture. Use a wire connector (wire nut) to join the wires together. Twist the wire nut clockwise until the connection is tight and secure. Gently tug on the wires to make sure they are firmly connected. Wrap the connection with electrical tape for added insulation and security. This helps prevent the possibility of a short circuit.
Connect the white wire from the ceiling box to the white wire (or the wire designated as neutral) from the new light fixture. Use a wire connector to join the wires together in the same manner as the black wires. Ensure the connection is tight, secure, and insulated with electrical tape.
Connect the green or bare copper wire from the ceiling box to the green or bare copper wire (or the grounding screw) on the new light fixture. This wire provides a grounding path for the fixture and is essential for safety. If the ceiling box is metal and is properly grounded, connecting the ground wire to the box itself may also suffice. Again, use a wire connector or attach the wire to the grounding screw, ensuring a tight and secure connection.
After making all the wiring connections, carefully tuck the wires into the ceiling box, making sure they are not pinched or stressed. Arrange the wires so that they do not interfere with the mounting of the light fixture.
Double-check all wire connections to ensure they are secure and properly insulated before proceeding.
Step 4: Mounting the Fixture and Testing
Once the wiring is complete, carefully align the new light fixture with the mounting bracket attached to the ceiling box. Secure the fixture to the bracket using the screws or nuts provided with the fixture. Make sure the fixture is securely attached and does not wobble. If necessary, adjust the mounting bracket to ensure a flush and level installation.
Once the fixture is securely mounted, install the light bulb(s) as specified by the fixture manufacturer. Do not exceed the maximum wattage rating of the fixture. Using bulbs with a higher wattage can overheat the fixture and create a fire hazard.
Visually inspect the entire installation to ensure that all connections are secure, and the fixture is properly mounted. Double-check that no wires are exposed or pinched.
After the visual inspection, turn the circuit breaker back to the "ON" position. Test the new light fixture by turning it on and off. If the light does not turn on, turn off the breaker again and recheck all the wiring connections. If the light still does not work after rechecking the connections, consult with a qualified electrician.
If the light turns on and operates correctly, congratulations on successfully installing your new ceiling light fixture. Ensure that all packaging materials and tools are properly disposed of or stored.
Observing the new fixture for a short period after installation is recommended. Listen for any unusual buzzing sounds or observe for any flickering of the light bulb. These symptoms could indicate a loose connection or other electrical issue that warrants further investigation.

How To Install Ceiling Light Homeserve Usa

Step By Installation Guide For Led Ceiling Lights

How To Install A Pendant Light Simple Step By Guide

How To Install A Ceiling Light Fixture 7 Easy Steps Diy

Diy Step By Guide Installing A Flexible Track Lighting System Delmarfans Com

How To Install A Light Fixture Diy Guide

6 Steps How To Install Led Strip Lights On Ceiling

How To Install A Ceiling Light Fixture Step By Guide For Diyers Mc Electrical Communications

How To Wire A Ceiling Light Step By Guide

How To Install A Hanging Light Step By Guide
Related Posts