How to Create a Ceiling in SketchUp Vray
Creating a ceiling in SketchUp Vray can significantly enhance the realism and visual impact of your 3D models. Whether you're designing a residential space, commercial building, or any other structure, a well-crafted ceiling can add depth, dimension, and a touch of sophistication to your renderings. This article will guide you through the step-by-step process of creating a ceiling using SketchUp Vray, covering essential techniques and considerations for achieving professional-looking results.
1. Define the Ceiling Area
The first step is to define the area where the ceiling will be located. You can achieve this using a variety of methods in SketchUp, depending on the complexity of your model. For simple rectangular ceilings, you can use the "Rectangle" tool to draw the outline. If your ceiling has a more intricate shape, you can employ the "Polyline" tool to create a custom outline. Remember to draw the outline on a plane above the desired height of the ceiling.
2. Extrude the Ceiling
Once the outline is established, you can extrude the shape to create the ceiling itself. Select the outline and use the "Push/Pull" tool to extrude it upwards. The height of the extrusion should correspond to the desired ceiling height. Alternatively, you can use the "Move" tool to manually reposition the outline upwards, creating a new plane that defines the ceiling.
3. Apply Materials and Textures
To make the ceiling realistic, you need to apply appropriate materials and textures. Vray offers a wide range of materials for different types of surfaces, including wood, plaster, concrete, and more. You can access the Vray Material Editor by navigating to the "Materials" panel in the SketchUp interface. To apply a material, select the ceiling surface, open the Vray Material Editor, and choose the desired material. Adjust the material properties, such as color, roughness, and reflection, to achieve the desired aesthetic.
Furthermore, you can add texture to the ceiling by using Vray's "Bump" or "Displacement" options. These features allow you to apply a subtle or dramatic texture to the surface, simulating the look of plaster, wood grain, or other surface irregularities. You can create or import your own texture files, or explore the numerous Vray texture libraries.
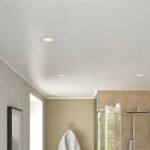
4. Add Ceiling Lights and Fixtures
Ceiling lights play a crucial role in illuminating the space and adding visual interest. SketchUp Vray provides various options for creating and customizing lights. You can choose from standard light types such as point lights, spotlights, area lights, and more. When placing lights, consider their position, intensity, and direction to create the desired lighting effect. You can adjust the light properties within the Vray Light Editor to fine-tune their performance.
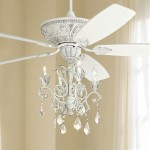
For more realistic renderings, you can add ceiling fixtures such as chandeliers, pendant lights, or recessed lights. These fixtures can be found in SketchUp's 3D Warehouse or downloaded from other online sources. Once imported, they can be positioned and scaled according to your design preferences.
5. Refine and Optimize
After creating the basic ceiling structure, you can refine its details and optimize its appearance. This might involve adjusting the material properties, adding more realistic textures, or experimenting with different lighting setups. Experiment with different Vray settings to achieve the desired level of realism. The "Vray Settings" dialog box provides a wide range of options for customizing the rendering process, including anti-aliasing, quality settings, and output options.
You can also add additional elements to the ceiling, such as moldings, cornice work, or ceiling fans. These features can add architectural interest and complexity to your models. Remember to apply appropriate materials and textures to these elements to ensure consistency with the rest of the ceiling.
Finally, consider the overall design and composition of your model. The ceiling should complement the other elements of the space, creating a visually cohesive and aesthetically pleasing environment. Use SketchUp's tools for viewing and manipulating your model to ensure that the ceiling fits seamlessly within the overall design.

How To Make Rectangular False Ceiling In Sketchup Vray

How To Make False Ceiling And Strip Light In Sketchup Vray Pixologic Interior

How To Make False Ceiling In Sketchup V Ray

How To Make Curve Ceiling In Sketchup Vray Setting

How To Make Circular False Ceiling In Sketchup Vray

How To Make Rectangular False Ceiling In Sketchup Vray

3 Ways To Make Pop Ceiling Lights I V Ray For Sketchup

3 Ways To Make Pop Ceiling Lights I V Ray For Sketchup

How To Make Circular False Ceiling In Sketchup Vray

How To Make False Ceiling And Strip Light In Sketchup Vray
Related Posts