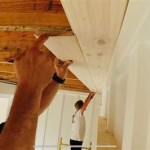
How to Build a Vaulted Ceiling Ridge Beam
A vaulted ceiling is a stunning architectural feature that adds elegance and grandeur to any space. The centerpiece of this design is the ridge beam, which supports the vaulted structure and provides a strong foundation for the ceiling. Building a vaulted ceiling ridge beam requires careful planning and execution. This article will guide you through the essential steps involved in constructing this crucial element of a vaulted ceiling.
Planning and Preparation
Before you start building your vaulted ceiling ridge beam, thorough planning is essential. This involves determining the size, shape, and materials for the beam, as well as the overall dimensions of the vaulted ceiling. Consider the following factors:
- Span of the beam: The distance between the supporting walls dictates the size and strength of the beam required. Longer spans necessitate larger and stronger beams.
- Desired height and shape of the vault: The height and shape of the vault influence the angle and length of the rafters that will be attached to the ridge beam.
- Materials: Choose materials that are strong enough to support the weight of the vaulted ceiling and any additional loads. Wood, steel, and concrete are common choices.
- Building codes and regulations: Ensure your construction plans comply with local building codes and regulations to guarantee the structural integrity and safety of your vaulted ceiling.
After carefully considering these factors, create detailed drawings of the vaulted ceiling, including the dimensions and specifications of the ridge beam. This will serve as a blueprint for your construction process.
Building the Ridge Beam
The construction of the ridge beam depends on the chosen materials and the design of the vaulted ceiling. Here's a general guide for constructing a wooden ridge beam:
- Cut and assemble the beam sections: Using the plans as a guide, cut the individual pieces of lumber to the required lengths and angles. If necessary, join the sections together using strong wood adhesives and screws or bolts to create a solid beam structure.
- Strengthen the beam: For larger spans or heavier loads, consider using additional support members, such as gussets or ledger boards, to reinforce the ridge beam. These components add extra strength and rigidity to the structure.
- Install the ridge beam: Once the beam is assembled, carefully lift it into position and secure it to the supporting walls using heavy-duty anchors or brackets. Ensure that the beam is level and securely fastened to the supports.
For steel or concrete ridge beams, specialized techniques and equipment are required. Consult with a qualified structural engineer or construction professional to ensure proper installation and safety.
Attaching Rafters to the Ridge Beam
The ridge beam serves as the central point for attaching the rafters that support the vaulted ceiling. The process involves:
- Cut the rafters: Using the plans as a guide, cut the rafters to the correct length and angle. Consider the desired pitch and shape of the vaulted ceiling when determining the angles.
- Attach rafters to the ridge beam: Fit the rafters to the ridge beam and secure them using nails, screws, or bolts. Use a combination of methods for maximum strength and durability. Ensure that the rafters are properly aligned and spaced according to your plans.
- Install sheathing and roofing: Once the rafters are attached, install sheathing boards to provide a solid base for the roofing materials. Apply the roofing material according to your chosen design and specifications.
The precise methods and materials for attaching rafters will vary depending on the specific design of the vaulted ceiling and local building codes. Always consult with a professional if you are unsure about the best approach for your project.
Safety Considerations
Building a vaulted ceiling ridge beam involves working at height and dealing with heavy materials. Safety is paramount, and it's essential to follow these precautions:
- Use proper safety equipment: Wear a safety harness and fall protection equipment whenever working at height. Ensure that all ladders and scaffolding are stable and correctly assembled.
- Be mindful of weight limits: Be aware of the weight limits for ladders, scaffolding, and other equipment used during the construction process. Avoid overloading or exceeding those limits.
- Work with a partner: Whenever possible, have a partner assist you in handling heavy materials and performing tasks that require multiple people.
- Follow all safety guidelines: Familiarize yourself with the safety guidelines for working with wood, steel, and other construction materials. Always adhere to these guidelines to minimize the risk of accidents.
Prioritize safety throughout the entire construction process, and don't hesitate to seek professional help if you encounter any doubts or concerns.

Framing A Cathedral Ceiling Rafter Overview My Diy

Vaulting The Ceiling Part Ii Construction Frugal Happy

Construction Of A Vaulted Cathedral Ceiling Eplan House

Construction Of A Vaulted Cathedral Ceiling Eplan House

Framing A Cathedral Ceiling Fine Homebuilding

Structural Ridge Beam Log Cabin Connection

House Tweaking

Frugal Happy Vaulting The Ceiling Greenbuildingadvisor

Ridge Beams Vs Boards Jlc

House Tweaking
Related Posts


