Can You Paint a Gold Ceiling Fan With Light?
Painting a ceiling fan, even one with integrated lighting, is a viable way to update a room's aesthetic. However, the process requires careful planning and execution to ensure a professional-looking result and the continued safe operation of the fixture. This article will explore the steps involved in painting a gold ceiling fan with a light fixture.
Key Considerations Before Painting
Several factors should be considered before embarking on this project:
- Fan Material: Different materials require different primer and paint types. Identify whether the fan is metal, plastic, or wood to select appropriate products.
- Existing Finish: A glossy finish will require sanding to create a surface for the primer to adhere to properly.
- Light Fixture Integration: Extra care is required when painting around electrical components. Disassembly and masking are essential for safety and a clean finish.
- Motor Housing: Avoid painting the motor housing as this can interfere with its operation and heat dissipation.
Preparing the Workspace
Adequate preparation simplifies the painting process and minimizes cleanup:
- Turn Off the Power: Safety is paramount. Turn off the power to the fan at the breaker box before starting any work.
- Protect the Floor: Use drop cloths or newspapers to cover the area beneath the fan and catch any drips or overspray.
- Ventilation: Ensure adequate ventilation in the room to dissipate paint fumes.
Disassembling the Fan
Careful disassembly is crucial for both painting and reassembly:
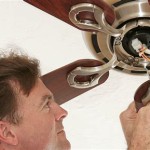
- Remove the Blades: Carefully remove the fan blades and label them for correct reinstallation. Consider photographing the wiring configuration before disconnection for easier reassembly.
- Remove Light Fixtures and Shades: Disassemble the light fixtures, removing bulbs, shades, and any other removable parts.
- Remove Decorative Elements: Carefully remove any decorative elements or finials that may be attached to the fan body.
- Motor Housing Protection: Cover the motor housing completely with plastic sheeting and painter's tape to prevent paint from getting on it.
Cleaning and Preparing the Fan Surfaces
Proper surface preparation is essential for paint adhesion:
- Cleaning: Thoroughly clean all surfaces to be painted with a degreaser or a mixture of mild detergent and water. Rinse and dry completely.
- Sanding: Lightly sand glossy surfaces with fine-grit sandpaper to create a slightly rough surface for better primer adhesion.
- Priming: Apply a metal primer specifically designed for adhesion to the fan's material. This will help the paint adhere properly and provide a more durable finish. Allow the primer to dry completely according to the manufacturer's instructions.
Painting the Fan
Applying the paint correctly is essential for a professional-looking finish:
- Thin Coats: Apply thin, even coats of paint to prevent drips and ensure even coverage. Multiple thin coats are preferable to one thick coat.
- Drying Time: Allow each coat of paint to dry completely before applying the next coat.
- Paint Type: Use a high-quality acrylic enamel paint or a spray paint specifically designed for metal. Spray painting can provide a smoother, more even finish, particularly for intricate details.
- Masking Tape: Use painter's tape to mask areas that should not be painted, such as any remaining wiring or the areas where the light fixtures will be reattached.
Reassembling the Fan
Once the paint is completely dry, carefully reassemble the fan:
- Reattach Blades: Reattach the blades, ensuring they are securely fastened and balanced. Refer to the labels and photographs taken during disassembly.
- Reconnect Light Fixtures: Reassemble and reconnect the light fixtures, ensuring all wiring is correctly connected and secured.
- Reattach Decorative Elements: Reattach any decorative elements or finials that were removed earlier.
Final Steps
After reassembly, ensure the following:
- Test the Fan: After allowing ample drying time, turn the power back on and test the fan's operation, ensuring all speeds and the light fixture function correctly.
- Cleanup: Carefully remove drop cloths and dispose of any paint or cleaning materials appropriately.
By following these steps, you can successfully paint a gold ceiling fan with a light, updating your space with a fresh look while maintaining the functionality and safety of the fixture.

How To Update A Ceiling Fan Without Removing It Savvy Apron

Update A Ceiling Fan Using Spray Paint

Golden Fan Better After Ceiling Makeover Painting Fans

How To Update A Ceiling Fan Without Removing It Savvy Apron

Ceiling Fan Makeover 100 Room Challenge The Palette Muse

Another Ceiling Fan Makeover And How Not To Paint A Nani S Notebook

Ceiling Fan Makeover 100 Room Challenge The Palette Muse

Another Ceiling Fan Makeover And How Not To Paint A Nani S Notebook

Diy Ceiling Fan Makeover One Room Challenge Week 4

My Favorite Ceiling Fan And I Painted It Gold Modern Wood Fans
Related Posts