Gypsum Board Ceiling Design for Bedroom: Enhancing Aesthetics and Functionality
Gypsum board, also known as drywall or plasterboard, is a widely used construction material renowned for its versatility, affordability, and ease of installation. It has become a popular choice for ceiling applications, particularly in bedrooms, due to its ability to create smooth, even surfaces and accommodate a variety of design options. The use of gypsum board in bedroom ceiling design allows for the integration of lighting, sound insulation, and aesthetically pleasing features that contribute to a relaxing and comfortable environment.
This article will explore various aspects of gypsum board ceiling design for bedrooms, focusing on its benefits, design considerations, installation techniques, and common challenges. The objective is to provide comprehensive information that can guide homeowners, interior designers, and contractors in making informed decisions regarding the incorporation of gypsum board ceilings into bedroom renovation or construction projects.
Gypsum board is manufactured by pressing a gypsum plaster core between two sheets of paper. This composition allows it to be easily cut, shaped, and fastened to ceiling joists or framing. The relatively lightweight nature of gypsum board simplifies installation, contributing to reduced labor costs and project timelines. Moreover, the material's fire-resistant properties enhance the overall safety of the structure. The smooth surface of gypsum board provides an ideal canvas for painting, wallpapering, or other decorative finishes, further expanding its design possibilities.
In the context of bedroom design, gypsum board ceilings offer several specific advantages. They can effectively conceal unsightly wires, pipes, and other mechanical elements, resulting in a cleaner, more organized appearance. The ability to create custom shapes and designs with gypsum board allows for the creation of unique and personalized spaces. Recessed lighting, cove lighting, and other integrated lighting solutions can be seamlessly incorporated into the ceiling, enhancing the ambiance and functionality of the bedroom. Furthermore, gypsum board can contribute to improved sound insulation, reducing noise transmission from adjacent rooms or floors, which is crucial for creating a peaceful sleeping environment.
Key Point 1: Design Considerations for Gypsum Board Bedroom Ceilings
Planning is paramount when designing a gypsum board ceiling for a bedroom. Several factors must be considered to ensure a successful and aesthetically pleasing outcome. Room size, ceiling height, architectural style, and desired functionality are all key variables that will influence the design choices.
For smaller bedrooms, a simple, flat gypsum board ceiling may be the most appropriate choice. Complex designs with excessive ornamentation can make the space feel cramped and overwhelming. Lighter colors and a smooth, even surface will help to create an illusion of spaciousness. Consider incorporating recessed lighting to minimize visual clutter and provide ample illumination. Conversely, in larger bedrooms with higher ceilings, more elaborate designs can be implemented. Dropped ceilings, coffered ceilings, or intricate patterns can add visual interest and create a sense of grandeur.
The architectural style of the bedroom should also be taken into account. In a traditional style bedroom, a gypsum board ceiling with ornate moldings and decorative details may be appropriate. In a modern or contemporary style bedroom, a minimalist design with clean lines and geometric shapes would be more fitting. The design should complement the overall aesthetic of the room and create a cohesive look.
Consider the function of the bedroom when designing the ceiling. If the bedroom is primarily used for sleeping, prioritize sound insulation and create a calming atmosphere. Consider using acoustic gypsum board, which is specifically designed to absorb sound. If the bedroom is also used as a home office or a reading room, incorporate adequate lighting for these activities. Consider installing dimmable lights to allow for adjustments based on the time of day and the task at hand.
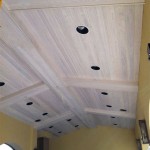
Lighting plays a crucial role in the overall ambiance of a bedroom. Gypsum board ceilings provide an excellent platform for integrating various lighting options. Recessed lighting is a popular choice for providing ambient illumination. Cove lighting, which is concealed behind a ledge or molding, creates a soft, indirect light that can add warmth and depth to the room. Pendant lights and chandeliers can be used to add a focal point and provide task lighting. Consider using energy-efficient LED lights to reduce energy consumption and prolong the lifespan of the bulbs.
Key Point 2: Installation Techniques and Best Practices
Proper installation is essential for ensuring the longevity, stability, and aesthetic appeal of a gypsum board ceiling. It is recommended that installation be performed by experienced professionals who are familiar with the necessary tools, techniques, and safety precautions. However, understanding the basic steps involved can help homeowners assess the quality of work and make informed decisions.
The first step in installing a gypsum board ceiling is to ensure that the ceiling joists or framing are properly aligned and level. Any imperfections in the framing can result in an uneven ceiling surface. Use a level and a straight edge to check the framing and make any necessary adjustments. Install furring strips perpendicular to the joists to provide a solid surface for attaching the gypsum board. Spacing between furring strips typically ranges from 16 to 24 inches, depending on the thickness of the gypsum board.
Cut the gypsum board to the appropriate size using a utility knife or a drywall saw. Score the paper on one side of the board, snap the core, and then cut the paper on the other side. Leave a small gap between the gypsum board and the adjacent walls to allow for expansion and contraction. This gap will be covered later with trim or molding.
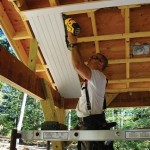
Attach the gypsum board to the furring strips using drywall screws. Use a screw gun to drive the screws into the gypsum board, ensuring that they are flush with the surface but not driven too deep, which could damage the paper. Space the screws approximately 12 inches apart along the edges of the board and 16 inches apart in the field. Stagger the joints between the gypsum board sheets to prevent cracking.
Once the gypsum board is installed, tape and mud the joints to create a seamless surface. Apply drywall tape over the joints and then apply several coats of joint compound, feathering the edges to create a smooth transition. Sand the joint compound until it is smooth and even with the surrounding surface. Apply a primer to the entire ceiling before painting or applying other finishes.
Safety is a paramount concern during gypsum board installation. Wear safety glasses, gloves, and a dust mask to protect yourself from debris and dust. Use caution when working at heights and follow all applicable safety regulations. Ensure that the work area is well-ventilated to prevent the buildup of dust and fumes.
Key Point 3: Common Challenges and Solutions
Even with careful planning and meticulous installation, certain challenges can arise during the construction of a gypsum board ceiling. Understanding these potential issues and knowing how to address them can help to minimize delays and ensure a successful outcome.
One common challenge is cracking. Cracks in gypsum board ceilings can be caused by a variety of factors, including movement in the framing, improper installation, and fluctuations in temperature and humidity. To minimize the risk of cracking, use high-quality gypsum board and ensure that the framing is properly supported. Stagger the joints between the gypsum board sheets and use a flexible joint compound. If cracks do occur, they can be repaired by applying fresh joint compound and sanding it smooth.
Another challenge is sagging. Sagging can occur if the gypsum board is not properly supported or if it is exposed to excessive moisture. To prevent sagging, use the appropriate thickness of gypsum board for the span and spacing of the framing. Ensure that the gypsum board is securely fastened to the framing. If sagging does occur, it may be necessary to reinforce the framing or replace the affected section of gypsum board.
Water damage is another significant concern. Leaks from the roof or plumbing can cause significant damage to gypsum board ceilings. Repair any leaks promptly to prevent further damage. If the gypsum board is exposed to water, it may need to be replaced. Before replacing the gypsum board, ensure that the underlying framing is dry and free from mold.
Mold growth can also be a problem, particularly in damp environments. Mold can grow on gypsum board that is exposed to moisture. To prevent mold growth, use a mold-resistant gypsum board in areas that are prone to moisture. Ensure that the area is well-ventilated and that any leaks are repaired promptly. If mold does grow, it should be removed and the affected area should be treated with a fungicide.
Finally, achieving a smooth, even finish can be challenging. It requires careful taping, mudding, and sanding. Use high-quality joint compound and apply multiple thin coats, feathering the edges to create a smooth transition. Sand the joint compound until it is smooth and even with the surrounding surface. Use a primer to seal the surface before painting or applying other finishes. Proper lighting during the finishing process is essential to identify and correct any imperfections.

Bedroom Ceiling Design False Gypsum Home Decor Ideas

Pin By Hani On Home Simple Ceiling Design Bedroom False Interior

Pictures Of Gypsum Board Bedroom Decor Decoration And Interior Design Company

Top 5 Bedroom False Ceiling Designs You Will Love Saint Gobain Gyproc

330 Gypsum Board Ceiling Ideas In 2025 False Design Modern

Bedroom False Ceiling Design New Modern Simple Trendy Designs

Gypsum Bedroom False Ceiling Thickness 12 5 Mm At Best In Mumbai

Master Bedroom False Ceiling Design For

Top 5 Bedroom False Ceiling Designs You Will Love Saint Gobain Gyproc

Best False Ceiling Design For Bedroom And Living Room Sunshine Home Painting Service Blog
Related Posts

