How To Fix A Ceiling Fan Light Chain
A ceiling fan light chain is a simple mechanism that controls the light fixture attached to a ceiling fan. When the chain breaks or becomes disconnected, the light may become inoperable, resulting in inconvenience and potentially requiring a replacement of the entire fan if not addressed. Repairing a light chain is typically a straightforward task that can be performed by most homeowners with basic tools and understanding. This article provides a detailed guide on how to diagnose and fix common issues associated with ceiling fan light chains, ensuring the light function is restored.
Identifying the Problem
Before attempting any repairs, it's crucial to accurately diagnose the specific problem affecting the light chain. Several issues can lead to a malfunctioning light chain, and understanding the root cause will dictate the appropriate course of action.
Broken Chain: This is the most obvious and common issue. The chain itself may have snapped due to wear and tear, excessive force, or simply age. A visual inspection will quickly confirm if the chain is broken. If the chain is disconnected near the fan housing, it may require using a ladder for closer inspection.
Disconnected Chain: The chain might still be intact but become disconnected from the switch mechanism inside the fan's light housing. This can happen if the small connector linking the chain to the switch loosens or breaks. The user would pull the chain, but the switch mechanism would not operate as a result.
Faulty Switch: The switch inside the light housing, which is activated by the chain, could be defective. This is less common but can occur due to electrical issues, wear, or manufacturing defects. In this case, the chain may be functioning, but the switch is unable to complete the electrical circuit to power the bulb.
Binding Chain: The chain can sometimes become tangled or bound within the fan's housing, preventing it from moving freely. This can make it difficult or impossible to turn the light on or off. Usually, it will require taking down the light kit to address and resolve this issue.
Electrical Issues: While the chain itself may appear to be the problem, underlying electrical issues within the fan or the wiring in the ceiling can also cause the light to malfunction. These issues should be addressed by a qualified electrician to avoid electrical shock or further damaging the electrical system.
Tools and Materials Required
Before starting the repair process, it's important to gather the necessary tools and materials. Having everything readily available will streamline the process and ensure a successful repair.
Ladder or Step Stool: To safely reach the ceiling fan and access the light chain, a sturdy ladder or step stool is essential. Ensure the ladder is placed on a stable surface and that appropriate safety measures are followed.
Screwdrivers: Both Phillips head and flathead screwdrivers may be needed to open the light housing and access the switch mechanism. The specific type of screwdriver required will depend on the screws used in the fan's construction.
Pliers: Pliers are useful for gripping, bending, and cutting the light chain or connector links. Needle-nose pliers are particularly helpful for working in tight spaces.
Wire Strippers: If replacing the switch, wire strippers are needed to safely remove insulation from the electrical wires connected to the switch. Most wire strippers also include crimping functions.
New Light Chain or Connector Links: If the chain is broken or the connector links are damaged, replacement parts will be needed. These can be purchased at most hardware stores. Verify it matches the original chain and that they both will work with each other.
Replacement Switch: If the switch is defective, a new switch of the same type and rating will be required. Ensure the replacement switch is compatible with the fan's voltage and wattage. It is commonly sold at most hardware stores too.
Electrical Tape: Electrical tape is used to insulate and protect any exposed wires after making electrical connections. It will avoid any shorts within the housing or any issues related to electrical continuity.
Safety Glasses: Safety glasses are essential to protect the eyes from debris or small parts that may dislodge during the repair process. It is required to adhere to basic safety rules.
Work Gloves: Work gloves can provide a better grip and protect the hands from sharp edges or electrical shock (ensure the power is off before working with any electrical components).
Step-by-Step Repair Instructions
Once the problem has been identified and the necessary tools and materials have been gathered, the repair process can begin. Follow these steps carefully to ensure a safe and effective repair.
Safety First: Before beginning any work, turn off the power to the ceiling fan at the circuit breaker. This is crucial to prevent electrical shock. It is important to confirm that the power is off at the fan by testing it with a non-contact voltage tester or by attempting to turn on the light.
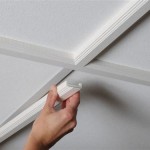
Access the Light Housing: Most ceiling fans have a light housing that covers the light fixture. Locate the screws or clips that hold the housing in place and carefully remove it. This will expose the switch mechanism and wiring.
Inspect the Chain Connection: Examine the connection between the light chain and the switch mechanism. If the chain is disconnected, use pliers to reattach it using a new connector link. Ensure the connection is secure and that the chain moves freely.
Repairing a Broken Chain: If the chain is broken, remove the damaged section. Use pliers to open the connector link at each end of the break. Attach a new section of light chain using the connector links. Ensure the new section of chain is the same length as the original to maintain proper functionality.
Replacing a Faulty Switch: If the switch is defective, it will need to be replaced. Before disconnecting the old switch, take a picture or draw a diagram of the wiring connections. This will help ensure that the new switch is wired correctly.
Disconnect the Wires: Use wire strippers to carefully remove the insulation from the wires connected to the old switch. Disconnect the wires from the switch terminals. Some switches may have screw terminals, while others may use push-in connectors. Use the appropriate method to disconnect the wires.
Connect the New Switch: Connect the wires to the new switch, following the wiring diagram or picture taken earlier. Ensure that each wire is securely connected to the correct terminal. If using screw terminals, tighten the screws firmly. If using push-in connectors, ensure the wires are fully inserted and locked in place.
Insulate the Connections: Wrap each wire connection with electrical tape to insulate and protect it from short circuits. Ensure that all exposed wires are completely covered with tape.
Reassemble the Light Housing: Carefully reassemble the light housing, ensuring that all wires are neatly tucked away. Secure the housing with the screws or clips that were removed earlier.
Restore Power and Test: Turn the power back on at the circuit breaker. Test the light by pulling the chain. If the light turns on and off correctly, the repair was successful. If the light still does not work, repeat and address each steps.
Troubleshooting: If the light does not work after completing the repair, there may be other issues. Ensure that the light bulb is not burned out. Check the wiring connections again to ensure they are secure. If the problem persists, consult a qualified electrician.
Chain Lubrication: A little lubrication will go a long way when addressing ceiling fan light chains. By applying a little silicone-based or graphite lubricant to the moving parts of the pull chain mechanism, individuals can greatly improve its functionality and lifespan. The lubricant reduces friction, preventing the chain from sticking or becoming difficult to pull. This easy preventative measure not only guarantees smooth operation but also minimizes the possibility of future breakage or damage, resulting in a well-maintained and dependable ceiling fan light.
Chain Extension: Chain extensions are a simple and efficient solution to enhance the functionality and accessibility of ceiling fan pull chains. If the original chain is too short or difficult to reach, adding an extension can make operating the fan and its lights much easier. Extensions are commonly made of metal or plastic and come in a variety of lengths and designs to match any home décor. They are simple to connect, requiring no special tools or skills. By adding a chain extension, users may easily adjust their ceiling fan settings, contributing to a more pleasant and user-friendly experience.

Ceiling Fan Light Repair Home Tutor

Ceiling Fan Pull Chain Came Out Doityourself Com Community Forums

Fix A Snapped Fan Pull Chain At No Cost How To

Replace A Hunter Ceiling Fan Pull Chain Switch Broken Fix

4 Ways To Replace A Ceiling Fan Pull Chain Switch Pulls

How To Easily Repair Or Replace Your Ceiling Fan Chain

Ceiling Fan Pull Chain Switch Replacement How To Replace A On Easy

4 Ways To Replace A Ceiling Fan Pull Chain Switch Wikihow

How To Repair Pull Chain Light Switch In Ceiling Fan

New Ceiling Fan Switch With Fix Pull Chain Problem Home And Garden Life
Related Posts