Ceiling Fan Won't Turn Off With Remote: Troubleshooting and Solutions
Ceiling fans are a common fixture in many homes, providing both light and air circulation. Modern ceiling fans often come equipped with remote controls, adding convenience to their operation. However, a recurring issue that homeowners face is a ceiling fan that fails to turn off using the remote control. This problem can be frustrating and consume unnecessary energy if the fan continues to run despite attempts to shut it down remotely. Understanding the potential causes and troubleshooting steps is crucial for resolving this issue efficiently.
The inability of a ceiling fan to respond to its remote can stem from a variety of factors, ranging from simple battery issues to more complex electrical problems within the fan unit or the remote itself. A systematic approach to diagnosing the problem can help pinpoint the source and determine the appropriate solution. This article will explore common reasons for this malfunction, providing a comprehensive guide to troubleshooting and implementing effective remedies.
Weak or Dead Batteries in the Remote
One of the most common reasons a ceiling fan remote fails to operate correctly is due to weak or dead batteries. Remote controls rely on battery power to transmit signals to the receiver unit in the ceiling fan. As batteries deplete, the signal strength weakens, potentially making it impossible for the receiver to detect the command to turn off the fan. Regular battery replacement is a preventive measure against this issue.
To check the batteries, remove the battery cover on the remote control. Inspect the batteries for any signs of corrosion or leakage. If corrosion is present, clean the battery compartment with a cotton swab dipped in rubbing alcohol. Replace the batteries with fresh ones of the correct type (usually AAA or AA). Ensure the batteries are inserted according to the polarity markings (+ and -) inside the battery compartment. After replacing the batteries, test the remote by attempting to turn the fan on and off. If the fan responds, the battery issue was the likely cause.
If the remote still fails to control the fan after replacing the batteries, it is advisable to test the remote using a different device. Some smartphones have infrared (IR) cameras that can detect the signal emitted by the remote. By pointing the remote at the phone's camera while pressing the power button, a faint light should be visible on the phone's screen if the remote is transmitting. If no light is visible, the remote may be faulty, even with new batteries. Alternatively, use a dedicated IR detector readily available from electronics retailers.
Interference with the Remote Signal
Interference with the remote control's signal can also prevent the ceiling fan from turning off. Several factors can disrupt the signal transmission, including other electronic devices operating on the same frequency, physical obstructions, and radio frequency interference from nearby sources. Understanding these sources of interference and taking steps to mitigate them is critical in resolving the remote control issue.
Other electronic devices, such as televisions, stereos, and routers, can emit signals that interfere with the remote's signal. To minimize this interference, try turning off or moving these devices away from the ceiling fan and remote. Cordless phones, especially older models, are notorious for causing interference and should be kept away from the area when operating the fan.
Physical obstructions, such as walls and furniture, can also block the remote's signal. Ensure that there is a clear line of sight between the remote and the ceiling fan. Avoid standing behind large objects when operating the remote. Repositioning the remote or adjusting your position in the room may improve signal transmission.
Radio frequency interference (RFI) can originate from various sources, including nearby radio towers, amateur radios, and even certain types of lighting fixtures. While it may be difficult to eliminate all sources of RFI, you can try shielding the receiver unit in the ceiling fan. Wrapping the receiver with aluminum foil can sometimes reduce interference. Additionally, consider using a remote with a different frequency or switching to a hard-wired wall control if RFI is a persistent problem.
Incorrect Frequency Synchronization
Many ceiling fan remotes and receiver units require synchronization to operate correctly. This synchronization ensures that the remote is communicating with the correct fan and not interfering with other fans in the vicinity. An incorrect or lost synchronization can result in the remote failing to control the fan, including the inability to turn it off. The process for synchronizing the remote and receiver varies depending on the brand and model of the ceiling fan, but generally involves a series of steps to reset and re-establish the connection.
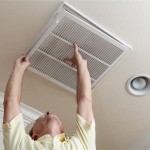
Refer to the ceiling fan's user manual for specific instructions on how to synchronize the remote and receiver. Typically, the synchronization process involves locating a "learn" or "sync" button on the receiver unit, which is usually located in the fan's canopy (the housing that covers the wiring at the ceiling). To access the receiver, you may need to turn off the power to the fan at the breaker and carefully remove the fan's canopy.
Once you have located the "learn" or "sync" button, press and hold it while simultaneously pressing a button on the remote (usually the fan speed or light button). Hold both buttons for a few seconds until the fan's light flickers or the fan makes a sound, indicating that the synchronization process is complete. Reassemble the fan's canopy and restore power to the fan at the breaker.
If the user manual is unavailable, search online for the specific model number of your ceiling fan and "remote synchronization instructions." Many manufacturers provide detailed instructions on their websites or through online support forums. If multiple ceiling fans are in close proximity, it is essential to synchronize each remote to its corresponding fan to prevent cross-interference.
Faulty Receiver Unit in the Ceiling Fan
The receiver unit within the ceiling fan is responsible for receiving signals from the remote and translating them into actions, such as turning the fan on or off. A faulty receiver is a significant cause of remote control malfunctions. Over time, the electronic components within the receiver can degrade or fail due to power surges, overheating, or general wear and tear. Diagnosing a faulty receiver often involves testing the unit with a multimeter or visual inspection for signs of damage.
Before inspecting the receiver, ensure the power to the ceiling fan is turned off at the circuit breaker. Carefully remove the fan's canopy to access the receiver unit. Visually inspect the receiver for any signs of damage, such as burned components, loose wires, or corrosion. If any visible damage is present, the receiver likely needs replacement.
If no visible damage is apparent, test the receiver using a multimeter. A multimeter can measure voltage, current, and resistance, allowing you to check the continuity of the wires and components within the receiver. Refer to the wiring diagram for your ceiling fan model to identify the correct terminals to test. Check for proper voltage and continuity according to the diagram. If the multimeter reveals inconsistencies or a lack of continuity, the receiver is likely faulty.
Replacing a faulty receiver requires purchasing a compatible replacement unit. Ensure the replacement receiver is specifically designed for your ceiling fan model or is a universal receiver unit that supports the fan's features. Follow the wiring diagram provided with the replacement receiver to connect the wires correctly. Incorrect wiring could damage the new receiver or the fan motor.
Defective Remote Control
While the receiver unit is a common point of failure, the remote control itself can also be defective. Internal components within the remote can fail, leading to the inability to transmit signals to the receiver. A defective remote may exhibit symptoms such as unresponsive buttons, intermittent operation, or complete failure to power on, even with fresh batteries. Testing the remote with an IR detector or through substitution with a known working remote can help diagnose a defective remote control.
As previously mentioned, an IR detector or a smartphone with an infrared camera can be used to test the remote's signal transmission. Point the remote at the detector or the phone's camera while pressing the power button. If no signal is detected or the signal is weak, the remote may be faulty. In some cases, the infrared LED on the remote may be damaged or misaligned, preventing it from emitting a signal.
The most definitive way to determine if the remote is defective is to test the ceiling fan with a known working remote. If you have another identical ceiling fan in your home, try using that fan's remote to control the malfunctioning fan. If the second remote operates the fan correctly, the original remote is likely defective and needs replacement.
Replacing a defective remote involves purchasing a compatible replacement. Contact the manufacturer of the ceiling fan or search online for a replacement remote that matches the model number of your existing remote. Alternatively, consider purchasing a universal ceiling fan remote that is compatible with a wide range of ceiling fan models. Program the universal remote according to the instructions provided to ensure it communicates correctly with the receiver unit in the ceiling fan.
Wiring Issues in the Ceiling Fan or Wall Switch
Wiring problems within the ceiling fan or at the wall switch can also cause the fan to malfunction and prevent it from turning off using the remote. Loose connections, frayed wires, or incorrect wiring configurations can disrupt the flow of electricity and interfere with the remote's operation. A thorough inspection of the wiring connections is crucial to identify and rectify any potential issues.
Begin by turning off the power to the ceiling fan at the circuit breaker. Remove the fan's canopy and inspect the wiring connections within the fan's housing. Check for any loose wires, frayed insulation, or signs of corrosion. Ensure that all wire connectors are securely attached and that the wires are properly connected according to the wiring diagram. Tighten any loose connections using a screwdriver or pliers.
Next, inspect the wiring at the wall switch that controls the ceiling fan. Remove the switch plate and carefully examine the wiring connections behind the switch. Look for any loose wires, frayed insulation, or signs of damage. Ensure that the wires are properly connected to the switch terminals and that the switch is functioning correctly. Use a multimeter to test the switch for continuity and proper voltage.
If you find any damaged or deteriorated wires, replace them with new wires of the same gauge and type. If the wiring configuration appears incorrect or you are unsure about the proper connections, consult a qualified electrician to ensure the wiring is safe and compliant with local electrical codes. Incorrect wiring can pose a fire hazard and damage the ceiling fan or other electrical components.

Ceiling Fan Remote Troubleshooting The Home Depot

How To Fix Minka Aire Remote Light Won T Turn Off

Remote Reset

Wynn Ceiling Fan Turns On By Itself Fixed

How To Turn Off Harbor Breeze Fan Without Remote

The Ceiling Fan Light Won T Turn Off Simple Fixing Guide Lightingvilla Com

Hampton Bay Ceiling Fan Troubleshooting Guide The Home Depot

How To Troubleshoot Your Ceiling Fan Addlon

The Ceiling Fan Light Won T Turn Off Fix Lightingvilla Com

Hampton Bay Ceiling Fan Troubleshooting Guide The Home Depot
Related Posts