How To Replace Drop Ceiling Tiles In A Basement
Replacing drop ceiling tiles in a basement is a common home improvement task that can significantly enhance the aesthetics and functionality of the space. Whether the existing tiles are damaged, stained, or simply outdated, replacing them is a relatively straightforward process that can be completed by most homeowners with basic tools and skills. This article provides a comprehensive guide to replacing drop ceiling tiles in a basement, covering the necessary tools, preparation steps, and installation techniques.
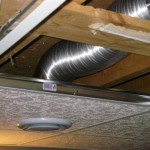
A drop ceiling, also known as a suspended ceiling, is a secondary ceiling that is hung below the main structural ceiling. It is a popular choice for basements because it conceals pipes, wiring, and ductwork while providing easy access for maintenance and repairs. Drop ceilings typically consist of a grid system of metal runners suspended from the floor joists above, with lightweight tiles placed within the grid. These tiles come in a variety of materials, including mineral fiber, fiberglass, and vinyl, each offering different properties in terms of acoustics, fire resistance, and moisture resistance.
Before embarking on the replacement process, it is crucial to understand the different types of drop ceiling tiles available and choose the ones that best suit the specific needs of the basement. Factors to consider include the level of humidity in the basement, the desired acoustic properties, and the overall aesthetic goals. Choosing the right tiles can contribute to a more comfortable and visually appealing basement environment.
Preparing for the Replacement
The first step in replacing drop ceiling tiles is to gather the necessary tools and materials. Essential tools include a stepladder, a utility knife, a measuring tape, gloves, safety glasses, and a pencil. A vacuum cleaner or broom is also useful for cleaning the grid system before installing the new tiles. The primary material needed, of course, is the replacement drop ceiling tiles themselves. Ensure that the new tiles are the same size and thickness as the existing ones to ensure a proper fit within the grid system.
Before starting the replacement process, it is essential to inspect the existing drop ceiling grid for any damage. Check for bent or broken runners, loose wires, or corroded components. Repairing these issues before installing the new tiles will ensure the structural integrity of the ceiling and prevent future problems. Minor bends can often be straightened with pliers, while more significant damage may require replacing sections of the grid.
Safety is paramount when working on any home improvement project. Before starting, turn off the power to any electrical circuits running above the drop ceiling. This will prevent the risk of electric shock while working around wiring. Wear safety glasses to protect your eyes from dust and debris, and wear gloves to protect your hands from sharp edges or cleaning chemicals. If the existing tiles contain asbestos, which was common in older homes, it is crucial to have them professionally removed to avoid health risks associated with asbestos exposure. Professional asbestos abatement is a specialized service that should not be attempted by untrained individuals.
Removing the old tiles is a straightforward process. Gently lift each tile up and tilt it to clear the grid system. Lower the tile and carefully remove it from the area. If the tiles are stuck or difficult to remove, use a utility knife to carefully cut around the edges to loosen them. Be careful not to damage the grid system while removing the old tiles. After removing the tiles, inspect the area above the drop ceiling for any potential hazards, such as exposed wiring or water leaks. Address any issues before proceeding with the installation of the new tiles.
Once the old tiles have been removed, it is a good opportunity to clean the grid system. Use a vacuum cleaner or broom to remove any dust, dirt, or debris that has accumulated on the runners. This will ensure a clean surface for the new tiles to rest on. It is also a good idea to inspect the suspension wires and adjustment clips that support the grid system. Tighten any loose wires and adjust the clips as needed to ensure that the grid is level and properly supported.
If the existing tiles were held in place with adhesive, scrape off any remaining adhesive residue from the grid system. A putty knife or scraper can be used for this purpose. Apply a solvent or adhesive remover to soften the residue if necessary. Ensure that the grid system is clean and dry before installing the new tiles.
Installing the New Drop Ceiling Tiles
With the grid system cleaned and prepared, it is time to install the new drop ceiling tiles. Start by carefully lifting each tile and tilting it to fit it into the grid opening. Ensure that the edges of the tile are properly aligned with the runners. Gently lower the tile into place, making sure it rests securely on the grid system.
When installing the tiles, pay attention to the orientation of any patterns or textures on the tile surface. Align the tiles according to the desired pattern to create a visually appealing ceiling. If the tiles are directional, follow the manufacturer's instructions for proper installation.
In some cases, it may be necessary to cut tiles to fit around pipes, ducts, or other obstructions. Use a measuring tape and pencil to mark the required cut on the tile. Use a utility knife to carefully score the tile along the marked line. Snap the tile along the score line to create a clean edge. For more complex cuts, a jigsaw or drywall saw may be necessary. Ensure that the cut edges are smooth and clean to prevent them from fraying or crumbling.
When cutting tiles, always wear safety glasses and gloves to protect yourself from dust and debris. Work in a well-ventilated area to avoid inhaling dust particles. Dispose of any scrap pieces of tile properly.
For tiles that need to be trimmed to fit along the edges of the room, measure the distance between the last full tile and the wall. Subtract a small amount (approximately 1/4 inch) to allow for expansion and contraction. Cut the tile to the required size using a utility knife or saw. Install the trimmed tile as described above. If the gap between the tile and the wall is too large, consider using molding or trim to conceal the gap and create a more finished look.
As you install the tiles, periodically check the level of the ceiling using a level. If any tiles are sagging or uneven, adjust the suspension wires or clips to correct the problem. Ensure that all tiles are resting securely on the grid system and are properly aligned.
If the new tiles are being installed in a basement with high humidity, consider using moisture-resistant or waterproof tiles. These tiles are designed to withstand damp conditions and prevent mold growth. They are also easier to clean and maintain.
Addressing Specific Challenges
One common challenge when replacing drop ceiling tiles is dealing with uneven or sloping ceilings. In older homes, the floor joists above the basement may not be perfectly level, resulting in an uneven drop ceiling. To address this issue, adjust the suspension wires or clips to compensate for the unevenness. You may need to adjust the height of individual tiles to create a level surface. A laser level can be helpful for ensuring that the ceiling is level across the entire room.
Another challenge is dealing with obstructions, such as pipes, ducts, or electrical boxes. These obstructions may require cutting holes in the tiles to allow them to fit around them. Use a hole saw or utility knife to carefully cut the required opening in the tile. Be sure to measure the size and location of the obstruction accurately to ensure a proper fit. Consider using trim or molding to conceal the edges of the cutouts and create a more finished look.
In some cases, it may be necessary to reinforce the drop ceiling grid system to support heavier tiles or to accommodate additional weight, such as light fixtures or speakers. This can be done by adding additional suspension wires or clips, or by replacing the existing runners with heavier-duty components. Consult with a professional contractor or engineer if you are unsure about the structural integrity of the grid system.
When installing light fixtures in a drop ceiling, it is important to use fixtures that are specifically designed for drop ceilings. These fixtures typically have a frame or bracket that rests on the grid system, providing support and preventing the fixture from sagging. Ensure that the weight of the fixture is properly supported by the grid system. Consider using LED light fixtures, which are more energy-efficient and generate less heat than traditional incandescent or fluorescent fixtures.
After completing the installation of the new drop ceiling tiles, inspect the ceiling carefully for any imperfections. Check for gaps, uneven tiles, or loose connections. Make any necessary adjustments to ensure that the ceiling is level, secure, and visually appealing. Clean up any dust or debris that may have accumulated during the installation process. The basement space will now have a refreshed and potentially improved aesthetic.

How To Install A Drop Ceiling

Replacing Drop Ceiling Tiles

How To Replace A Drop Ceiling The Lilypad Cottage

Replacing Drop Ceiling Tiles

Diy How To Update Old Ceiling Tile Pink Little Notebookpink Notebook

How To Install Drop Ceiling Tiles For A Bathroom Diy Danielle

How To Easily Update An Ugly Drop Ceiling

Basement Drop Ceiling Tiles Total Finishing

Drop Ceiling Tile Installation Acoustic Suspended

Update Your Drop Ceiling Dropped Basement Finishing
Related Posts