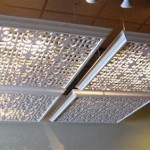
How To Install Drop Ceiling Tiles In Basement
Installing a drop ceiling, also known as a suspended ceiling, in a basement is a popular home improvement project. It offers several advantages, including concealing unsightly ductwork, pipes, and wiring, improving acoustics, and providing easy access to utilities for maintenance and repairs. This article details the process of installing drop ceiling tiles in a basement, outlining the necessary steps and considerations for a successful installation.
Before embarking on the project, it's crucial to assess the basement's suitability for a drop ceiling. Measure the height from the floor to the lowest obstruction (pipes, ducts, etc.). A minimum clearance of usually three inches is recommended above your drop ceiling grid to accommodate the tiles and suspension system, while the International Residential Code (IRC) requires a minimum ceiling height of 7 feet (84 inches) in habitable spaces. Ensure compliance with local building codes, which may have specific requirements for ceiling height, fire resistance, and access to utilities.
Planning is an essential initial step. Accurately measure the dimensions of the basement. Create a layout plan indicating the placement of the main tees, cross tees, and border tiles. Optimizing the layout minimizes the number of cut tiles around the perimeter, reducing waste and simplifying the installation process. Consider the placement of light fixtures, HVAC vents, and other features that will integrate into the ceiling. Determine the desired height of the ceiling, which will affect the length of the hanger wires.
Materials and Tools Required
Gathering the necessary materials and tools beforehand streamlines the installation process and prevents delays. Key materials include:
Main Tees: These are the primary structural components of the ceiling grid, running the length of the room.
Cross Tees: These are shorter tees that connect to the main tees, forming a grid pattern.
Wall Angle: This is attached to the walls around the perimeter of the room, providing support for the edge of the ceiling tiles.
Hanger Wire: This is used to suspend the ceiling grid from the floor joists above.
Drop Ceiling Tiles: These are available in various materials, sizes, and designs. Choose tiles appropriate for basement environments, considering moisture resistance and sound absorption properties.
Fasteners: Screws, nails, or anchors for attaching the wall angle to the walls and securing the hanger wires to the floor joists.
Essential tools include:
Measuring Tape: For accurate measurements of the room and ceiling components.
Level: For ensuring the ceiling grid is level and plumb.
Chalk Line: For marking straight lines on the walls and floor joists.
Drill with appropriate drill bits: For installing fasteners into the walls and floor joists.
Tin Snips or Metal Cutters: For cutting the main tees, cross tees, and wall angle to size.
Utility Knife: For cutting the ceiling tiles.
Safety Glasses: For protecting eyes from debris.
Gloves: For protecting hands.
Ladder or Scaffolding: For reaching the ceiling and working at height.
Preparing the Basement for Installation
Proper preparation of the basement is crucial for a smooth and accurate installation. Begin by clearing the space of any furniture, boxes, or other obstructions. Cover the floor with drop cloths to protect it from dust and debris.
Locate and mark the position of any utilities, such as electrical wiring, plumbing pipes, or HVAC ducts, that may interfere with the ceiling grid. Plan the layout of the ceiling grid to avoid these obstructions. If necessary, reroute or protect these utilities before proceeding with the installation. Consult with qualified professionals for electrical or plumbing modifications.
Determine the desired height of the drop ceiling. Use a laser level or a water level to mark a level line around the perimeter of the room at the chosen height. This line will serve as a reference for installing the wall angle. Ensure the line accounts for any existing floor unevenness to avoid creating a sloping ceiling.
Locate the floor joists above the existing ceiling. Mark their position on the walls. These joists will serve as the anchor points for the hanger wires. Use a stud finder or tap the ceiling to locate the joists. A consistent tapping sound indicates the presence of a joist.
Installing the Ceiling Grid
Installing the ceiling grid involves several steps, each requiring precision and attention to detail. The goal is to create a level, square, and structurally sound framework for supporting the ceiling tiles.
Installing the Wall Angle: Begin by attaching the wall angle to the walls along the marked level line. Use screws, nails, or anchors, depending on the wall material. Ensure the wall angle is securely fastened and level around the entire perimeter of the room. Overlap the corners of the wall angle for a clean and professional finish. Avoid gaps or unevenness in the wall angle, as this will affect the alignment of the ceiling tiles.
Hanging Main Tees: Cut the main tees to the appropriate length, considering the dimensions of the room and the desired layout. Use tin snips or metal cutters to make clean and accurate cuts. Attach the hanger wires to the floor joists above, spacing them according to the manufacturer's recommendations. Typically, hanger wires are spaced 4 feet apart along the main tees. Use screws or nails to securely fasten the hanger wires to the floor joists. Ensure the hanger wires are taut and plumb. Attach the main tees to the hanger wires using the appropriate clips or fasteners. Adjust the height of the hanger wires to ensure the main tees are level and aligned with the wall angle. Use a level to check the alignment of the main tees.
Installing Cross Tees: Cut the cross tees to the appropriate length, considering the dimensions of the ceiling tiles. Connect the cross tees to the main tees, forming a grid pattern. The spacing of the cross tees depends on the size of the ceiling tiles. For standard 2' x 2' tiles, the cross tees should be spaced 2 feet apart. For 2' x 4' tiles, they should be spaced 4 feet apart. Ensure the cross tees are securely connected to the main tees and are level and plumb. Use a level to check the alignment of the cross tees.
Squaring the Grid: Before installing the ceiling tiles, it is essential to ensure the grid is square. Measure the diagonals of the grid. If the diagonals are equal, the grid is square. If not, adjust the position of the main tees and cross tees until the diagonals are equal. A square grid ensures the ceiling tiles will fit properly and the ceiling will have a professional appearance.
Installing the Ceiling Tiles
With the ceiling grid in place, the final step is to install the ceiling tiles. This process involves carefully lifting and placing the tiles into the grid openings.
Cutting Border Tiles: Begin by measuring the size of the border tiles required around the perimeter of the room. Accurately cut the tiles to size using a utility knife or a tile cutter. Ensure the cuts are straight and clean for a professional finish. Use a straightedge as a guide when cutting the tiles. Cutting partial tiles is often required to correctly fill spaces around the perimeter of the room where a full tile will not fit.
Placing the Tiles: Carefully lift each ceiling tile and tilt it upwards to fit it through the grid opening. Gently lower the tile into place, ensuring it rests securely on the grid frame. Avoid damaging the tiles during installation. Handle the tiles with clean gloves to prevent smudges or fingerprints.
Integrating Light Fixtures and Vents: As you install the tiles, integrate any light fixtures, HVAC vents, or other features into the ceiling. Cut holes in the tiles to accommodate these features. Use a template or a cutout tool to ensure the holes are the correct size and shape. Securely attach the light fixtures and vents to the ceiling grid or the structure above. Ensure the light fixtures and vents are properly wired and connected according to local electrical codes and the manufacturer's instructions.
Addressing Common Challenges
Several challenges may arise during the installation of a drop ceiling. Understanding these potential issues and having solutions prepared can mitigate difficulties.
Uneven Ceiling Height
Basement floors and joists may not be perfectly level, leading to variations in the drop ceiling height. To address this, meticulously measure and adjust the hanger wires to compensate for any differences. Minor imperfections can often be concealed by slight adjustments during the tile installation phase.
Obstructions
Pipes, ducts, and wiring frequently present obstacles. Plan the ceiling layout to minimize contact with these elements. If necessary, consider lowering the entire ceiling or boxing around obstructions. Professional help may be necessary for more complex scenarios.
Insufficient Headroom
Minimum ceiling height requirements must be met. If headroom is limited, explore alternative ceiling options such as drywall ceilings or opting for a shallower drop ceiling system.
Proper planning, accurate measurements, and careful installation techniques are essential for a successful drop ceiling project. Adhering to manufacturer's instructions and local building codes ensures both the aesthetic appeal and safety of the finished ceiling.

How To Easily Install A Drop Ceiling Ron Hazelton

How To Install A Drop Ceiling Diy For Beginners

Drop Ceiling Tiles Installation Tips Diy Family Handyman

Finish Your Basement With Drop Ceiling Tiles Decorative Inc

Drop Ceiling Installation How To Install A Homeserve Usa

Installing Basement Drop Ceiling Tiles Acoustic Tile Is Easy As Long You Measure Twice Cut Once

How To Install A Drop Ceiling Ceilings Armstrong Residential

How To Install A Drop Ceiling Diy For Beginners

Diy How To Update Old Ceiling Tile Pink Little Notebookpink Notebook

Basement Ceiling Ideas Installation
Related Posts


