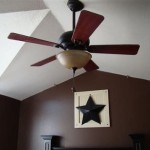
How to Run Crown Molding on a Vaulted Ceiling
Installing crown molding enhances the aesthetic appeal of any room, adding architectural detail and a sense of sophistication. However, navigating the complexities of a vaulted ceiling presents unique challenges compared to installing crown molding on a standard horizontal surface. These challenges include dealing with varying angles, precise measurements, and the need for accurate cuts to ensure a seamless and professional finish. This article offers a comprehensive guide on how to run crown molding on a vaulted ceiling, covering essential tools, techniques, and considerations for a successful installation.
Planning and Preparation for Vaulted Ceiling Crown Molding
Before commencing the physical installation, careful planning and preparation are paramount. This stage involves assessing the ceiling's geometry, selecting the appropriate molding, and gathering the necessary tools and materials. Neglecting this initial phase can lead to inaccuracies and complications during the installation process, potentially resulting in wasted materials and rework.
First, accurately measure the length of each wall segment where the crown molding will be installed. This requires precise measurements along the top edge of the wall, where the molding will meet the ceiling. For vaulted ceilings, special attention must be paid to the angles formed where the walls meet the ceiling. A protractor or angle finder can be used to determine these angles accurately. Record all measurements and angles meticulously, creating a detailed blueprint of the installation layout.
Next, select the appropriate crown molding. Consider the style of the room and the desired aesthetic. Crown molding is available in various materials, including wood, polyurethane, and MDF (Medium-Density Fiberboard). Wood offers a classic look and can be stained or painted, while polyurethane is lightweight, water-resistant, and easier to install. MDF is a cost-effective option but is more susceptible to moisture damage. Choose a molding that is suitable for the environment and easy to handle.
The following tools and materials are essential for a successful crown molding installation on a vaulted ceiling: * Crown molding of your choice * Miter saw with a sharp blade designed for crown molding * Coping saw * Caulk gun and paintable caulk * Wood filler * Measuring tape * Pencil * Angle finder or protractor * Stud finder * Nail gun or hammer and finishing nails * Construction adhesive * Safety glasses * Dust mask * Ladder
Finally, prepare the surfaces where the crown molding will be installed. Ensure the walls and ceiling are clean and free of dust, dirt, and debris. Repair any imperfections, such as cracks or holes, with spackle and sand smooth. Prime the walls and ceiling to ensure proper adhesion of the molding and paint.
Cutting Techniques for Vaulted Ceiling Crown Molding
Accurate cutting is arguably the most critical aspect of installing crown molding on a vaulted ceiling. The complex angles and varying slopes require precise cuts to ensure seamless transitions and a professional-looking finish. Mastering the proper cutting techniques is essential for achieving a high-quality installation.
Understanding the concept of "spring angle" is crucial. The spring angle refers to the angle at which the crown molding sits against the wall and ceiling. This angle is typically 45 degrees for standard crown molding, but it can vary depending on the specific molding used. The miter saw settings must be adjusted to account for the spring angle to achieve accurate cuts. Most miter saws have settings that can be adjusted for crown molding, simplifying the process.
For inside corners, use the "coping" technique. Coping involves cutting one piece of molding with a miter saw and then using a coping saw to remove the back portion of the molding, creating a profile that matches the shape of the adjoining piece. This technique allows for a precise fit, even if the corner angles are not perfectly square. Practice coping on scrap pieces of molding to develop the necessary skill and technique.
Outside corners require miter cuts. Determine the correct miter angle based on the angle of the corner and the spring angle of the crown molding. A miter saw with a digital angle finder can greatly assist in achieving accurate miter cuts. Test the fit of the mitered pieces before applying adhesive or nails to ensure a proper alignment. Slight adjustments may be necessary to achieve a seamless transition.
When dealing with vaulted ceilings, the angles at which the walls meet the ceiling will vary. This necessitates calculating and cutting different miter angles for each corner. Use the angle finder to determine the exact angle of each corner and apply the appropriate calculations to determine the correct miter saw settings. It is advisable to cut slightly long and then fine-tune the fit using a block plane or sandpaper.
Installation Procedures for Vaulted Ceiling Crown Molding
Once the molding has been cut and prepared, the next step is to install it securely to the walls and ceiling. Proper installation techniques are crucial for ensuring the molding remains in place and maintains its aesthetic appeal over time. This involves using appropriate adhesives, fasteners, and techniques to achieve a durable and visually appealing installation.
Start by applying construction adhesive to the back of the crown molding. This will provide an initial bond and help hold the molding in place while it is being secured with fasteners. Use a high-quality construction adhesive that is specifically designed for crown molding installation.
Position the crown molding against the wall and ceiling, ensuring it is aligned properly with the marked lines. Use a nail gun or hammer and finishing nails to secure the molding to the wall studs and ceiling joists. Drive the nails at an angle to provide a stronger hold. Space the nails approximately 12 to 16 inches apart, or closer if necessary to ensure a secure attachment.
At inside corners, apply caulk to fill any gaps or imperfections. Use a paintable caulk that matches the color of the crown molding. Smooth the caulk with a wet finger or a caulk smoothing tool to create a seamless transition. At outside corners, use wood filler to fill any gaps or imperfections. Sand the wood filler smooth and prime before painting.
When joining two pieces of crown molding along a straight run, create a scarf joint. A scarf joint involves cutting the ends of the two pieces of molding at a 45-degree angle and overlapping them. This creates a stronger and more visually appealing joint than a simple butt joint. Apply construction adhesive to the back of the scarf joint and secure it with nails. Fill any gaps with wood filler and sand smooth before painting.
After the crown molding has been installed, inspect the entire installation for any imperfections. Fill any nail holes with wood filler, sand smooth, and prime. Apply a final coat of paint to match the color of the walls and ceiling. This will create a seamless and professional-looking finish.
Throughout the installation process, safety should always be a priority. Wear safety glasses and a dust mask to protect your eyes and lungs from debris. Use a stable ladder and exercise caution when working at heights. Follow all safety guidelines provided by the tool manufacturers.
Dealing with vaulted ceilings adds considerable complexity. One recommended approach is to install "spring blocks" to provide a consistent surface for attaching the molding. These blocks are typically triangular and are attached to the ceiling and wall at regular intervals, providing a consistent angle for the crown molding to rest against. This can simplify the process of cutting and installing the molding.
Another option is to use flexible crown molding. Flexible molding is made of a polyurethane material that can be bent and shaped to conform to curved or irregular surfaces. This can be particularly useful for vaulted ceilings that have complex curves or angles. However, flexible molding is typically more expensive than traditional wood or MDF molding.
When working with vaulted ceilings, it is often helpful to have a partner assist with the installation. A second set of hands can make it easier to hold the molding in place, align the pieces, and ensure a secure attachment. Communication is essential when working with a partner to ensure the job is done safely and accurately.
Running Crown On Cathedral Ceilings Jlc

Installing Crown Molding Around A Cathedral Ceiling Fine Homebuilding

How To Install Crown Molding On Vaulted Or Cathedral Ceilings The Joy Of Moldings

Crown Molding On Angled Ceilings Makely

Installing Crown Molding On A Vaulted Ceiling Pro Construction Guide

How To Install Crown Molding On A Vaulted Cathedral Ceiling Without Transition Piece

How To Install Crown Molding On Vaulted Or Cathedral Ceilings The Joy Of Moldings

Crown Molding On Angled Ceiling Sawdust Girl

Installing Crown Moulding Part Two Canadian Woodworking

Nightmare Job Vaulted Ceiling Crown Molding Mobile Home Bedroom Renovation
Related Posts

