How to Make a Ceiling Light Remote Controlled
Modernizing your home lighting can be a simple and rewarding project, and one of the most sought-after upgrades is the ability to control your lights remotely. This article will guide you through the process of transforming your existing ceiling light fixtures into remote-controlled wonders. While this process requires some basic electrical knowledge and tools, it is achievable for many DIY enthusiasts.
Step 1: Assess Your Existing Fixture and Wiring
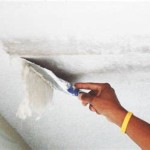
Before embarking on any electrical project, safety is paramount. Begin by switching off the power to the circuit controlling the light fixture at the breaker box. Then, carefully remove the light fixture's cover plate to gain access to the wiring. Identify the wires: the black wire is typically the "hot" wire carrying power; the white wire is the "neutral" wire; and the green or bare wire is the "ground" wire.
Next, determine the type of switch controlling the light. If it's a standard wall switch, it's likely a single-pole switch, which means it only has two terminals: one for the hot wire and one for the neutral wire. If you have a dimmer switch, it will have three terminals, with an extra terminal for the dimmer function.
Step 2: Choose Your Remote Control System
There are several options available for remote control systems for ceiling lights. Here are some of the most common:
- Infrared (IR) Receivers: These are budget-friendly options that work by sending signals using infrared light. They are generally easy to install, but have limited range and require line-of-sight for the remote to work.
- Radio Frequency (RF) Receivers: This type of receiver uses radio waves, offering greater range and the ability to control lights even through walls. They are usually more expensive than IR receivers.
- Smart Home Hubs: Smart home platforms like Amazon Alexa, Google Home, or Apple HomeKit integrate with various smart lighting solutions, allowing you to control lights with voice commands or through a smartphone app. These offer the most advanced features but often require additional hardware and setup.
Consider your budget, desired features, and the size of your home when choosing a system. It's also important to research compatibility with your existing light fixture. Some receivers are designed for specific bulb types, while others offer universal compatibility.
Step 3: Install the Remote Receiver
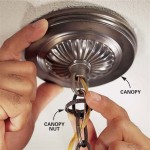
Once you've selected a remote control system, follow the manufacturer's instructions for installation. Generally, the receiver needs to be connected in parallel with the light fixture. This means that the receiver's hot and neutral wires are connected to the same wires that power the light fixture.
If you're using a smart home hub, you may need to install a specialized smart bulb or a separate hub device. Follow the specific instructions for your chosen smart home platform.
Step 4: Test Your Remote Control System
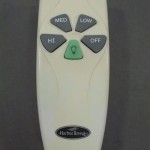
After installing the receiver and connecting it to the light fixture, it's time to test the system. Turn on the power at the breaker box and test the remote control. Make sure it turns the light on and off reliably, and that you have the desired range and functionality.
If you're using a smart home hub, follow the instructions to configure your lights within the app or platform. You should then be able to control your ceiling lights with voice commands or through your smartphone.
Safety Notes
Remember, working with electricity can be dangerous. If you are unsure about any aspect of the installation process, consult a qualified electrician. Here are some safety precautions to always keep in mind:
- Always turn off the power at the breaker box before working on any electrical wiring.
- Use appropriate tools and ensure they are in good working condition.
- Never touch exposed wires or electrical components with wet hands.
- Always wear appropriate safety gear, including gloves and eye protection.
By following these steps and prioritizing safety, you can successfully upgrade your ceiling lights to remote control, adding convenience and functionality to your home.

Hanging Pendant Light With No Hardwiring Er Friendly Ceiling Remote Control

Oaks Aura Becca 24 In Diy Shade Led Indoor Black Smart App Control Modern Flush Mount Ceiling Fan With Light Remote Included Dc2401 The Home Depot

Oaks Aura Wesley 42in Indoor Led Chrome Diy Shape Retractable Ceiling Fan With Lights 6 Sd Remote Control Dc4264 C The Home Depot

Aoksee Ceiling Fans Lights Deals Bedroom Desk Fan With Enclosed Low Profile Light Remote Control Easy To Instalwithout E27 Socket Pendant Gift For Children Com

Cold White Remote Control Modern Suspended Ceiling Lights China Light Flush Mount Made In Com

Modern Simple Remote Control Decorative Ceiling Lights China Flush Mount Made In Com

Cusp Barn 36 Retractable Ceiling Fan With Lights Modern Diy Shape Led Light Remote Control And Abs Blades For Bedroom Living Room Com

Led Ceiling Light Rgbw Bluetooth Speaker App Remote Control Lamp Dimmable

Livingandhome Modern Round Crystal Ceiling Fan Light With Remote Control 50cm Dia Diy At B Q

Make It Rain 3 Colour Dimmable Led With Remote Control Crystal Ceiling Light Lightbox Vu
Related Posts