How to Change a Light Bulb in a False Ceiling
Replacing a light bulb in a false ceiling can seem like a daunting task, especially for those unfamiliar with the process. However, with the right information and approach, the process can be straightforward and manageable. This article will guide you through the steps involved in changing a light bulb in a false ceiling, ensuring a safe and efficient operation.
1. Identifying the Access Panel
The first step involves locating the access panel for the light fixture. False ceilings typically have dedicated access panels for maintenance and repair. These panels are usually concealed by a removable cover, often resembling a square or rectangular section of the ceiling. To identify the panel, look for a slightly different texture or color compared to the surrounding ceiling. If you have difficulty locating the panel, consult the installation manual of your false ceiling or contact a contractor.
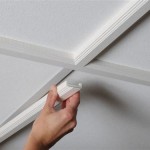
Once you've identified the access panel, you'll need to detach it from the ceiling. The panel is generally secured using screws or clips. Carefully remove the screws or release the clips using a flat-head screwdriver or a prying tool. Once the panel is detached, set it aside in a safe location.
2. Disengaging the Power Supply
Before attempting to change the light bulb, always prioritize safety by disconnecting the power supply to the fixture. Locate the circuit breaker controlling the light fixture and turn it off. To confirm the power is off, use a non-contact voltage tester to check the fixture's electrical wires. When verifying the power is off, ensure the tester does not touch any metal parts, as this could cause an electrical shock.
Once you've confirmed the power is disconnected, you can proceed to remove the old light bulb. The process of removing the bulb will depend on the type of fixture. Most false ceiling fixtures use standard screw-in bulbs. Unscrew the old bulb by twisting it counter-clockwise until it detaches from the socket.
3. Installing the New Light Bulb
With the old bulb removed, you can now install the new one. Before inserting the new bulb, carefully inspect the socket for any damage or debris. If necessary, use a clean cloth to remove any dust or dirt. Ensure the new bulb is compatible with the fixture and the voltage requirements. Most false ceiling light fixtures use standard incandescent, halogen, or CFL bulbs. However, some fixtures may be designed for LED bulbs, which offer higher energy efficiency and longer lifespan.
To install the new bulb, simply screw it into the socket. Turn the bulb clockwise until it is securely tightened. Avoid overtightening, as this can damage the socket. Once the new bulb is in place, you can re-secure the access panel using the screws or clips you removed earlier. Remember to turn the circuit breaker back on to restore power to the fixture.
After switching the power back on, check the new bulb to ensure it is functioning correctly. If the light bulb is flickering or not working, double-check the connections and ensure the power supply is properly connected. If the issue persists, consult an electrician for assistance.

How To Change Downlights Or Recessed Lights In False Ceiling Electrician Singapore Recommended Services

How To Un The Light Bulb From False Ceiling Safely Change Out Of Order Replace Halogen And Other Types Modern Bulbs

How To Open Twist Off The Cover Of Some Really Stupid Awkward Flush Mounted Ceiling Light Dome Fittings Fixtures Replace Change Bulb My Technical Blog

How To Install Led Flat Panel Light Ox Lighting

Replace Light Fitting Service In Singapore 2024 Affordable Electrician

Easy Ways To Replace An Led Recessed Light Bulb 13 Steps

9 Types Of False Ceiling Light Designs To Glam Up Your Home

False Ceiling Led Lights Best For Home Office In Murphy

How To Replace Recessed Lighting Drop Ceiling Dropped Installing
How To Fix Concealed Led Lights A Concrete Ceiling Without False Quora
Related Posts


