How to Install Drop Ceiling Lighting Fixtures
Installing lighting fixtures in a drop ceiling is a relatively straightforward task, requiring only basic tools and some electrical knowledge. Drop ceilings, often made of mineral fiber or metal tiles, are common in basements, offices, and other areas where easy access to wiring and utilities is desired. This guide provides step-by-step instructions on how to install drop ceiling lighting fixtures, ensuring a safe and successful project.
1. Gathering Tools and Materials
Before embarking on installation, gather the necessary tools and materials. This list ensures you have everything on hand to complete the project efficiently:
- New lighting fixture, including any necessary wiring, bulbs, and mounting hardware
- Voltage tester
- Wire strippers
- Wire cutters
- Screwdriver (preferably with a magnetic tip)
- Pliers
- Level
- Safety glasses
- Work gloves
- Electrical tape
- Optional: Ladder (depending on ceiling height)
2. Preparing the Electrical Wiring
Electrical safety is paramount. Before proceeding, confirm the power to the circuit is off. Use a voltage tester to verify that the wires are de-energized. Once confirmed, the existing wiring must be prepared for the new fixture:
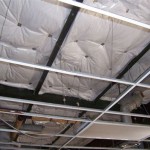
- Locate the junction box: Drop ceiling fixtures are often wired to a dedicated junction box accessible within the ceiling grid. The junction box houses the electrical connections.
- Disconnect the wires: Carefully disconnect the wires from the existing fixture or outlet. Use wire strippers to expose a small amount of wire for clean connections.
- Identify the wires: In most cases, the wiring will be color-coded: black (hot), white (neutral), and green or bare copper (ground). Use electrical tape to mark the wires for clear identification.
3. Installing the New Fixture
The installation process varies depending on the type of fixture, but the general steps remain similar:
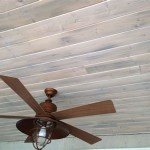
- Mount the fixture: Determine the fixture's location and secure the mounting bracket to the ceiling grid using the provided hardware. Ensure the bracket is level.
- Connect the wires: Wire the new fixture to the junction box wires. Connect the black wire (hot) to the black wire on the fixture, the white wire (neutral) to the white wire, and the green or bare copper wire (ground) to the fixture's ground wire. Securely connect the wires using wire nuts.
- Test the fixture: Turn the power back on and test the fixture. If it's working, secure the fixture's cover and any decorative elements.
4. Additional Tips and Considerations
Following these tips will ensure a smooth and successful installation:
- Check the fixture's weight: Ensure the ceiling grid can support the weight of the new fixture.
- Use the right bulbs: Refer to the fixture's instruction manual for recommended bulb wattage and type.
- Proper grounding: A ground wire is essential for safety. Ensure the connection is secure and the ground wire is connected to the fixture's grounding terminal.
- Professional assistance: If unsure about any aspect of the installation, seek assistance from a qualified electrician.
Installing drop ceiling lighting fixtures is generally a manageable DIY project. By following these steps and prioritizing safety, you can confidently enhance your space with new lighting.

Light Installation In A Ceiling Tile

Installing Flush Mount Llight Fixture Into Drop Ceiling Refinish Paint House Remodeling Decorating Construction Energy Use Kitchen Bathroom Bedroom Building Rooms City Data Forum

Drywall Suspended Grid Showroom Ceiling Systems How To Install Pictures Of Tips For Installing Drop Ceilings Strictly Racine Wisconsin

How To Install Recessed Lights In A Drop Ceiling The Home Depot

Install Lighting In A Suspended Ceiling Doityourself Com

Drop Ceiling Installation How To Install A Homeserve Usa

Diy A Dropped Ceiling Light Box

Drop Ceiling Tiles Installation Tips Diy Family Handyman

Lighting Retrofits

Garage Work Lighting Plug In Cord Wiring Update
Related Posts