How to Build a Cathedral Ceiling With Exposed Beams
Cathedral ceilings, with their soaring heights and exposed beams, bring a sense of grandeur and spaciousness to any room. They are a popular choice for living rooms, dining rooms, and master bedrooms, adding architectural interest and visual appeal. While building a cathedral ceiling is a significant undertaking, it's a project that can be accomplished with careful planning and skilled execution. This article will guide you through the essential steps involved in constructing a cathedral ceiling with exposed beams.
1. Design and Planning
The first step in building a cathedral ceiling is to meticulously plan the design and layout. This involves determining the desired height, slope, and beam placement. Consider factors like the existing roof structure, the overall style of your home, and the desired aesthetic.
Here are some key considerations for design and planning:
-
Height:
The height of the cathedral ceiling will affect the overall feel of the room. Higher ceilings create a sense of spaciousness and grandeur, while lower ceilings can feel more intimate and cozy. -
Slope:
The slope of the ceiling will determine how much headroom you have in the center of the room. A steeper slope will create a more dramatic effect but will require more structural support. -
Beam Placement:
The placement of the exposed beams can impact both the visual appeal and structural integrity of the ceiling. Carefully consider the spacing and size of the beams to ensure stability and aesthetics. -
Structural Support:
Existing load-bearing walls may need reinforcement to support the weight of the cathedral ceiling. Consult with a structural engineer to determine any necessary modifications.
Once you have a clear design in mind, create detailed drawings or blueprints that outline the dimensions, materials, and construction process.
2. Framing the Cathedral Ceiling
The framing of a cathedral ceiling involves constructing a new roof structure that supports the higher ceiling height. Here are the key steps involved:
-
Construct the Rafters:
The rafters form the main structural support for the cathedral ceiling. They are typically made of lumber and are installed at a specific angle to create the desired slope. The rafter length and angle will depend on the design of the ceiling. -
Install the Ridge Board:
The ridge board is a horizontal beam that runs along the top of the rafters, providing a strong connection for the entire roof system. It is usually placed in the center of the room and serves as a central support point. -
Install the Collar Ties:
Collar ties are horizontal beams that connect the rafters, preventing them from spreading outward. They are typically placed in the middle of the rafter length and contribute to the structural stability of the ceiling. -
Install the Ceiling Joists:
Ceiling joists are horizontal beams that run perpendicular to the rafters and support the drywall or other finishing materials.
Ensure that all framing members are properly secured with nails or screws, and that the framing meets local building codes. Consult with a licensed contractor or building inspector for guidance on the appropriate framing techniques and materials.
3. Installing the Exposed Beams
Once the framing is complete, you can install the exposed beams. This involves selecting the appropriate materials, cutting them to size, and securing them to the framing.
-
Material Selection:
Choose beams that complement the style of your home. Common materials include wood, steel, and engineered lumber. Consider the weight, finish, and appearance when selecting the best option. -
Cutting and Sizing:
Measure the beams to ensure they are the correct length and shape. Use a saw to cut the beams to the desired dimensions. -
Installation:
Secure the beams to the framing using metal brackets or hangers. Ensure that the beams are level and plumb before fastening them permanently.
It's crucial to consider the load-bearing capacity of the chosen beam material and to reinforce the framing if necessary. Consult with a structural engineer or licensed contractor to ensure that the beams are properly installed and contribute to the overall structural integrity of the ceiling.
4. Finishing and Decoration
The final step is to finish and decorate the cathedral ceiling. This involves selecting materials for the ceiling surface and adding decorative touches.
-
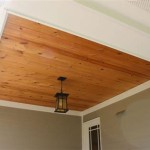
Ceiling Surface:
Choose a ceiling surface that complements the exposed beams. Options include drywall, wood paneling, or even tongue and groove boards. Apply a coat of paint or stain to enhance the desired aesthetic. -
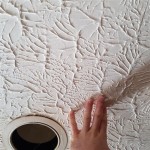
Decorative Elements:
Add decorative elements like moldings, trim, or crown molding to enhance the visual appeal of the cathedral ceiling. These elements can accentuate the exposed beams and create a more refined look. -
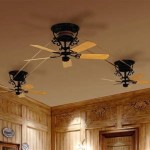
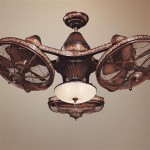
Lighting Fixtures:
Install lighting fixtures that complement the overall style of the room. Consider chandeliers, pendant lights, or recessed lighting to illuminate the space effectively and highlight the cathedral ceiling.
By following these steps, you can build a stunning cathedral ceiling with exposed beams that will add character and charm to your home. Remember to consult with professionals for advice and guidance on the structural aspects of the project. With careful planning and skilled execution, you can create a majestic and captivating focal point in your living space.

Cabin House Build Episode 9 How We Exposed Wood Ceilings

A Complete Guide To Install Vaulted Ceiling Beams Alittledelightful

23 Extraordinary Ceilings With Exposed Beams Elevate Interior Space North Eastern Group Realty

Creating A Vaulted Ceiling With Exposed Roof Beams In The

Vaulted Ceiling Beams With Laminate Wood Jenna Sue Design

A Complete Guide To Install Vaulted Ceiling Beams Alittledelightful

Vaulted Ceiling Beams With Laminate Wood Jenna Sue Design

Cabin House Build Episode 9 How We Exposed Wood Ceilings

23 Exposed Ceiling Beam Ideas

23 Extraordinary Ceilings With Exposed Beams Elevate Interior Space North Eastern Group Realty
Related Posts