Hanging a Ceiling Fan on a Vaulted Wall
Installing a ceiling fan on a vaulted ceiling presents unique challenges compared to a standard flat ceiling. The sloped wall requires specialized hardware and careful planning to ensure proper installation and safe operation. This article outlines the steps involved in hanging a ceiling fan on a vaulted wall, covering essential safety precautions, necessary tools, and the installation process itself.
Safety First
Working with electricity always carries inherent risks. Before beginning any electrical work, disconnect the power to the circuit at the breaker box. Double-check the power is off by using a non-contact voltage tester at the wiring location. Never assume the power is off based solely on the switch position. Using a sturdy ladder rated for the required height is crucial for safe access. When working at heights, having a helper to stabilize the ladder and assist with handling the fan is highly recommended.
Gathering the Necessary Tools and Materials
Having the right tools and materials on hand before starting the project will significantly streamline the installation process. Essential tools include a voltage tester, drill with appropriate drill bits for both wood and potentially masonry, wire strippers, wire connectors, screwdrivers (Phillips and flathead), a ladder, and safety glasses. The specific materials required will vary depending on the fan and ceiling structure, but generally include a downrod (for sloped ceilings), a ceiling fan rated for sloped ceilings, an approved electrical box designed for fan support, and appropriate wiring (gauge determined by fan requirements).
Choosing the Right Ceiling Fan and Downrod
Standard ceiling fans are not designed for angled ceilings. When purchasing a fan, ensure it is specifically rated for use with a sloped or vaulted ceiling. These fans often come with angled mounting brackets or adapter kits designed to accommodate the slope. The downrod is the metal pipe that connects the fan motor to the mounting bracket and establishes the distance between the fan blades and the ceiling. For vaulted ceilings, a longer downrod is usually required to ensure adequate clearance and optimal airflow. The correct downrod length depends on the ceiling angle and desired fan height. Consult the fan manufacturer's guidelines for determining the appropriate downrod length for your specific ceiling angle.
Installing the Electrical Box
The electrical box must be securely anchored to the ceiling joists and rated to support the weight of the ceiling fan. For vaulted ceilings, identifying the joist location may require specialized tools like a stud finder. If the existing wiring is insufficient, consult a qualified electrician to upgrade the wiring to meet the fan's electrical demands. For ceilings with significant slopes, a specialized vaulted ceiling fan mounting bracket may be required to ensure proper fan alignment. These brackets are designed to compensate for the ceiling angle and provide a stable mounting platform.
Connecting the Wiring
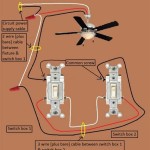
Once the electrical box is securely mounted, connect the wiring according to the manufacturer's instructions. Typically, this involves connecting the fan's ground wire to the grounding wire in the electrical box, the fan's white wire to the neutral wire (usually white), and the fan's black wire to the hot wire (usually black). Use appropriately sized wire connectors and ensure all connections are secure. If a light kit is included with the fan, connect the light kit wires to the corresponding wires in the fan housing, again following the manufacturer's instructions.
Assembling and Mounting the Fan
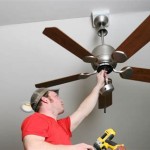
After the wiring is complete, assemble the fan according to the manufacturer's instructions. This typically involves attaching the fan blades to the motor housing and installing the light kit (if applicable). Once assembled, carefully attach the fan to the mounting bracket, ensuring all screws are tightened securely. The fan's canopy should cover the electrical box and wiring connections, providing a finished and aesthetically pleasing appearance.
Testing the Installation
After completing the installation, restore power to the circuit at the breaker box. Test the fan's operation by using the pull chains or remote control to ensure all speeds and light functions (if applicable) are working correctly. Observe the fan while it is running to ensure it is stable and not wobbling excessively. If wobble is present, consult the troubleshooting section of the fan's manual or seek professional assistance.
Final Considerations
Installing a ceiling fan on a vaulted ceiling requires careful planning, appropriate tools, and adherence to safety guidelines. When in doubt about any aspect of the installation process, consult a qualified electrician. This ensures proper installation, safe operation, and compliance with local electrical codes. This article provides a general overview and may not cover all specific scenarios or local code requirements. Always refer to the manufacturer's instructions and consult a qualified electrician if needed.

Ensuring Proper Ceiling Fan Installation With Vaulted Ceilings

How To Choose A Ceiling Fan For Vaulted Ceilings Lightology

How To Install A Ceiling Fan On Sloped Lemon Thistle

How To Choose A Ceiling Fan For Vaulted Ceilings Lightology

How To Choose A Ceiling Fan For Vaulted Ceilings Lightology

Electrical Mount Ceiling Fan At The Peak Of A Sloped Home Improvement Stack Exchange

Vaulted Sloped Ceiling Adapter For Modern Fan Company Fans Stardust

Ceiling Fans For Vaulted Ceilings Downrod

How To Install A Ceiling Fan On Cathedral Ask This Old House

How To Install Vaulted Ceiling Fan
Related Posts


