How to Install HVAC Vent in Ceiling
Installing an HVAC vent in a ceiling requires careful planning and execution to ensure proper airflow and a professional finish. Whether adding a new vent or replacing an existing one, understanding the process is crucial for a successful installation.
Planning and Preparation
Before beginning any installation, assess the existing ductwork. Locate a suitable position for the new vent, ensuring it aligns with a main duct or branch duct. Consider the room's size and layout to determine the optimal placement for efficient air distribution. Measure the ceiling joist spacing to select the correct size vent and duct components.
Gather necessary tools and materials, including a measuring tape, pencil, safety glasses, gloves, utility knife, tin snips, duct sealant, screws, drill, and the desired vent cover and ductwork materials (flexible duct, rigid duct, or duct board). Choosing the correct duct material depends on the specific application and local building codes. Flexible duct is easier to install in tight spaces, while rigid duct offers better airflow and durability. Duct board provides insulation and sound dampening properties.
Turning off the HVAC system is a critical safety precaution before starting any work. This prevents accidental injury and ensures no debris enters the system during installation.
Cutting and Connecting the Ductwork
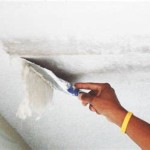
Once the location is marked, carefully cut a hole in the ceiling using a drywall saw or utility knife. The hole should be slightly larger than the ductwork to allow for adjustments. If using existing ductwork, create a tee connector by cutting a hole in the main duct and attaching a duct tee. Secure the connection with duct sealant and screws, ensuring an airtight seal to prevent leaks and maintain efficient airflow.
For new duct runs, carefully measure and cut the chosen duct material to the appropriate length. Ensure precise measurements for proper fit and airflow. Connect the ductwork to the main duct or branch duct, again using duct sealant and screws to create an airtight seal. Support the new ductwork with straps or hangers, preventing sagging and maintaining proper alignment.
Installing the Vent and Finishing
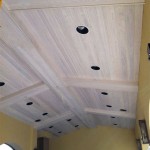
After connecting the ductwork, insert the vent boot into the ceiling opening. Ensure the boot fits snugly and securely. Attach the boot to the ceiling joists using screws. Apply a layer of duct sealant around the perimeter of the boot to create an airtight seal and prevent air leakage. This also helps to minimize noise transmission.
Install the vent cover by snapping it onto the vent boot or securing it with screws, depending on the specific model. Ensure the cover is flush with the ceiling for a professional finish. If necessary, apply a thin bead of caulk around the perimeter of the cover where it meets the ceiling to create a seamless look and prevent dust accumulation.
Working with Different Ceiling Types
Different ceiling types require specific considerations during installation. For dropped ceilings, use a ceiling tile cutter to create the opening for the vent. Ensure the vent and ductwork are properly supported by the grid system. In plaster ceilings, exercise extra caution to avoid cracking the plaster. Use a plaster saw and score the outline of the opening before cutting. Reinforce the opening with wood framing if necessary.
Insulation and Air Sealing
Insulating the ductwork is essential for energy efficiency, particularly in unconditioned spaces like attics or crawlspaces. Use duct insulation wrap or duct board to minimize heat loss or gain. Sealing all connections and joints with duct sealant ensures optimal airflow and prevents energy waste. Properly sealed ductwork also helps improve indoor air quality by preventing dust and other pollutants from entering the system.
Testing the airflow after installation is crucial. Turn the HVAC system back on and check for proper air distribution through the new vent. Adjust the damper if necessary to balance the airflow with other vents in the room or zone. Inspect for any leaks or unusual noises and address them promptly.

Replacing A Heat Vent Register

How To Replace Your Ac Vent Covers Clf Services

How To Replace Your Air Conditioner Ceiling Vent For Better Efficiency

How To Redirect Airflow From Ceiling Vent

How To Open And Close Ceiling Air Vents Angi

Adjusting An Hvac Damper

How Important Are Vent Covers For Your Ac Air Assurance

Quick Ceiling Vent Fix

Hvac Best Vent Size For Replacing Drop Ceiling Register With Boot Drywall Using 8 Duct Home Improvement Stack Exchange

Hvac Ductwork Air Duct Types Working Problems Installation Austin Area Conditioning And Heating G S Mechanical
Related Posts