Can You Make a Ceiling Fan Remote Control?
Building a ceiling fan remote control can be a rewarding project for electronics enthusiasts. While commercially available remotes are readily accessible, creating a custom solution offers the opportunity to learn about radio frequency (RF) communication, microcontroller programming, and circuit design. This article will explore the process of constructing a ceiling fan remote control, covering the necessary components, circuit design considerations, and programming aspects.
Key Components
Several key components are required for building a ceiling fan remote control:
- Microcontroller: This acts as the brain of the remote, controlling all other components.
- RF Transmitter Module: This module transmits signals to the receiver unit connected to the ceiling fan.
- Buttons: These provide the user interface for controlling the fan's speed and light.
- Power Source: Typically, batteries provide the power for the remote.
- Enclosure: This houses all the components and provides a user-friendly interface.
RF Communication
Understanding radio frequency communication is crucial for building a functional remote control. The chosen RF module will dictate the frequency and modulation scheme used for communication. Commonly used RF modules operate in the 433MHz or 315MHz frequency bands and employ Amplitude Shift Keying (ASK) or Frequency Shift Keying (FSK) for modulation.
- Frequency Selection: Choosing the appropriate frequency band depends on local regulations and interference considerations.
- Modulation Techniques: ASK and FSK offer different trade-offs in terms of complexity, data rate, and power consumption.
- Range Considerations: The range of the remote control depends on the transmitter power and the sensitivity of the receiver.
Microcontroller Programming
The microcontroller requires programming to interpret button presses and transmit corresponding signals via the RF module. Different microcontrollers are available, each with its own programming language and development environment.
- Choosing a Microcontroller: Selecting an appropriate microcontroller depends on processing power requirements and available development tools.
- Programming Logic: The program must handle button inputs, generate control signals for the RF module, and manage power consumption.
- Debugging and Testing: Thorough testing is necessary to ensure the remote functions correctly and transmits the desired signals.
Circuit Design
The circuit design involves connecting all components correctly to ensure proper functioning. A well-designed circuit ensures reliable operation and minimizes power consumption.
- Schematic Diagram: A detailed schematic diagram is essential for planning the circuit layout and component connections.
- Power Management: Proper power management is crucial for battery-powered devices to maximize battery life.
- Component Placement: Careful placement of components minimizes interference and optimizes circuit performance.
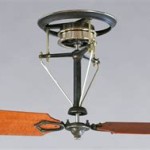
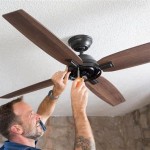
Receiver Unit
The receiver unit, installed within the ceiling fan, receives the signals transmitted by the remote. This unit typically consists of an RF receiver module, a microcontroller, and relays to control the fan motor and light.
- RF Receiver Module: The receiver must be compatible with the transmitter in terms of frequency and modulation scheme.
- Decoding Signals: The receiver microcontroller decodes the received RF signals and activates the corresponding relays.
- Relay Control: Relays switch the fan motor and light on or off based on the received commands.
Testing and Integration
Thorough testing of both the transmitter and receiver units is crucial to ensure reliable operation. Integration involves connecting the receiver unit to the ceiling fan's wiring and ensuring compatibility with the existing fan controls.
- Range Testing: Verifying the remote's operational range is essential for practical use.
- Functionality Testing: Testing all button functions ensures the fan and light respond correctly.
- Safety Precautions: Safety precautions should be taken when working with electrical wiring to avoid hazards.
Customization and Features
Building a custom remote allows for adding various features beyond basic fan and light control. These can include dimming control for the light, timer functions, and even integration with home automation systems.
- Dimming Control: Implementing dimming control requires a suitable dimmer circuit and corresponding control signals.
- Timer Functionality: Adding a timer allows for automatic fan shutoff after a specified duration.
- Home Automation Integration: Integrating the remote with a home automation system enables remote control via smartphones or other devices.
Building a ceiling fan remote control is a complex project that involves various electronic components, programming, and circuit design. Careful planning and execution are essential for successful implementation. This article has provided a comprehensive overview of the key aspects involved in building a functional and customizable ceiling fan remote control.

How To Make Your Ceiling Fan Remote Control Operated

Converting An Existing Ceiling Fan To A Remote Control

6 Steps To Turn Your Ceiling Fan Into A Remote Controlled

How To Install A Ceiling Fan Remote Extreme Diy

Ceiling Fan Remote Control Information Do You Need A

How To Convert A Ceiling Fan Remote Control

Ceiling Fans With Remote To Or Not

Say Goodbye To Pull Chains 6 Ways Add Smart Control Your Old Ceiling Fan

Ceiling Fan Remote Troubleshooting Temecula Handyman

Remote Controlled Ceiling Fan
Related Posts