How to Install a Return Air Vent in a Ceiling Fan
Integrating a return air vent into a ceiling fan can boost HVAC efficiency by improving air circulation. This article outlines the process of installing such a vent, highlighting crucial safety measures and installation steps.
Safety Precautions
Working with electrical wiring and ceiling structures requires adherence to safety protocols. Before commencing any work, ensure the power to the ceiling fan and the HVAC system is completely shut off at the breaker box. Using a voltage tester to double-check the absence of power is a crucial safety step. Appropriate personal protective equipment (PPE), including safety glasses and gloves, should be worn throughout the installation process. If working from a ladder, ensure it is stable and on a level surface.
Planning and Preparation
Careful planning is essential for a successful installation. Begin by determining the size and location of the return air vent. The vent should be adequately sized to handle the airflow requirements of the HVAC system without restricting the fan's operation. Consider the existing ductwork and how the new vent will connect. Check the ceiling joist spacing to ensure the vent and supporting structure can be securely mounted. Lastly, gather all necessary tools and materials, including the return air vent kit, ductwork, sealant, screws, and electrical connectors.
Removing the Existing Ceiling Fan
Once the area is prepared, the existing ceiling fan must be removed. Carefully disconnect the wiring, noting the connections for later reinstallation. Lower the fan assembly and remove the mounting bracket. Inspect the wiring and the ceiling box for any damage and repair as needed. This is also a good time to assess the existing ceiling structure and make any necessary reinforcements.
Installing the Return Air Vent Housing
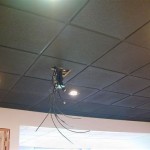
The return air vent housing typically mounts directly to the ceiling joists. Use a stud finder to locate the joists and mark the vent's position. Securely attach the housing using appropriate screws, ensuring a tight seal against the ceiling. Connect the ductwork to the vent housing using metal tape or sealant for an airtight connection. Test the connection for leaks before proceeding.
Wiring the Ceiling Fan and Vent
With the vent housing in place, the ceiling fan can be re-wired. Connect the fan's wiring to the existing electrical connections, matching the wires according to their color coding. If the return air vent includes a built-in damper or other electrical components, connect these according to the manufacturer's instructions. Ensure all wiring is properly secured and tucked away inside the electrical box.
Mounting the Ceiling Fan and Vent Grille
After the wiring is complete, mount the ceiling fan to the vent housing or mounting bracket per the manufacturer's instructions. Attach the vent grille to the housing, ensuring it fits snugly and securely. Double-check all connections and ensure no wires are pinched or exposed. Restore power to the circuit and test both the fan and the return air vent for proper operation.
Sealing and Finishing
Seal any gaps around the vent housing and ductwork with caulk or sealant to prevent air leaks and improve energy efficiency. This also helps to minimize noise and vibration from the HVAC system. Clean the area around the installation, removing any debris or dust. Finally, inspect the entire installation to ensure all components are properly secured and functioning correctly.
Troubleshooting
If the fan or vent doesn't function correctly, double-check all connections and wiring. Ensure the breaker is not tripped and that the power switch is functioning. If the airflow from the vent is weak, check for blockages in the ductwork. If the fan vibrates excessively, ensure it is properly balanced and securely mounted. If issues persist, consult a qualified HVAC technician or electrician.
Maintenance
Regular maintenance is essential to ensure optimal performance. Periodically clean the vent grille to remove dust and debris, improving airflow. Check the ductwork for leaks or blockages. Inspect the fan blades for dust buildup and clean them as needed. Proper maintenance will prolong the life of the system and maintain efficient air circulation.

How To Install An Aria Vent Flush Exhaust Cover

Return Air Vent Internachi Forum

The Central Vs Dedicated Return Vent Debate Energy Vanguard

How To Install A Bathroom Fan Diy Step By Guide

Ducts In Dropped Ceilings Building America Solution Center

Designing Return Filter Grille Boxes Greenbuildingadvisor

How To Install A Return Air Vent Plumbersstock Com

Learn How To Install Return Air Duct In Your Home The Kings

How To Install A Return Air Vent In The Wall Angi

Ventilation Basis Of Design
Related Posts