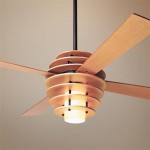
How To Replace A Ceiling Fan Remote Control
Ceiling fan remote controls offer convenient operation of fan speed and lighting. Over time, these remotes can malfunction due to wear and tear, battery corrosion, or other issues. Replacing the remote is often a simpler and more cost-effective solution than repairing it. This article provides a comprehensive guide to replacing a ceiling fan remote control.
Identifying the Correct Replacement
Locating the correct replacement remote is the crucial first step. Several methods can be employed to achieve this:
Check Existing Remote: The existing remote may contain model numbers printed on the back or inside the battery compartment. This information is often the quickest way to identify the correct replacement.
Check Fan Housing: The fan motor housing often contains labels with model and serial numbers. This information can be used to contact the manufacturer or search online retailers for compatible remotes.
Online Retailers: Many online retailers offer search tools that allow users to input fan model information and find compatible remotes.
Contact the Manufacturer: If identifying the model through the remote or fan housing proves unsuccessful, contacting the manufacturer directly is recommended. Customer support can assist in identifying the correct replacement based on the fan's specifications.
Types of Ceiling Fan Remotes
Understanding the different types of ceiling fan remotes can help ensure compatibility and proper functionality:
Frequency-Based Remotes: These remotes use radio frequencies to communicate with the receiver unit in the fan. They are commonly used and offer a wider range of operation compared to older technologies.
Dip Switch Remotes: Older ceiling fans may utilize dip switches, small toggle switches inside both the remote and the receiver unit. These switches require a matching configuration for the remote to function correctly. When replacing a dip switch remote, ensure the dip switch settings on the new remote match the settings on the receiver in the fan.
Wall-Mounted Controls: Some fans are controlled by wall-mounted units. These units may have compatible hand-held remote controls available, or the entire wall unit may need replacement.
Preparing for Installation
Prior to installing the new remote, certain preparatory steps are essential:
Safety First: Turn off the power to the ceiling fan at the circuit breaker. This is crucial to prevent electrical shock.
Gather Necessary Tools: Typically, a screwdriver and a ladder are sufficient for installing a ceiling fan remote. Some installations may require additional tools depending on the fan's mounting and wiring configuration.
Installation Steps
The installation process generally involves the following steps:
Accessing the Receiver Unit: The receiver unit is typically located within the fan's motor housing, above the blades. Accessing it may require removing a canopy or cover plate.
Removing the Old Receiver (if applicable): If replacing the entire remote system, disconnect the wiring from the old receiver unit, noting the wire placement for proper reconnection of the new receiver.
Connecting the New Receiver: Connect the wires from the fan to the corresponding terminals on the new receiver unit. Ensure the wires are securely fastened.
Mounting the New Receiver: Securely mount the receiver unit back inside the fan housing.
Testing the New Remote: Once the receiver is installed, restore power to the ceiling fan and test the functionality of the new remote. Verify that the fan speed and light controls operate correctly.
Troubleshooting
If the new remote does not function correctly, consider the following troubleshooting steps:
Battery Check: Ensure the new remote has fresh batteries installed correctly.
Wiring Check: Double-check the wiring connections between the receiver and the fan to ensure they are secure and in the correct terminals.
Frequency Interference: Occasionally, other electronic devices might interfere with the remote's signal. Try moving other electronics away from the fan and testing the remote again.
Remote Programming: Some remotes may require programming or syncing with the receiver unit. Consult the manufacturer's instructions for specific programming procedures.
Receiver Reset: In some cases, resetting the receiver can resolve connectivity issues. This procedure is typically outlined in the manufacturer's instructions.
Maintaining Your Ceiling Fan Remote
Proper maintenance can extend the lifespan of your ceiling fan remote:
Battery Replacement: Regularly replace the batteries, typically every 6-12 months, to prevent corrosion and maintain optimal performance.
Cleaning: Periodically clean the remote with a soft, dry cloth to remove dust and debris.
Storage: If the remote is not used frequently, store it in a cool, dry place to prevent damage from temperature extremes and humidity.
Universal Ceiling Fan Remote Replacement Ifixit Repair Guide

How To Wire A Ceiling Fan Control Using Dimmer Switch

How To Convert A Ceiling Fan Remote Control

How To Install And Wire Ceiling Fan Remote Control Switches

How To Change A Ceiling Fan Remote Control

How To Remove Replace A Hampton Bay Universal Ceiling Fan Remote

Replace A Bad Ceiling Fan Remote Control With Universal Step By

How To Wire A Ceiling Fan Control Using Dimmer Switch

How To Wire A Ceiling Fan With Remote Receiver

How To Wire And Install A Ceiling Fan With Remote Control Light Fixture Removal
Related Posts

