1.
Do you have a hole in the ceiling, but don’t know how to fix it? Congratulations, you’ve come to the right place! In this article, we’ll take you step-by-step through the entire process of fixing a hole in the ceiling, from assessing the damage to applying the finishing touches. Read on to learn how to make your ceiling look like new!
Step 1: Assess the Damage
The first step in fixing a hole in the ceiling is to assess the damage. Inspect the hole to determine the size, shape, and depth of the damage. You’ll also need to check for any other signs of damage, such as cracks or loose material. Once you’ve assessed the damage, you can decide what supplies you’ll need to complete the repair.
Step 2: Gather the Materials
Once you’ve assessed the damage, you’ll need to gather the materials you’ll need to complete the repair. Depending on the size, shape, and depth of the hole, you may need some or all of the following materials:
- Drywall patch or mesh tape
- Drywall compound
- Putty knife
- Sandpaper
- Paint
Step 3: Prepare the Area
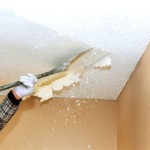
Before you begin the repair, you’ll need to prepare the area around the hole. Start by removing any loose material or debris from the area. Then, use a putty knife to smooth out any rough edges around the hole. Finally, use a vacuum to remove any dust or dirt that may have accumulated.
Step 4: Apply the Patch
Once the area is prepped, you can apply the patch. If you’re using a drywall patch, cut it to size and press it firmly into the hole. If you’re using mesh tape, cut it to size and apply it to the edges of the hole with a putty knife. Once the patch is in place, use a putty knife to smooth out any bumps or ridges.
Step 5: Apply the Compound
The next step is to apply the drywall compound. Use a putty knife to apply the compound in thin layers, starting at the edges and working your way in. Allow the compound to dry completely between each layer. Once the area is filled, use a sandpaper to smooth out any rough edges.
Step 6: Paint the Area
Finally, you can paint the area to match the rest of the ceiling. Start by priming the area with a good quality primer. Once the primer is dry, apply two coats of paint, allowing each coat to dry completely before applying the next. Once the paint is dry, you can admire your handiwork and enjoy your newly-repaired ceiling!


Related Posts


