1.
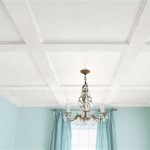
Are you looking to add a touch of elegance and sophistication to your home? Coffered ceilings are a great way to do just that. They offer a timeless and classic look that is sure to impress any guests. In this guide, we’ll explain how to build a coffered ceiling from start to finish. With the right tools and materials, you can easily create a beautiful and custom coffered ceiling that will make your home stand out.
Gather the Materials Needed
Before you start building a coffered ceiling, you’ll need to gather the materials and tools you’ll need. This includes wood boards, nails, screws, saw, drill, level, tape measure, and caulk. You may also need a jigsaw, depending on the design you’re going for.
Plan the Layout and Mark the Studs
Once you have the materials and tools, you can begin planning the layout of your coffered ceiling. Mark the studs in the ceiling area you plan to install the coffered ceiling, as this will ensure that you have a solid backing for the boards. Also, use a level to make sure the boards are straight and even.
Cut the Boards and Secure
Once the layout is planned, you can cut the boards to the necessary size. Use a saw, jigsaw, or drill to get the job done. Once the boards are cut, you can secure them in place with nails or screws. Make sure the boards are level and even before you secure them.
Fill in Gaps and Add Molding
Once the boards are secured, you can fill in any gaps using caulk or wood putty. This will give the coffered ceiling a polished and finished look. After the gaps are filled, you can add molding to the ceiling. This will give the ceiling an extra layer of detail and sophistication.
Finishing Touches
Once the boards and molding are in place, you can paint or stain the boards to match the rest of your home. You can also add trim or other decorative features to give your coffered ceiling a unique look. With the proper materials and a bit of patience, you can easily create a beautiful and unique coffered ceiling.


Related Posts


