Essential Aspects of How to Replace an Integrated LED Ceiling Light
Integrated LED ceiling lights have emerged as a popular choice for modern lighting solutions, offering energy efficiency and contemporary aesthetics. However, their fixed LED modules present a challenge when it comes to replacement. Understanding the process is vital to ensure a proper and safe installation.
Safety Considerations
Before embarking on the replacement, prioritize safety. Turn off the power supply at the circuit breaker panel and verify that the electricity has been disconnected using a voltage tester. Always wear insulated gloves and safety glasses.
Assessing the Ceiling Light
Examine the ceiling light to determine its type and mounting mechanism. Integrated LED ceiling lights are typically secured using screws, clips, or magnets. Establish the location of these fasteners to facilitate the removal process.
Removing the Light
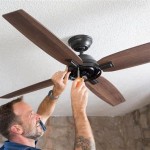
Locate the fasteners holding the ceiling light in place and use the appropriate tool (e.g., screwdriver or wrench) to loosen them. Be careful not to overtighten or damage the screws. Once the fasteners are loose, gently pull down on the light to disconnect it from the electrical wires.
Disconnecting the Wires
Before handling the wires, ensure power is still disconnected. Identify the wires connected to the ceiling light (usually black for line, white for neutral, and green or bare copper for ground). Use a pair of wire strippers to trim any excess insulation, leaving about half an inch of exposed wire.
Preparing the Replacement Light
Unpack the new ceiling light and assemble any necessary components. Expose the wire terminals on the new light in the same manner as the old light. Carefully align the wires of the new light with the wires of the ceiling, ensuring proper color coding (black to black, white to white, green to green/bare copper).
Connecting the Wires
Join the wires of the new light to the ceiling wires using approved wire connectors (e.g., wire nuts). Twist the connectors clockwise until snug, ensuring a secure connection. Afterward, use electrical tape to insulate the connections.
Mounting the Replacement Light
Carefully lift the replacement light into place, aligning the mounting points with the fasteners on the ceiling. Secure the light using the screws, clips, or magnets, ensuring a firm fit. Double-check all connections to ensure they are tight and secure.
Restoring Power and Testing
Return to the circuit breaker panel and turn on the power. Switch on the light and verify that it is functioning correctly. If the light does not turn on, check the connections, ensure the wattage of the replacement light is compatible, and consult an electrician if necessary.
Maintenance and Care
LED ceiling lights require minimal maintenance. To ensure their longevity, clean them periodically with a soft cloth, and avoid using harsh chemicals or abrasive materials.

Change Integrated Led Light In Ceiling Fan Or Dome

How To Replace A Ceiling Light Led Fixture

How To Replace A Ceiling Light Led Fixture

How To Repair A Ceiling Fan Led Light Replace Broken Harbor Breeze Or Hampton Bay

Can An Integrated Led Light Bulb Be Replaced Upgradedhome Com

Can An Integrated Led Light Bulb Be Replaced Lamphq

Can You Replace An Integrated Led Light Ceiling Fans Also Attainable Home

Never Change A Bulb Again With Integrated Led Light Fixtures The Money Pit

Everything You Must Know About Integrated Led Lighting Delmarfans Com

Are Integrated Led Light Fixtures Worth It
Related Posts

