How To Fix Nail Pops In Popcorn Ceiling Textures
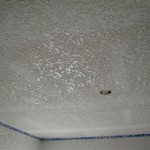
Popcorn ceilings, also known as acoustic ceilings, were once a popular choice for homes and commercial buildings. They help reduce noise and provide a unique aesthetic. However, over time, these ceilings can develop nail pops, which are small bumps or indentations in the popcorn texture. While nail pops are not typically a structural issue, they can be unsightly and affect the overall appearance of the ceiling.
Nail pops occur when the nails used to attach the drywall to the ceiling joists become loose or pop out. This can happen due to several reasons, including:
- Poor installation: If the nails were not properly driven into the joists or if the drywall was not adequately secured, it can lead to nail pops.
- Moisture: Excess moisture in the air can cause the drywall to expand and contract, which can put stress on the nails and cause them to pop out.
- Temperature fluctuations: Extreme temperature changes can also cause the drywall to expand and contract, leading to nail pops.
- Settling: Over time, buildings can settle, which can put stress on the drywall and cause nail pops.
Fixing nail pops in popcorn ceiling textures requires a few simple steps. Here's a step-by-step guide:
- Identify the nail pops: Examine the ceiling and locate all the nail pops. Mark them with a pencil or chalk for easy identification.
- Re-nail the pops: Using a hammer and small nails, re-nail the popped nails back into the joists. Make sure to drive the nails in straight and flush with the surface of the ceiling.
- Apply joint compound: Mix a small amount of joint compound according to the manufacturer's instructions. Apply the joint compound to the nail pops and smooth it out using a putty knife or your finger.
- Sand the patch: Once the joint compound has dried, sand the patched areas lightly to remove any excess and create a smooth surface.
- Apply popcorn texture: If the patched areas are noticeable, you can apply popcorn texture to match the rest of the ceiling. Use a popcorn texture sprayer or a brush to apply the popcorn material to the patched areas.
By following these steps, you can effectively fix nail pops in popcorn ceiling textures. However, if the nail pops are extensive or if you are not confident in your DIY skills, it is best to consult a professional drywall contractor for assistance.
Tips for preventing nail pops:
- Ensure the drywall is properly installed and secured to the ceiling joists.
- Control moisture levels in the home to prevent the drywall from expanding and contracting.
- Avoid extreme temperature fluctuations by maintaining a consistent indoor temperature.
- Address any settling issues in the building promptly to prevent further damage to the ceiling.
By following these tips, you can help prevent nail pops from occurring in the first place and maintain the beauty and integrity of your popcorn ceiling texture.

How To Repair A Drywall Nail Pop In Textured Ceiling

How To Fix Or Nail Pops In Drywall Diy Repair Tutorial For Beginners

How To Repair A Drywall Nail Pop In Textured Ceiling

Fix Your Ceiling Nail Pops Fast And Easy

How To Repair Textured Ceilings Craving Some Creativity

How To Fix Popcorn Ceiling The Repair Guide Top Tier Painting Inc

How To Deal With Textured Ceilings 3 Diy Tips For Refreshing Your Space

Easiest Way To Repair Holes All Items Purchased From The Home Depot Wallrepair Diy Spackle Drywallrepair Popcornceiling Fyp Fypシ Reels Fbreels Virals Instagramreels

Drywall Taper Fix Nail Pops Everywhere In Ceiling

How To Do A Popcorn Ceiling Patch
Related Posts

