How to Install PVC Beadboard Ceiling Panels from Home Depot USA
Upgrading your ceiling with PVC beadboard panels from Home Depot USA is a fantastic way to elevate the look of any room. These panels are not only visually appealing but also durable, moisture-resistant, and easy to install. Here's a comprehensive guide to help you achieve a flawless ceiling installation:
Materials You'll Need:
- PVC beadboard ceiling panels (calculate the required quantity based on your ceiling area)
- Furring strips (1x3 or 1x4)
- Nails or screws
- Measuring tape and pencil
- Saw
- Caulk gun and caulk
- Safety glasses
Step 1: Prepare the Ceiling
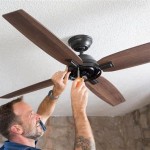
Clear the ceiling of any existing fixtures, such as light fixtures or ceiling fans. Mark the location of any obstacles, such as beams or pipes, where you will need to cut around the panels.
Step 2: Install Furring Strips
Determine the direction you want the panels to run. Install furring strips perpendicular to the panel direction, spacing them evenly at 16-inch centers. Use nails or screws to secure the strips to the ceiling joists.
Step 3: Install the Starting Strip
Measure and cut a starting strip from a panel. It should be the same length as the wall it runs against. Attach the strip to the furring strips along the perimeter of the ceiling, using nails or screws.
Step 4: Install the First Row of Panels
Measure and cut the first panel to fit between the starting strip and the next furring strip. Slide the panel into the starting strip and secure it to the furring strips with nails or screws. Continue installing panels in this manner until you reach the end of the row.
Step 5: Continue Installing the Panels
Repeat step 4 to install the subsequent rows of panels. Ensure that the tongue-and-groove edges fit together snugly. Trim any excess panels to fit the ceiling.
Step 6: Install the Last Row of Panels
Measure and cut the last row of panels to fit. You may need to rip the panels lengthwise to ensure they fit properly. Secure them to the furring strips as before.
Step 7: Caulk the Seams
Apply a thin bead of caulk along the seams between the panels and the starting strip. Smooth the caulk with your finger or a damp cloth to create a neat finish.
Step 8: Reinforce the Corners (Optional)
For added strength, consider installing decorative corner molding or PVC trim to the corners of the ceiling. This will help conceal any gaps and provide a finished look.
Tips for a Successful Installation:
- Wear safety glasses throughout the installation process.
- Use a sharp saw to ensure clean cuts.
- Test fit the panels before securing them to avoid mistakes.
- Caulk all the seams to prevent moisture penetration.
- Allow the caulk to dry completely before painting or staining the ceiling.
Installing PVC beadboard ceiling panels from Home Depot USA is a straightforward project that can significantly enhance the aesthetics of your home. By following these steps and tips, you can achieve a professional-looking finish that will last for years to come.

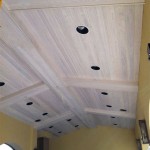
Diy Beadboard Ceiling Tutorial Easy And Inexpensive Custom Treatment

Generic 1 In X 6 8 Ft Pvc Beaded Ceiling Wall Board 208784 The Home Depot

Generic 1 In X 6 8 Ft Pvc Beaded Ceiling Wall Board 208784 The Home Depot

A La Maison Ceilings Bead Board Silver 1 6 Ft X Decorative Foam Glue Up Ceiling Tile 21 Sq Case R104 8sr The Home Depot

Generic 1 In X 6 8 Ft Pvc Beaded Ceiling Wall Board 208784 The Home Depot

A La Maison Ceilings Bead Board Black Matte 1 6 Ft X Glue Up Foam Ceiling Tile 259 2 Sq Case R104bk 96 The Home Depot

Veranda 5 1 2 In X 96 White Pvc Bead Board Siding 8 Piece 8272548 The Home Depot

Veranda 1 2 In X 5 8 Ft Reversible Cellular White Pvc Bead Board Trim S120xws3 The Home Depot

Pin Page

How To Install A Wood Plank Ceiling Young House Love
Related Posts

