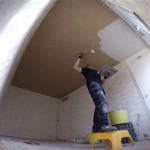
Essential Aspects of Installing a Ceiling Fan on Vaulted Ceilings
Ceiling fans not only add a touch of elegance to any room but also provide much-needed airflow, especially during hot and humid months. Installing a ceiling fan on a vaulted ceiling, however, requires a slightly different approach compared to installing on a flat ceiling.
This guide will provide you with a comprehensive overview of the essential aspects of installing a ceiling fan on vaulted ceilings, ensuring a safe and successful outcome.
Planning and Preparation
Before embarking on the installation, it is crucial to gather all necessary materials and tools, including the fan, mounting bracket, extension rod, and electrical supplies. Determine the ideal location for the fan and ensure that the ceiling joists provide adequate support. If not, additional reinforcement may be necessary.
Electrical Wiring
For safety, turn off power at the circuit breaker panel. Identify the electrical box on the vaulted ceiling and connect the fan wires according to the manufacturer's instructions. Ensure proper insulation of all connections using electrical tape or wire nuts.
Mounting the Bracket and Extension Rod
Attach the mounting bracket to the ceiling joist, ensuring it is level and secure. Install the extension rod between the mounting bracket and the fan. Adjust the length of the extension rod to achieve the desired height for the fan.
Installing the Fan
Lift the fan and align the bracket on the fan with the extension rod. Secure the fan to the bracket with the provided hardware.
Connecting Electrical Components
Connect the electrical components of the fan, including the wires from the fan motor, light kit, and remote control receiver. Double-check all connections to ensure proper functionality.
Securing the Canopy
Install the canopy over the mounting bracket to conceal the wiring and connections. Secure the canopy firmly to the ceiling using screws or bolts.
Final Adjustments and Testing
Turn on the power at the circuit breaker panel and test the fan. Adjust the fan blades for proper balance and ensure that all components are functioning correctly. If any issues arise, consult the manufacturer's instructions or seek professional assistance.
Tips for Success
- Use a level to ensure proper alignment during installation.
- Consider the height of the vaulted ceiling when selecting the extension rod length.
- Tighten all screws and bolts securely to prevent any movement or vibration.
- If the ceiling joists are not accessible, install a ceiling fan brace to provide additional support.
- For taller vaulted ceilings, consider using a ladder extension or renting a scaffold for safe installation.
Conclusion
Installing a ceiling fan on a vaulted ceiling can enhance the ambiance and comfort of your room. By following these essential aspects, you can ensure a safe and successful installation. However, if you are not confident in completing the task, do not hesitate to seek professional assistance to avoid any potential hazards.

How To Install A Ceiling Fan On Sloped Lemon Thistle

Electrical Mount Ceiling Fan At The Peak Of A Sloped Home Improvement Stack Exchange

Ensuring Proper Ceiling Fan Installation With Vaulted Ceilings

How To Install A Ceiling Fan On Vaulted Quora

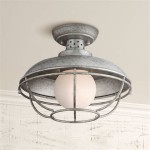
How To Choose A Ceiling Fan For Vaulted Ceilings Lightology

How To Install A Ceiling Fan On Sloped Lemon Thistle

How To Install Vaulted Ceiling Fan

How To Choose A Ceiling Fan For Vaulted Ceilings Lightology

Vaulted Sloped Ceiling Adapter For Modern Fan Company Fans Stardust

How To Find Ceiling Fans Slope Adapters And Downrods For Angled Ceilings Delmarfans Com
Related Posts